Your cart is empty

Smithing Skill Training Guide for Free-to-Play (F2P) in OSRS: 2025 Edition
Training Smithing in Old School RuneScape (OSRS) as a free-to-play (F2P) player is a challenging but rewarding endeavor. Unlike pay-to-play (P2P) accounts, F2P players lack access to high-XP methods like the Blast Furnace or Artisans’ Workshop, making efficient resource gathering and planning crucial. This comprehensive guide outlines the best F2P strategies for leveling Smithing, key items to smelt and forge, resource management tips, and common mistakes to avoid. Whether you’re aiming for level 99 or crafting gear for combat, this guide will help you maximize efficiency in 2025.
Why Train Smithing in F2P?
Smithing is a core skill in OSRS that allows players to smelt ores into bars and forge bars into armor, weapons, and other items. For F2P players, Smithing offers several benefits:
-
Combat Gear: Craft Rune armor and weapons (e.g., Rune Platebody, Rune 2h Sword) for personal use or alching.
-
Profit Potential: High-level items like Rune Platelegs can be alched for profit, especially for Hardcore Ironmen.
-
Quest Requirements: Unlocks quests like The Knight’s Sword (29 Smithing, 12,725 XP reward).
-
Skill Synergy: Combines with Mining to gather ores, making it ideal for self-sufficient F2P accounts.
However, F2P Smithing is slower and more resource-intensive than P2P, requiring careful planning to gather ores and coal while optimizing XP rates.
Key Smithing Methods for F2P
F2P Smithing involves two main processes: smelting (turning ores into bars) and forging (turning bars into items). Below are the best methods and items to focus on for efficient XP in 2025.
1. Smelting Bars
Smelting ores into bars is the first step and provides moderate XP. Use a furnace (e.g., Lumbridge, Al Kharid, or Falador).
|
Bar |
Level Required |
Ores Needed |
XP per Bar |
Notes |
|---|---|---|---|---|
|
Bronze |
1 |
1 Tin + 1 Copper |
6.2 |
Easy to mine in Lumbridge or Burthorpe. |
|
Iron |
15 |
1 Iron |
12.5 |
50% success rate (100% with Ring of Forging). |
|
Steel |
30 |
1 Iron + 2 Coal |
17.5 |
Coal is time-intensive to mine. |
|
Mithril |
50 |
1 Mithril + 4 Coal |
30 |
Mithril ore is slow to mine in F2P. |
|
Adamantite |
70 |
1 Adamantite + 6 Coal |
37.5 |
Rare ore; use for high-XP items. |
|
Runite |
85 |
1 Runite + 8 Coal |
50 |
Very rare in F2P; save for Rune items. |
Best Smelting Strategy:
-
Levels 1–15: Smelt Bronze Bars (Tin and Copper from Lumbridge Swamp or Burthorpe Mine).
-
Levels 15–30: Smelt Iron Bars with a Ring of Forging (130 GP each, guarantees 100% success) for ~20,000 XP/hour.
-
Levels 30–99: Smelt Steel Bars (Iron + 2 Coal) for a balance of XP and cost. Coal is mined at Mining Guild or Barbarian Village.
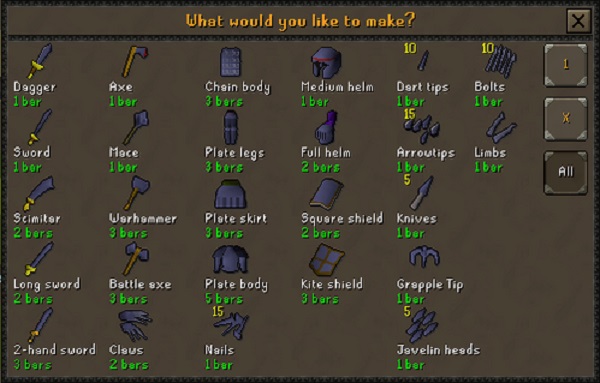
2. Forging Items
Forging bars into items at an anvil (e.g., Varrock, Falador) provides the bulk of Smithing XP. Focus on items with high XP per bar.
|
Item |
Level Required |
Bars Needed |
XP per Item |
Notes |
|---|---|---|---|---|
|
Bronze Platelegs |
16 |
3 Bronze |
37.5 |
Fast for early levels. |
|
Iron Platelegs |
31 |
3 Iron |
75 |
Good XP, alchable for profit. |
|
Steel Platelegs |
46 |
3 Steel |
112.5 |
Balance of XP and resource cost. |
|
Mithril Platelegs |
66 |
3 Mithril |
150 |
High XP, but Mithril is slow to mine. |
|
Adamant Platelegs |
86 |
3 Adamantite |
187.5 |
Best F2P XP per bar before Runite. |
|
Rune Platelegs |
99 |
3 Runite |
225 |
Best XP; alch for ~39,000 GP each. |
Best Forging Strategy:
-
Levels 1–31: Forge Bronze Platelegs or Bronze Platebodies (37.5–62.5 XP per item).
-
Levels 31–46: Forge Iron Platelegs (75 XP per item, alch for ~1,000 GP each).
-
Levels 46–86: Forge Steel Platelegs (112.5 XP per item, alch for ~2,000 GP each).
-
Levels 86–99: Forge Adamant Platelegs (187.5 XP per item, alch for ~5,000 GP each) or save Runite for Rune Platelegs if available.
3. Quest Boosts
Quests provide significant XP to skip early levels:
-
The Knight’s Sword:
-
Level Required: 10 Mining (recommended).
-
XP Reward: 12,725 Smithing XP (boosts from 1 to 29 instantly).
-
Requirements: Mine 2 Iron Ores and obtain a Redberry Pie (Crafting or Cooking).
-
Tip: Complete early to jumpstart training.
-
Managing Resources in F2P
F2P players must rely on Mining and other methods to gather ores, as the Grand Exchange is not an option for buying supplies. Here’s how to manage resources efficiently:
1. Mining Ores
Mining is the primary source of ores for Smithing in F2P.
-
Key Locations:
-
Lumbridge Swamp: Tin and Copper for Bronze Bars.
-
Mining Guild (60 Mining): Best spot for Iron and Coal.
-
Al Kharid Mine: Iron, Mithril, and Adamantite ores.
-
Varrock South-East Mine: Tin, Copper, and Iron.
-
Wilderness Runite Mine: Runite ores (high risk, level 46 Wilderness).
-
-
Mining Strategy:
-
Use the best pickaxe available (e.g., Rune Pickaxe at 41 Mining).
-
Equip Varrock Armour (from Varrock Diary) for a chance to mine double ores.
-
Mine Coal in the Mining Guild (30–40 ores/hour at 60 Mining) for Steel Bars.
-
For Runite, camp the Wilderness mine with minimal risk gear (high risk of PKers).
-
-
Tip: Combine Mining with Superheat Item (43 Magic, 53 XP per cast) to smelt bars while mining, saving inventory space.
2. Inventory Management
A well-planned inventory reduces banking trips:
-
Essentials: Pickaxe, Ores (e.g., Iron + Coal), Ring of Forging (for Iron Bars).
-
Teleportation: Use Varrock Teleport (25 Magic) or Lumbridge Teleport for quick access to furnaces and anvils.
-
Checklist: Carry enough ores for 50–100 bars per trip to minimize downtime.
3. Banking and Travel
-
Best Furnace: Al Kharid Furnace (closest to a bank, 5–10 seconds round trip).
-
Best Anvil: Varrock West Anvil (close to Varrock West Bank).
-
Tip: Complete Varrock Easy Diary for Varrock Teleport (free with staff) to speed up banking.
4. Utilize Experience Boosts
-
Varrock Armour (Varrock Diary): Chance to smelt double bars or mine double ores.
-
Superheat Item: Smelt bars while mining (43 Magic, 53 XP per cast, requires Nature Runes).
-
Goldsmith Gauntlets (P2P, not F2P): If you temporarily access P2P (e.g., via bonds), these double Gold Bar XP (not applicable for F2P-only accounts).
Training Smithing Efficiently
Here’s a level-by-level guide for F2P Smithing in 2025:
|
Level |
Method |
XP per Action |
Resources Needed |
Notes |
|---|---|---|---|---|
| 1–15 |
Smelt Bronze Bars |
6.2 |
Tin + Copper |
Mine in Lumbridge Swamp. |
| 15–29 |
Smelt Iron Bars |
12.5 |
Iron Ore, Ring of Forging |
~20,000 XP/hour with Ring. |
| 29–46 |
Forge Steel Platelegs |
112.5 |
3 Steel Bars |
Alch for ~2,000 GP each. |
| 46–86 |
Forge Steel Platelegs |
112.5 |
3 Steel Bars |
Switch to Mithril at 66 if ores are available. |
| 86–99 |
Forge Adamant Platelegs |
187.5 |
3 Adamantite Bars |
Alch for ~5,000 GP each; Runite at 99 if available. |
XP Rates:
-
Levels 1–29: ~10,000–20,000 XP/hour (Bronze/Iron smelting).
-
Levels 29–86: ~30,000–40,000 XP/hour (Steel Platelegs).
-
Levels 86–99: ~50,000–60,000 XP/hour (Adamant Platelegs).
-
Total XP to 99: ~13,034,431 XP. Expect 300–400 hours in F2P due to slow ore gathering.
Quest Boost: Complete The Knight’s Sword at level 1 for 12,725 XP (jumps to level 29).
Money-Making with Smithing
Smithing in F2P can be profitable, especially for Hardcore Ironmen who can alch items. Here’s how to make GP:
-
Steel Platelegs:
-
Cost: ~800 GP per Steel Bar (Iron + 2 Coal, market price).
-
Alch Value: ~2,000 GP per Steel Platelegs (3 bars).
-
Profit: ~600–800 GP per item after Nature Rune cost (~200 GP).
-
Hourly Profit: ~20,000–30,000 GP/hour at 40–50 items/hour.
-
-
Adamant Platelegs:
-
Cost: ~3,000 GP per Adamantite Bar (Adamantite + 6 Coal).
-
Alch Value: ~5,000 GP per Adamant Platelegs (3 bars).
-
Profit: ~1,500–2,000 GP per item.
-
Hourly Profit: ~50,000–60,000 GP/hour at 30–40 items/hour.
-
-
Rune Platelegs (Level 99):
-
Cost: ~10,000 GP per Runite Bar (Runite + 8 Coal).
-
Alch Value: ~39,000 GP per Rune Platelegs (3 bars).
-
Profit: ~6,000–9,000 GP per item.
-
Hourly Profit: ~100,000–150,000 GP/hour (rare due to Runite scarcity).
-
Tip: Use High Alchemy with a Fire Staff to save Fire Runes and monitor OSRS GE Tracker for alch values.
Common Mistakes to Avoid
Avoid these pitfalls to streamline your Smithing training:
-
Neglecting Mining:
-
Mistake: Relying on random ore drops or slow mining spots.
-
Solution: Mine at Mining Guild (60 Mining) for Coal and Iron to ensure a steady supply.
-
-
Ignoring The Knight’s Sword:
-
Mistake: Grinding early levels without quest XP.
-
Solution: Complete The Knight’s Sword at level 1 for 12,725 XP (level 29).
-
-
Wasting Ores:
-
Mistake: Forging low-XP items like Bronze Daggers at high levels.
-
Solution: Focus on Platelegs or Platebodies for maximum XP per bar.
-
-
Poor Inventory Management:
-
Mistake: Carrying too few ores, causing frequent banking.
-
Solution: Bring 28 ores (e.g., 14 Iron + 14 Coal for Steel) per trip to maximize smelting.
-
-
Skipping Varrock Diary:
-
Mistake: Not using Varrock Armour for double ores or bars.
-
Solution: Complete Varrock Easy Diary (free teleport, double ore chance).
-
-
Ignoring Superheat Item:
-
Mistake: Not using Magic to smelt while mining.
-
Solution: Cast Superheat Item (43 Magic) to smelt bars on the spot, saving time.
-
-
Overlooking Alching:
-
Mistake: Banking items instead of alching for profit.
-
Solution: Alch Steel Platelegs or Adamant Platelegs for GP to fund runes or gear.
-
Advanced Tips for F2P Smithing
-
Combine with Mining:
-
Train Mining to 60+ for access to the Mining Guild, where Coal and Iron are abundant.
-
Use Superheat Item to smelt bars while mining, boosting XP and efficiency.
-
-
Optimize Travel:
-
Use Al Kharid Furnace for smelting (closest to a bank).
-
Forge at Varrock West Anvil for quick banking.
-
Unlock Varrock Teleport (25 Magic) via Varrock Easy Diary.
-
-
Bank Organization:
-
Store ores and bars in separate Bank Tabs for easy access.
-
Keep a Ring of Forging stack (100 charges each) for Iron smelting.
-
-
Wilderness Runite (High Risk):
-
Mine Runite in the Wilderness Runite Mine (level 46 Wilderness) for Rune Platelegs.
-
Tip: Bring minimal gear (e.g., Bronze Pickaxe, Rune Scimitar) and an emergency teleport (e.g., Burning Amulet).
-
-
Profit Maximization:
-
Alch Rune Platelegs (~39,000 GP) or Rune Platebodies (~65,000 GP) for maximum profit at 99 Smithing.
-
Monitor OSRS Exchange for alch values to sell at peak prices.
-
Conclusion
Training Smithing as an F2P player in OSRS in 2025 requires dedication, but it’s a valuable skill for crafting gear and earning GP. By focusing on Steel Platelegs for mid-levels, Adamant Platelegs for high levels, and Rune Platelegs at 99, you can achieve decent XP rates while generating profit through alching. Prioritize Mining for ores, complete The Knight’s Sword for a massive early XP boost, and use Varrock Armour to optimize resource gathering. Avoid common mistakes like wasting ores or neglecting quests, and leverage tools like OSRS Wiki or r/2007scape for the latest strategies. With smart planning, you’ll reach level 99 Smithing and equip yourself with the best F2P gear in Gielinor.
