Your cart is empty

Ultimate Guide to OSRS F2P Smithing Training
Smithing is a crucial skill in Old School RuneScape (OSRS) that allows players to create a variety of weapons and armor. This guide focuses on the free-to-play (F2P) aspects of Smithing, helping new players efficiently train their skills without requiring a membership. Understanding the mechanics and optimal training methods can significantly enhance your gameplay experience, enabling you to craft valuable items and contribute effectively in both PvE and PvP scenarios. Let’s delve into the basics and strategies to level up your Smithing skill in F2P content.
In OSRS, Smithing is divided into several levels, each allowing players to create different items. For free-to-play players, the leveling process is straightforward but requires a good understanding of the available ores and anvils. Players start with no Smithing experience and can work their way up to level 99, although achieving this in F2P is a long journey due to limited resources.
At level 1, players can smelt bronze bars using copper and tin ores. Collecting these ores can be done at various mining locations such as the Lumbridge Swamp or the Varrock East Mine. It’s advisable to mine as many ores as possible, as they are used for both smelting and crafting weapons. Once you have enough ores, head to a furnace, which can be found in locations like Varrock or Falador, to smelt them into bronze bars.
As players progress to level 15, they can start working with iron. Iron bars are crafted using iron ores, which can be mined from locations such as the Al Kharid Mine. Unlike bronze, iron requires a higher level of proficiency to create, but it is essential for crafting stronger weapons. Players should aim to smelt iron bars until they reach level 30.
Upon reaching level 30, players can smelt steel bars, which are made from iron and coal. Coal can be mined from various locations, including the Mining Guild and the Al Kharid Mine. Steel bars are more profitable and useful for crafting steel weapons and armor. Players should continue to smelt steel bars until they reach level 50.
At level 50, players unlock the ability to smelt mithril bars using mithril ore and coal. Mithril items are some of the best equipment available to F2P players, allowing for effective combat and defense. Finally, at level 70, players can smelt adamantite bars, which are even stronger and provide better combat stats.
To maximize training efficiency, players should focus on using the best available ores for their level and consider using the anvil for smithing items. Crafting items like swords or armor pieces at the anvils will grant substantial experience points. Additionally, players can enhance their training by taking advantage of mining and smelting in conjunction, ensuring a steady supply of materials.
In conclusion, understanding the F2P Smithing levels and the optimal training methods is essential for any player looking to excel in this skill. By strategically mining and smelting, players can reach higher Smithing levels and enjoy the benefits of crafting powerful weapons and armor.
Best Locations for Smithing in F2P
When it comes to Smithing in Old School RuneScape (OSRS), choosing the right location can significantly impact your training efficiency. Here are some of the best spots for Free-to-Play (F2P) players to consider:
- Varrock West Smithing Furnace: One of the most popular spots, this furnace is located near the West Varrock bank. It’s convenient because you can easily bank your ores and get back to smelting quickly.
- Edgeville Furnace: Situated just north of the Edgeville bank, this furnace is another great option. The proximity to the bank allows for quick trips, making it ideal for players who want to smelt ores without wasting time.
- Falador West Smithing Furnace: Although a bit farther from a bank, this furnace is less crowded. It’s located near the west side of Falador, and it’s perfect for those who prefer a quieter training environment.
- Al Kharid Furnace: This furnace is located just south of the Al Kharid bank. It’s a bit further from the main F2P areas but is still a viable option if you’re in the area.
Each of these locations has its pros and cons, so consider factors like access to raw materials and personal preference when choosing where to train. Remember, the faster you can smelt, the more experience you’ll gain!
Essential Tools and Equipment for Smithing
To make the most out of your Smithing training in OSRS, having the right tools and equipment is crucial. Here’s a quick rundown of what you need:
- Hammer: This is your primary tool for Smithing. You can obtain a hammer from various locations, such as general stores or by looting the corpses of certain NPCs.
- Ores: The more ores you have, the better! Make sure to gather Copper, Tin, Iron, and Silver ores. You can mine these from various locations around Gielinor.
- Furnace: While not a physical item, knowing where the nearest furnace is located is essential for smelting your ores.
- Smithing Leveling Guide: Having a guide on what to smith at each level can greatly improve your efficiency. You can find many guides online or within the community.
In summary, ensure you have a hammer, plenty of ores, and knowledge of nearby furnaces to optimize your Smithing training. Happy smithing!
5. Step-by-Step Guide to Efficient Smithing Training
If you’re looking to level up your Smithing skill in Old School RuneScape (OSRS), following a structured approach can make a significant difference. Here’s a step-by-step guide to help you efficiently train your Smithing from level 1 to level 99.
Step 1: Gather Materials
Start by collecting ores and bars. Here’s a quick list of what you’ll need:
- Level 1-15: Copper and Tin ores
- Level 15-30: Iron ores
- Level 30-99: Steel, Mithril, Adamant, and Rune ores
Step 2: Smelting Ores
Once you have your ores, head to a furnace. Use the ores to smelt bars:
- 1 Copper + 1 Tin = 1 Bronze Bar
- 1 Iron Ore = 1 Iron Bar
- 1 Coal + 1 Iron Bar = 1 Steel Bar
Step 3: Smithing Bars into Items
After you’ve smelted your bars, you can start crafting items:
- Bronze equipment up to Level 15
- Iron equipment from Level 15 to 30
- Steel equipment from Level 30 to 50
- Mithril equipment from Level 50 to 70
- Adamant equipment from Level 70 to 85
- Rune equipment from Level 85 to 99
Step 4: Use Anvil Locations
Choose an anvil that is close to a bank for efficiency. The following locations are recommended:
By following these steps, you’ll be on your way to becoming a Smithing master in OSRS!
6. Tips and Tricks for Maximizing Experience Gains
Maximizing your experience gains in Smithing can significantly speed up your training. Here are some tips and tricks to help you get the most out of your time:
Tip 1: Use a Goldsmith Gauntlet
If you can access the Smithing minigame in the Motherlode Mine, equip the Goldsmith Gauntlet. This will provide you with a 2.5x experience bonus when smelting gold bars.
Tip 2: Train with Friends
Training with others can be more enjoyable and can sometimes yield better results. Consider forming a Smithing group where you can share resources and tips.
Tip 3: Focus on High-Experience Items
Some items provide better experience than others. Here’s a quick comparison:
| Item | Experience Gained |
|---|---|
| Bronze Equipment | 12.5 XP |
| Iron Equipment | 25 XP |
| Steel Equipment | 50 XP |
| Mithril Equipment | 75 XP |
| Adamant Equipment | 100 XP |
| Rune Equipment | 150 XP |
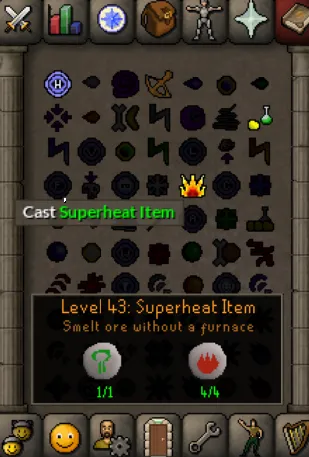
Tip 4: Use Superheat Item Spell
This spell allows you to smelt ores into bars while gaining experience in both Magic and Smithing. It’s particularly effective for training during your lower levels.
By implementing these tips and tricks, you’ll be able to maximize your experience gains and make your Smithing training more efficient and enjoyable!
Common Mistakes to Avoid in F2P Smithing
When diving into Smithing in Old School RuneScape (OSRS), especially as a free-to-play (F2P) player, it’s easy to make some missteps that can slow your progress or waste your resources. Here are some common pitfalls to steer clear of:
- Not Planning Ahead: Jumping into Smithing without a clear goal can lead to wasted bars and time. Before you start, decide what level you want to reach and what items you want to create.
- Overlooking the Importance of Coal: Coal is essential for smelting ores into bars. Failing to gather enough coal can halt your training progress. Always keep a stash handy.
- Ignoring the Cost of Materials: Some players forget to account for the cost of ores and coal. Make sure you’re not spending more than you’re making, especially if you’re selling items for profit.
- Forgetting About Experience Rates: Not all items give the same amount of experience. Focus on items that provide the best experience per hour to maximize your training efficiency.
- Neglecting Inventory Management: If your inventory is cluttered, you’ll waste time managing it. Keep your inventory organized to make your training smoother.
- Failing to Use the Right Anvil: Many players don’t realize that using a higher-level anvil can yield better results. Always use the best available anvil for your level.
- Not Utilizing the Smithing Guide: It’s easy to forget to check guides. Make sure you’re up-to-date on the best training methods and requirements.
Alternative Training Methods and Their Benefits
While the traditional smithing path of smelting and creating items is the go-to for many players, there are alternative training methods worth exploring in F2P. Here are some effective alternatives and their benefits:
| Method | Description | Benefits |
|---|---|---|
| Mining | Gather ores directly from mining rocks. | Gain experience while collecting materials for Smithing. |
| Quest Rewards | Complete quests that provide Smithing experience. | Fast experience gains without the need for materials. |
| Buying Bars | Purchase bars from other players or shops. | Quickly level up without the grind of mining and smelting. |
| Selling Items | Create items and sell them for profit. | Earn gold while training your Smithing skill. |
Exploring these alternatives can provide variety to your training and help you level up your Smithing more efficiently. Don’t hesitate to mix and match methods to find what works best for you!
Ultimate Guide to OSRS F2P Smithing Training
Smithing is a vital skill in Old School RuneScape (OSRS), enabling players to create weapons, armor, and various tools. This guide will help you master F2P smithing training, allowing you to progress efficiently without membership.
Here’s a structured approach to training your Smithing skill:
Levels 1-15: Bronze Smithing
- Start by mining bronze ore, which can be found in various locations, including Varrock South East Mine.
- Smelt the bronze ore into bronze bars using a furnace.
- Craft bronze items (e.g., bronze dagger, bronze sword) to gain experience.
Levels 15-30: Iron Smithing
- Mine iron ore, available in places like Al Kharid Mine and the Mining Guild (if you have level 60 Mining).
- Smelt iron ore into iron bars.
- Forge iron items (e.g., iron scimitar, iron kiteshield) to gain experience.
Levels 30-99: Steel Smithing and Beyond
- Once you reach level 30, start smelting steel bars using two iron ores and one coal.
- Continue crafting steel items (e.g., steel platebody, steel full helm) for maximum experience.
- At level 99, consider creating items like rune equipment which can be profitable.
Experience Rates
| Level | Item | Experience |
|---|---|---|
| 1-15 | Bronze Bar | 6 |
| 15-30 | Iron Bar | 12 |
| 30-99 | Steel Bar | 17.5 |
In conclusion, leveling up your Smithing skill in OSRS as a free-to-play player is achievable with consistent mining and smelting. Focus on crafting items that grant the most experience and consider the locations of ores to optimize your training. Happy Smithing!