Your cart is empty

Tombs of Amascut Cheat Sheet OSRS – Ultimate Guide for Success
The Tombs of Amascut (ToA) is one of the most engaging and challenging raids in Old School RuneScape (OSRS). Whether you’re a seasoned raider or a newcomer looking to conquer this epic adventure, having a reliable cheat sheet can make all the difference. This guide provides a comprehensive ToA cheat sheet for OSRS, covering strategies, gear, invocations, and puzzle solutions to help you succeed in the Jaltevas Pyramid. Let’s dive into the essentials to ensure your raids are efficient and rewarding!
ToA, located in the Necropolis within the black Jaltevas Pyramid, is a raid that pits you and up to seven other players against a series of puzzles, challenges, and bosses. The raid’s unique invocation system allows you to customize difficulty, balancing challenge with rewards. Before diving into the cheat sheet, it’s crucial to grasp the raid’s structure and flow.
What Makes ToA Unique
Unlike other raids, ToA’s invocation system lets you toggle difficulty modifiers, impacting loot probability and raid intensity. You’ll face four demi-bosses—each with a unique path and puzzle—before confronting the final boss, Elidinis’ Warden. The flexibility to choose your path order and invocation settings makes preparation key.
Accessing the Raid
To participate, you must complete the Beneath Cursed Sands quest. Here are the fastest ways to reach ToA:
- Pharaoh’s Sceptre: Teleport directly to Jaltevas after using the sceptre on the obelisk north of the Necropolis mine.
- Fairy Ring (AKP): Requires 62 Agility to bypass a shortcut, then run east.
- Magic Carpet: From Shantay Pass to Pollnivneach, then south to Sophanem (costs 200-400 coins).
- Nardah Teleport: Run southwest to the raid entrance.
Recommended Gear and Inventory Setup
Your gear and inventory are the backbone of a successful ToA run. While high-end gear maximizes efficiency, budget setups can still get you through with proper strategy.
High-End Gear Recommendations
For optimal performance, aim for the following (estimated cost: ~5.7B GP):
| Slot | Item |
|---|---|
| Head | Masori Mask (f) |
| Body | Torva Platebody |
| Legs | Torva Platelegs |
| Weapon | Tumeken’s Shadow or Zaryte Crossbow |
| Shield | Elysian Spirit Shield |
Purchase Order for Upgrades: Zaryte Crossbow → Tumeken’s Shadow → Masori gear → Torva armor.
Budget Gear Options
If you’re on a budget, consider:
- Melee: Bandos Chestplate, Tassets, Dragonfire Shield.
- Range: Armadyl Chestplate, Chainskirt, Toxic Blowpipe.
- Mage: Ahrim’s Robes, Trident of the Seas.
Bring a Dragon Pickaxe for the Path of Het and deposit it permanently to save inventory space.
Inventory Essentials
Your inventory should include:
- Potions: 2-3 Saradomin Brews, Super Restores, Stamina Potion.
- Food: High-healing items like Sharks or Manta Rays.
- Runes: For Blood, Ice, and Fire spells if using magic.
- Utility: Menaphite Remedy, Divine Rune Pouch.
Path Strategies and Puzzle Solutions
ToA consists of four paths, each with a puzzle and a demi-boss. You can tackle them in any order, but a planned route saves time. Below is a cheat sheet for each path’s challenges and strategies.
Path of Het – Akkha
Puzzle: Reflect light using mirrors to hit a statue, then mine the obelisk (85 Mining and Dragon Pickaxe recommended for one-phase clear).
Boss Strategy:
- Akkha switches prayers: Mage/Range → Melee/Mage → Range/Melee.
- Counter: If praying Mage/Range, use Melee and pray Range. Adjust accordingly.
- Avoid black shadows on the floor; light beams deal minor damage.
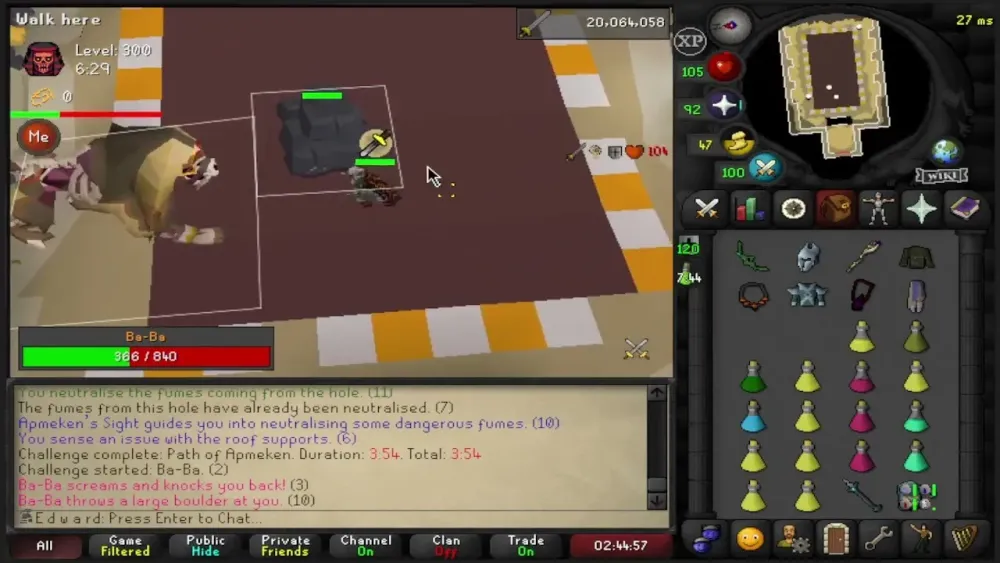
Path of Apmeken – Ba-Ba
Puzzle: Kill monkeys to clear the room. One player gets Apmeken’s Blessing, receiving special instructions.
Issues to Handle:
- Corruption: DD on a designated tile (e.g., south of middle pillar); blessed player uses a potion on corrupted teammates.
- Volatile Monkey: Run away when it touches you to avoid explosion damage.
- Vents: Assign one player per vent/pillar to prevent damage.
Boss Strategy: Focus on dodging Ba-Ba’s slam attacks and manage adds quickly.
Path of Scabaras – Kephri
Puzzle: Five puzzles test your speed and logic. Enable Protect from Missiles to counter scarab attacks.
Key Puzzles:
- Lights Out: Press tiles to match a pattern. Use the RuneLite plugin “ToA Puzzle Helper” for instant solutions or brute-force by toggling adjacent tiles.
- Addition Puzzle: Match symbols to reach a target number. Refer to a cheat sheet like the one on the OSRS Wiki for quick combos.
Boss Strategy: Interrupt Kephri’s egg-laying phase with ranged attacks and avoid scarab swarms.
Path of Crondis – Zebak
Puzzle: Fill jugs with water to specific levels, then pour them into a basin. Simple but time-sensitive.
Boss Strategy:
- Dodge poison pools and falling rocks.
- Use Protect from Ranged to mitigate Zebak’s cannon attacks.
- Coordinate with your team to interrupt his roar mechanic.
Invocations Cheat Sheet
Invocations are difficulty modifiers that increase raid challenge and loot potential. Here’s a quick guide to balancing them for your skill level.
Beginner-Friendly Invocations
Start with these for easier runs (Raid Level 150-200):
- Softcore Run: Unlimited deaths.
- Not Just a Head: Adds minor Zebak mechanics but manageable.
- Walk for It: Increases path length slightly but no major impact.
Intermediate Invocations
For moderate challenge (Raid Level 200-300):
- Need Some Prayer: Limits prayer points, requiring efficient use.
- Jungle Japes: Adds Ba-Ba mechanics like extra monkeys.
- Quiet Prayers: Disables protection prayers during Akkha’s special attacks.
Expert Invocations
For high-skill groups (Raid Level 300+):
- Walk the Path: Randomizes room difficulty, requiring adaptability.
- Artery Issues: Increases Kephri’s scarab spawns.
- Overclocked: Speeds up all boss attacks, demanding precision.
Tip: Stack invocations gradually to learn mechanics before pushing Expert Mode.
Final Boss – Elidinis’ Warden
After clearing all paths, you face Elidinis’ Warden, a two-phase fight requiring coordination and quick reactions.
Phase 1: Wardens’ Core
Mechanics:
- Protect from Magic and Range simultaneously; switch styles based on the Warden’s stance.
- Dodge floor spikes and energy blasts by moving to safe tiles.
- Destroy the core when exposed to progress to Phase 2.
Phase 2: Elidinis’ Warden
Mechanics:
- Special Attacks: Watch for the Warden’s slam, meteor shower, and binding spell—move or pray accordingly.
- Adds: Clear summoned scarabs quickly to avoid being overwhelmed.
- Enrage: At low HP, the Warden speeds up; prioritize survival and DPS.
Team Tip: Assign roles (e.g., one player handles adds, another focuses on DPS) to streamline the fight.
This ToA cheat sheet for OSRS equips you with the knowledge to tackle the raid confidently. From gear setups to puzzle solutions and invocation choices, preparation is your greatest asset. Practice each path, communicate with your team, and gradually increase difficulty to maximize rewards. Ready to conquer the Tombs of Amascut? Share your tips or questions below, and happy raiding!
