Your cart is empty

OSRS Tombs of Amascut Pillar Damage: A Comprehensive Guide
The Tombs of Amascut (ToA) in Old School RuneScape (OSRS) is a thrilling raid that challenges players with intricate mechanics, customizable difficulty, and rewarding loot. One of the standout elements in this raid is the pillar damage mechanic, particularly in the Path of Apmeken and the Wardens fight. Understanding how pillar damage works can significantly improve your raid performance, whether you’re a solo player or part of a team. In this blog post, we’ll dive deep into the OSRS ToA pillar damage system, exploring its mechanics, strategies, and tips to optimize your runs. Let’s get started!
Pillar damage refers to the environmental or mechanical damage tied to specific pillars or supports in various rooms of the Tombs of Amascut. These pillars play a critical role in certain encounters, requiring players to interact with them to mitigate damage or progress through the raid. While pillar-related mechanics appear in multiple areas, they are most prominent in the Path of Apmeken (Ba-Ba fight) and the final Wardens encounter. Misunderstanding or mishandling these can lead to unnecessary damage, failed runs, or wasted supplies.
The Role of Pillars in ToA
In ToA, pillars aren’t just decorative—they’re interactive elements that influence combat dynamics. For instance, in the Path of Apmeken, pillars must be repaired to prevent structural collapse and subsequent damage. Similarly, in the Wardens fight, energy troughs (akin to pillars) dictate how much power the bosses gain, indirectly affecting the damage players take. Mastering these interactions is key to controlling the raid’s difficulty.
Why Pillar Damage Matters
Pillar damage can quickly escalate if ignored, draining your hitpoints and forcing you to burn through food or brews. For high-invocation runs (e.g., 300+ raid levels), where enemy stats are boosted, managing pillar-related mechanics becomes even more critical. Efficient pillar management can mean the difference between a smooth clear and a wipe.
Pillar Damage in the Path of Apmeken (Ba-Ba)
The Path of Apmeken, guarded by the monkey boss Ba-Ba, is one of the four demi-boss paths in ToA. Before facing Ba-Ba, players must complete a puzzle room where pillar damage first comes into play. Let’s break it down.
The Apmeken Puzzle Room
In this room, you’ll encounter four pillars and four vents, with waves of baboons spawning to complicate things. The pillars can become damaged, indicated by a red skull icon, and if left unattended, they collapse, dealing area-wide damage to all players. Here’s how it works:
- Pillar Collapse Damage: If a pillar isn’t repaired, it collapses, dealing moderate damage (typically 10-20 hitpoints, scaling with raid level).
- Vent Explosions: Vents marked with a red skull explode if not addressed, hitting players for 5-15 damage each.
- Team Coordination: In groups, each player can cover a vent or pillar; in solos, you only need to repair one pillar to progress.
How to Mitigate Pillar Damage
To avoid taking unnecessary hits, follow these steps:
- Grab Supplies: Pick up a hammer and potion at the room’s entrance.
- Monitor Icons: Watch for red skulls on pillars or vents—act immediately when they appear.
- Repair Pillars: Click a damaged pillar to fix it with the hammer.
- Seal Vents: Use the potion on a vent with a red skull to stop the explosion.
- Prioritize Threats: Kill shamans first (they summon more mobs), then handle volatile baboons (they explode for high damage).
Pro Tip: In solo runs, focus on repairing just one pillar and sealing vents as needed while using a blowpipe to clear enemies efficiently.
Pillar Damage in the Wardens Fight
The Wardens—Tumeken’s Warden and Elidinis’ Warden—are the final bosses of ToA, and their fight introduces a unique pillar-like mechanic via energy troughs. While not traditional pillars, these troughs function similarly by influencing damage output.
Phase 1: The Obelisk and Energy Troughs
In Phase 1, players must DPS the central obelisk while it sends energy orbs through three troughs to charge the Wardens. Blocking these orbs reduces the Wardens’ power, but it comes at a cost:
- Orb Damage: Each orb you block deals 3 damage to you.
- Unblocked Orbs: If orbs reach the Wardens, they charge up, unleashing stronger attacks later (e.g., UFOs or orb barrages).
Table: Wardens Phase 1 Damage Breakdown
| Action | Damage Taken | Consequence |
|---|---|---|
| Block Orb | 3 per orb | Reduces Warden charge |
| Ignore Orb | 0 initially | Increased Warden attack damage |
| Fail to DPS Obelisk | Varies (10-30+) | Multiple orb sets charge Wardens |
Strategies to Minimize Damage
Here’s how to handle the troughs effectively:
- Solo Strategy: Block orbs on one side (e.g., east) to limit Tumeken’s Warden’s charge, taking minimal damage while focusing DPS on the obelisk.
- Group Strategy: Assign players to block each trough, spreading the 3-damage hits across the team.
- Invocation Impact: “Ancient Haste” speeds up orb generation, increasing unavoidable damage—turn it off for learning runs.
How Invocations Affect Pillar Damage
The invocation system in ToA lets you customize raid difficulty, and several invocations directly or indirectly amplify pillar damage. Understanding these can help you tailor your runs.
Key Invocations Impacting Pillar Damage
- Jungle Japes (Path of Apmeken): Adds more baboons, increasing the chance of pillar damage from delayed repairs.
- Ancient Haste (Wardens): Speeds up orb generation, forcing more frequent blocking and higher damage intake.
- Overclocked (Wardens): Boosts Warden attack speed in Phase 3, amplifying damage if troughs were poorly managed in Phase 1.
Balancing Invocations for Success
For a manageable 150-invocation run, consider this setup:
- Turn on “On a Diet” (no solid food) and “Quiet Prayers” (minor prayer drain)—low impact on pillar mechanics.
- Avoid “Dehydration” or “Overly Draining” unless you’re confident in supply management.
- Toggle “Jungle Japes” off for easier Apmeken clears.
Tips to Optimize Pillar Damage Management
Whether you’re tackling Ba-Ba’s puzzle or the Wardens’ troughs, these tips will help you keep pillar damage under control.
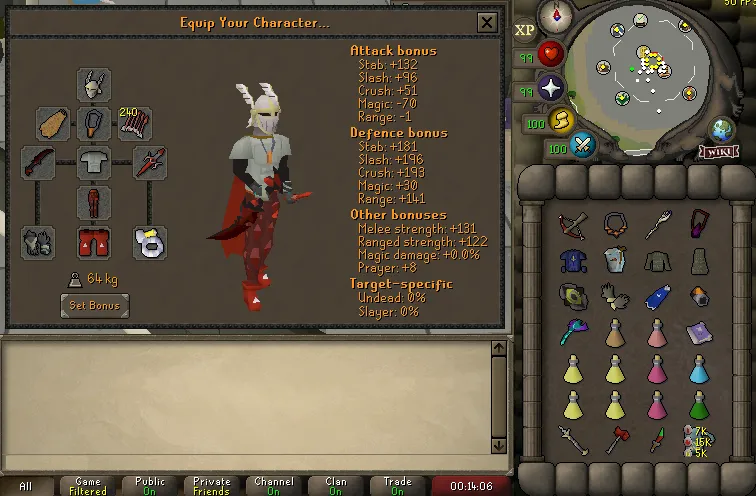
Gear and Inventory Recommendations
Your setup can make a big difference:
- Weapons: Osmumten’s Fang for melee, Tumeken’s Shadow for magic, Twisted Bow or Blowpipe for ranged.
- Armor: Masori or Torva for high DPS and defense.
- Inventory: Saradomin Brews, Restores, and a Liquid Adrenaline dose for special attacks.
General Strategies
- Prioritize Speed: Clear enemies quickly in Apmeken to focus on pillars.
- Communicate: In groups, call out pillar or trough assignments.
- Practice Low Levels: Start with 50-100 invocation runs to master mechanics before scaling up.
Conclusion: Mastering Pillar Damage in ToA
Pillar damage in OSRS Tombs of Amascut is a nuanced mechanic that rewards preparation and coordination. From repairing pillars in the Path of Apmeken to blocking energy troughs in the Wardens fight, every decision impacts your survival and success. By understanding the damage sources, leveraging the right strategies, and tweaking invocations, you can turn these challenges into opportunities for smoother clears and better loot. Ready to raid? Dive into ToA, tackle those pillars, and claim your rewards!
Happy scaping, and may your runs be purple!
