Your cart is empty

OSRS Olm Tile Markers Ultimate Guide for Chambers of Xeric
Mastering the Great Olm, the final boss of Old School RuneScape’s Chambers of Xeric (CoX), is a rite of passage for PvM enthusiasts. One key to success is using tile markers to navigate Olm’s complex mechanics and chaotic attacks. This comprehensive guide explores how to use Olm tile markers effectively, offering practical tips, importable marker setups, and strategies to streamline your raids. Whether you’re a solo raider or part of a team, this post will help you conquer Olm with confidence.
Olm’s fight is a gauntlet of mechanics, from dodging crystal bombs to positioning for special attacks like the teleport or firewall. Tile markers, available through the RuneLite client’s Ground Markers plugin, allow you to mark specific tiles in the Olm room to guide your movements and roles. These visual cues reduce mistakes, improve coordination, and save precious time during the fight.
Benefits of Using Tile Markers
- Precision Positioning: Mark safe spots for dodging attacks like falling crystals or lightning.
- Role Clarity: Designate tiles for roles like Melee Hand, Mage Hand, or head runner to avoid confusion.
- Team Coordination: Shared markers ensure everyone knows where to stand, especially in larger groups.
- Efficiency: Minimize unnecessary movement, letting you focus on dealing damage and surviving.
Common Mistakes Without Markers
Without tile markers, players often struggle with Olm’s attacks. For example, mispositioning during the teleport attack can lead to heavy damage, while failing to spot the middle tile line when running the head can cause you to eat avoidable hits. Markers eliminate guesswork, making the fight more predictable.
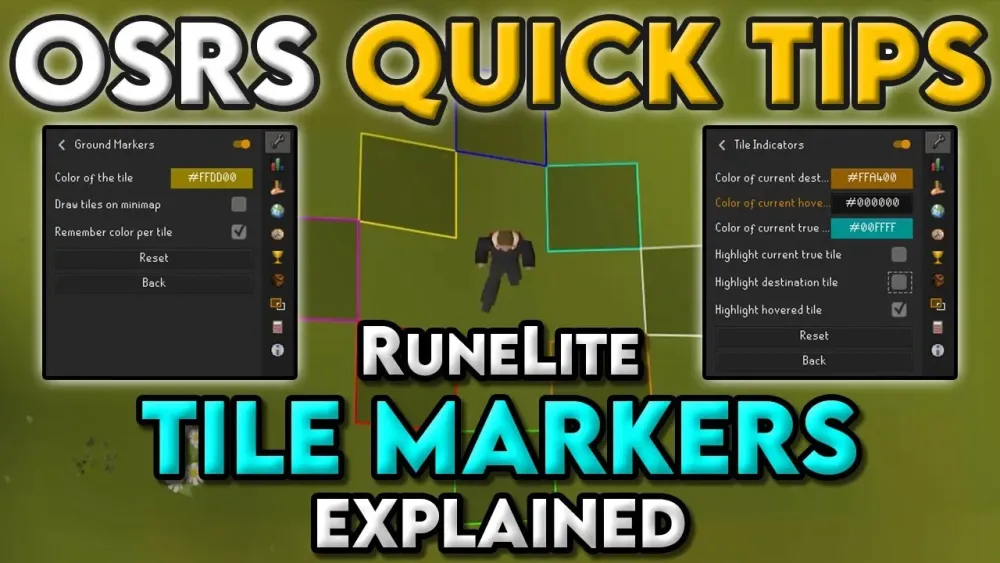
Setting Up Tile Markers in RuneLite

RuneLite’s Ground Markers plugin is the go-to tool for placing and importing tile markers. Here’s how to get started and optimize your setup for Olm.
Enabling the Ground Markers Plugin
To use tile markers, ensure RuneLite is installed and follow these steps:
- Open RuneLite and navigate to the Plugin Hub.
- Search for “Ground Markers” and enable it.
- Access the plugin settings via the RuneLite sidebar to customize marker colors and opacity.
Manually Marking Tiles
To mark tiles manually during a raid:
- Hold Shift and right-click a tile in the Olm room.
- Select “Mark Tile” from the menu.
- Adjust the color or label in the Ground Markers settings for clarity.
Manual marking is useful for experimenting, but importing pre-made markers is faster for Olm.
Importing Tile Markers
Pre-made tile marker strings save time. To import:
- Copy a tile marker string (e.g., from RuneMarkers.net or community posts).
- Right-click the World Map orb by the minimap in-game.
- Select “Import Ground Markers.”
- Paste the string and confirm to load the markers.
Sites like RuneMarkers.net offer Olm tile marker strings tailored for CoX.
Recommended Olm Tile Marker Setup
A well-planned tile marker setup covers key positions for Olm’s mechanics and roles. Below is a recommended configuration based on community strategies and raid guides.
Key Tiles to Mark
Focus on marking tiles for the following:
- Melee Hand: Mark the tile for attacking the Melee Hand (right claw) to ensure proper positioning.
- Mage Hand: Mark the long-range tile for attacking the Mage Hand (left claw) safely.
- Melee Thumb: Mark the thumb tile for the portals special attack, where players group up.
- Middle Line: Mark the center tile line for head runners to navigate Olm’s gaze.
- Safe Spots: Mark tiles to avoid attacks like crystal bombs or lightning.
Sample Tile Marker String
Here’s an example tile marker string for Olm, covering essential positions (colors and coordinates simplified for clarity):
[{"regionId":12850,"regionX":22,"regionY":19,"z":0,"color":"#FF0000FF"},
 {"regionId":12850,"regionX":21,"regionY":19,"z":0,"color":"#FF00FF00"},
 {"regionId":12850,"regionX":20,"regionY":18,"z":0,"color":"#FFFF0000"}]
This string marks three tiles: Melee Hand (red), Mage Hand (green), and Melee Thumb (yellow). Copy and import it via RuneLite. For more setups, check community resources like Reddit’s r/2007scape or RuneMarkers.net.
Color Coding Tips
Use distinct colors to differentiate roles and mechanics:
| Tile Purpose | Recommended Color | Use Case |
|---|---|---|
| Melee Hand | Red | Position for attacking right claw |
| Mage Hand | Green | Long-range attack position |
| Melee Thumb | Yellow | Portals attack grouping |
| Safe Spot | Blue | Avoiding AoE attacks |
Strategies for Using Tile Markers in Olm’s Fight
Tile markers shine when paired with a solid understanding of Olm’s mechanics. Here’s how to leverage them across different phases and roles.
Phase-Specific Marker Usage
Olm has at least three phases, with additional phases for larger teams. Markers help with:
- Phase 1-3: Use Melee and Mage Hand markers to focus damage on the claws. Safe spot markers help dodge crystal bursts and lightning.
- Penultimate Phase: Mark the Melee Thumb for the portals attack. Both claws must be disabled quickly, so precise positioning is critical.
- Head Phase: Middle line markers guide head runners to manipulate Olm’s gaze while avoiding falling crystals.
Role-Based Marker Strategies
Different roles benefit from specific marker placements:
- Melee Hand Role: Stay on the red tile to attack the right claw. Move to the yellow Melee Thumb tile during portals.
- Mage Hand Role: Use the green tile for long-range attacks on the left claw, minimizing movement.
- Head Runner: Follow middle line markers to control Olm’s head direction, skipping attacks by staying out of sight.
Avoiding Common Pitfalls
Even with markers, mistakes happen. Avoid these:
- Over-Marking: Too many markers can clutter the screen. Stick to essentials.
- Panic Movement: Trust your markers instead of spam-clicking, which can lead to mispositioning.
- Ignoring Mechanics: Markers don’t replace knowledge. Learn Olm’s attack patterns, like the infinity symbol indicating healing on the Mage Hand.
Tips for Solo and Team Raids
Tile markers adapt to both solo and team raids, but strategies differ slightly.
Solo Raids
Solo raiders rely heavily on markers due to handling all roles alone. Key tips:
- Use the 3:0 or 4:1 attack methods, with markers guiding your movement between Melee and Mage Hands.
- Mark safe spots for crystal bombs, as solo players can’t afford mistakes.
- Note that teleport markers may persist in solo raids, cluttering the room. Clear them manually via RuneLite settings.
Team Raids
In teams, markers enhance coordination:
- Share marker strings with teammates via RuneLite’s export feature to ensure everyone’s aligned.
- Assign roles clearly, using color-coded markers to avoid overlap.
- Mark the middle line for head runners, as team size increases phase complexity.
Community Resources for Markers
Tap into community knowledge for optimized setups:
- RuneMarkers.net: Offers importable Olm tile markers.
- Reddit (r/2007scape): Check threads like the tile marker import/export post for player-shared setups.
- OSRS Wiki: Provides detailed mechanics and marker guides.
By integrating tile markers into your Olm strategy, you’ll transform a chaotic fight into a manageable challenge. Practice with these setups, refine your markers, and soon you’ll be claiming that 1kc T-bow with ease. Happy raiding!