Your cart is empty

OSRS Monkey Madness No Prayer Guide: Master the Quest Without Prayer
Old School RuneScape (OSRS) is packed with iconic quests, and Monkey Madness I stands out as one of the most thrilling yet challenging adventures. For players looking to tackle this quest without relying on prayer, the stakes are even higher. Whether you’re an Ironman avoiding prayer potions or just testing your skills, completing Monkey Madness I with no prayer requires careful planning, precise execution, and a solid strategy. This guide will walk you through every step of the quest, offering tips and tricks to succeed without the safety net of protection prayers. Let’s dive into Ape Atoll’s dangers and emerge victorious!
The Challenge Factor
Taking on Monkey Madness I without prayer is a self-imposed challenge that pushes your OSRS skills to the limit. Without Protect from Melee or Missiles, you’ll need to rely on timing, inventory management, and raw combat prowess. It’s a badge of honor for seasoned players and a unique twist for those bored of the standard approach.
Ironman and Resource Constraints
For Ironmen, prayer potions can be a scarce resource early on, especially before unlocking better methods like ensouled heads or high-level PvM drops. Skipping prayer in Monkey Madness I saves those precious supplies for later, making this guide a lifeline for self-sufficient accounts.
Proving Prayer Isn’t Essential
Many assume prayer is a must for surviving Ape Atoll’s aggressive monkeys and the Jungle Demon finale. This guide proves otherwise—strategic movement and preparation can outshine prayer reliance, opening new ways to enjoy this classic quest.
Preparation: Gear and Inventory Setup
Combat Stats and Recommended Levels
Before heading to Ape Atoll, ensure your combat stats are up to par. Aim for at least:
- Attack: 40+ (for decent weapon accuracy)
- Strength: 40+ (to hit harder)
- Defence: 40+ (to reduce damage taken)
- Hitpoints: 50+ (to survive longer)
- Ranged: 40+ (optional but helpful for safespotting)
These stats give you a fighting chance against the island’s threats without prayer’s damage mitigation.
Gear Choices Without Prayer
Since you won’t be boosting prayer, focus on defensive and offensive gear:
- Melee Setup: Rune armor (chainbody, platelegs, kiteshield), Rune scimitar or better.
- Ranged Setup: Green d’hide armor, a crossbow with bronze bolts (for safespotting the Jungle Demon).
- Other: Amulet of Strength, Combat bracelet, or Ring of Recoil.
Avoid heavy armor like platebodies if agility obstacles are a concern—weight management is key.
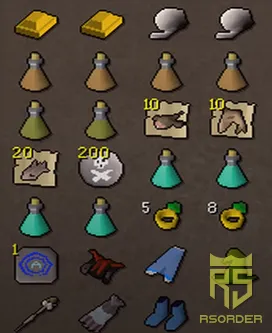
Inventory Essentials
Your inventory is your survival toolkit. Here’s what to bring:
| Item | Purpose |
|---|---|
| Gold Bar | Required for the M’speak amulet |
| Ball of Wool | Required for the M’speak amulet |
| Monkey Bones (Karamjan) | For the Monkey Greegree |
| Antipoison (4+ doses) | Counter poison from spiders, snakes, and arrows |
| High-healing Food (15+ Sharks) | Sustain through combat and traps |
| Energy Potions (4+) | Keep run energy up for long dungeon runs |
| Teleport (e.g., Duel Ring) | Emergency escape and banking |
Fill remaining slots with food—Sharks or better are ideal for their high healing value.
Step-by-Step Walkthrough: No Prayer Edition
Starting the Quest
Head to the Grand Tree and speak to King Narnode Shareen. He’ll task you with finding the missing 10th Squad, handing you the Gnome Royal Seal. Travel to Karamja via the glider (Gandius), then enter the Shipyard north of the island. Talk to G.L.O. Caranock by the southern fence to progress. Return to the Grand Tree and speak to Daero on the 1st floor, then Waydar, to reach Crash Island. Finally, convince Lumdo to sail you to Ape Atoll.
Surviving Ape Atoll’s Surface
Without prayer, Ape Atoll is a gauntlet of poison and aggression. As you land, run northwest along the coast, avoiding snakes (level 24) and scorpions (level 38). When you reach the gate, expect a barrage of poisoned arrows—no Protect from Missiles means you’ll take hits. Drink an antipoison immediately and sprint through. You’ll be knocked out and jailed.
In the jail, stay two squares from the walls to avoid guard punches (up to 15 damage). Watch the patrol pattern: one guard walks by twice, then heads to switch shifts. Pick the lock when he’s leaving, then bolt to the grass east of the jail. Speak to Karam in the bushes near the crafting shop.
Navigating the Ape Atoll Dungeon
Return to the Grand Tree, restock, then head back to Ape Atoll via Daero, Waydar, and Lumdo. Enter the dungeon west of the boat. Without Protect from Melee, this is the toughest part:
- Run Constantly: Keep run on and use energy potions to outpace zombie monkeys (level 98, max hit 7) and skeletons (level 142, max hit 12).
- Eat Early: Heal when your HP drops below 20—monsters hit fast in multicombat.
- Avoid Traps: Stop one square before claw traps, then run through. Rocks (1-3 damage) can be ignored if HP is high.
Reach Zooknock at the end. Use your Gold Bar, Monkey Dentures, and M’amulet Mould on him to get an Enchanted Bar. Teleport out, bank, and return.
Crafting the Monkey Greegree
Back on Ape Atoll, go to the temple’s northeast corner. Climb down the trapdoor (avoid bearded guards—run upstairs and down the east ladder if needed). Use the Enchanted Bar on the flame wall, then add a Ball of Wool to craft the M’speak Amulet. Head west to the banana garden. Wait for the Monkey’s Aunt to leave, then tell the Monkey Child you’re his uncle. Pick 5 bananas from nearby trees, give them to him, and take the Monkey Talisman. Return to Zooknock with the Talisman and Monkey Bones to get your Monkey Greegree.
Facing the Jungle Demon Without Prayer
Battle Prep
Bank and gear up for the level 195 Jungle Demon. With no Protect from Magic or Melee, safespotting is your best bet. Bring:
- Ranged Gear: Crossbow and bolts (or a Magic shortbow).
- Food: 10+ Sharks.
- 10th Squad Sigil: From Garkor earlier.
Equip the sigil to teleport to the arena.
Safespot Strategy
The Jungle Demon hits up to 32 with Magic and Melee (halberd range: 2 squares). Without prayer, direct combat is risky. Instead:
- Teleport in and immediately run south to the 10th Squad gnomes.
- Position yourself so the Demon gets stuck behind a gnome or terrain.
- Use Ranged to attack from 3+ squares away, avoiding Melee range.
- Eat food as needed—keep HP above 32 to survive stray hits.
The gnomes will tank while you whittle it down. If no safespot works, tank with Melee, but expect heavy food usage.
Tips and Tricks for Success
Managing Poison Without Prayer
Poison starts at 4 damage and ticks frequently. Carry 4+ Antipoison doses and sip preemptively near spiders or after the gate. Strange Fruits from the island can substitute in a pinch.
Conserving Resources
Bank often—use your Duel Ring to Al Kharid, restock, and glide back via the Grand Tree. Cut pineapples on Ape Atoll for extra food if supplies run low.
Avoiding Common Pitfalls
Don’t rush the dungeon without energy potions—you’ll get swarmed. Avoid burying Monkey Bones accidentally when making the Greegree—right-click “Use” on Zooknock. And never stand too close to jail guards, or you’ll reset progress.
With the Jungle Demon defeated, return to King Narnode Shareen to claim your rewards: 3 Quest Points, combat XP, and Dragon Scimitar access. Completing Monkey Madness I without prayer is a testament to your skill and patience. Ready to take on Ape Atoll’s chaos again? Share your no-prayer triumphs below!
