Your cart is empty

OSRS Jellies Catacombs of Kourend Ultimate Slayer Guide
Warped Jellies in the Catacombs of Kourend are a fan-favorite Slayer task in Old School RuneScape (OSRS) for players seeking efficient experience and valuable loot. Requiring a Slayer level of 52, these gooey monsters offer unique combat challenges and rewarding drops, including hard clue scrolls and ancient shards. This comprehensive guide covers everything you need to know about tackling Warped Jellies, from locations and strategies to gear setups and loot potential, optimized for players looking to maximize their Slayer tasks.
Warped Jellies, found exclusively in the Catacombs of Kourend, are stronger variants of regular Jellies, boasting a combat level of 112 and improved drop tables. They’re a popular choice for Slayer tasks due to their multi-combat environment, which allows for area-of-effect (AOE) attacks like Ice Barrage, and their high drop rate for hard clue scrolls (1/64 chance). The Catacombs also provide prayer point restoration when burying bones, making it a sustainable location for extended sessions. Choosing Warped Jellies over regular Jellies in places like the Fremennik Slayer Dungeon often yields better rewards and experience rates, especially for players with access to Ancient Magicks.
Key Benefits of Slaying Warped Jellies
- High Slayer XP: Up to 120k Magic XP per hour when bursting or barraging.
- Valuable Drops: Hard clue scrolls, ancient shards, and alchable items like Rune kiteshields.
- Multi-Combat Zone: Ideal for AOE attacks, increasing kill speed.
- Prayer Restoration: Burying bones in the Catacombs restores prayer points (1 for regular bones, 4 for dragon bones).
Getting to the Catacombs of Kourend
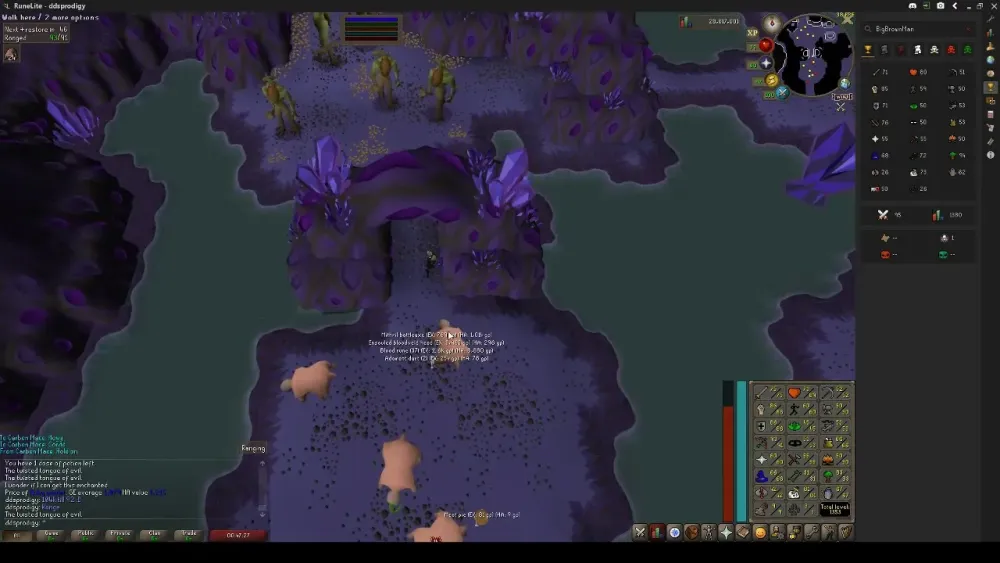
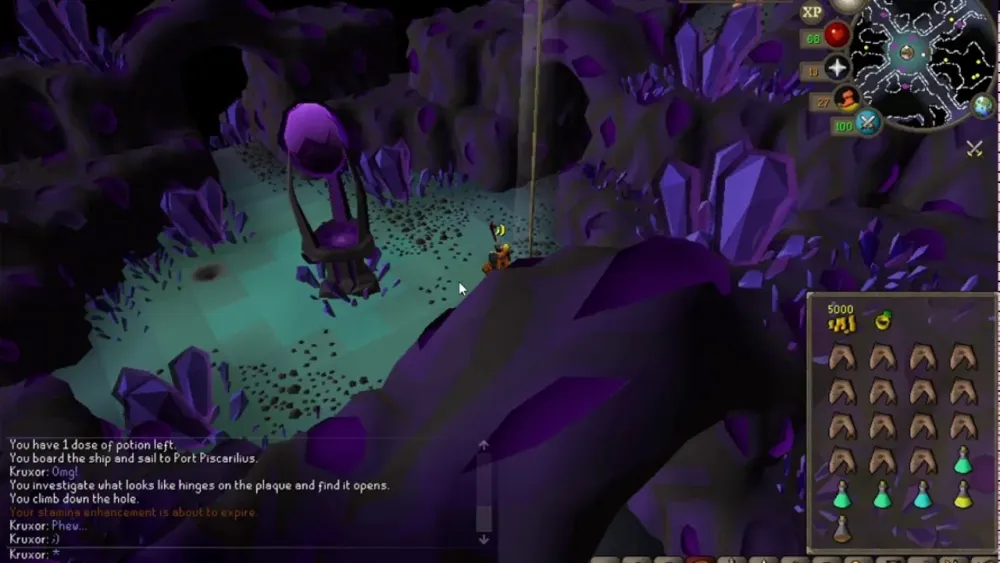
The Catacombs of Kourend, located beneath Great Kourend, are accessible via multiple entrances, with the main one at the statue of King Rada I in Kourend Castle’s courtyard. Warped Jellies spawn in the south-eastern “Shallows” section, a watery area with 18 spawns, perfect for stacking and bursting. Here’s how to get there efficiently:
Fastest Travel Methods
- Xeric’s Talisman (Xeric’s Heart): Teleports you near the statue of King Rada I after completing the Architectural Alliance miniquest.
- Kourend Castle Teleport: Requires the “Transportation Incantations” book for standard spellbook users.
- House Portal: Use a house portal attuned to Kourend or redirect house teleport tabs to Zeah.
- Fairy Ring (CIS): Access the Demon’s Run exit after unlocking it, then run east.
Navigating the Catacombs
Once inside, head east to the Shallows section. A shortcut requiring 34 Agility (Northern Crevice) connects Warped Jellies to Greater Nechryaels, saving time. The Catacombs’ multi-combat nature means monsters can stack, so be prepared for aggressive encounters. Dwarf multicannons are not allowed, so rely on combat skills or AOE magic for efficiency.
Combat Strategies for Warped Jellies
Warped Jellies use a magic-based melee attack, making high magic defense armor like Karil’s or black dragonhide ideal. However, using Protect from Melee nullifies all damage, making prayer-focused setups viable. Below are the most effective combat strategies, tailored to different playstyles.
Magic Bursting/Barraging (Fastest XP)
For maximum Slayer and Magic XP, use Ancient Magicks like Ice Burst or Ice Barrage in the multi-combat Shallows. Lure Jellies to a corner (e.g., near the south-east water) to stack them, then cast AOE spells. Use cheap darts or knives to tag non-aggressive Jellies and a Dinh’s Bulwark with a Lightbearer for faster tagging. This method can yield 120k Magic XP and 60k HP XP per hour but is rune-intensive.
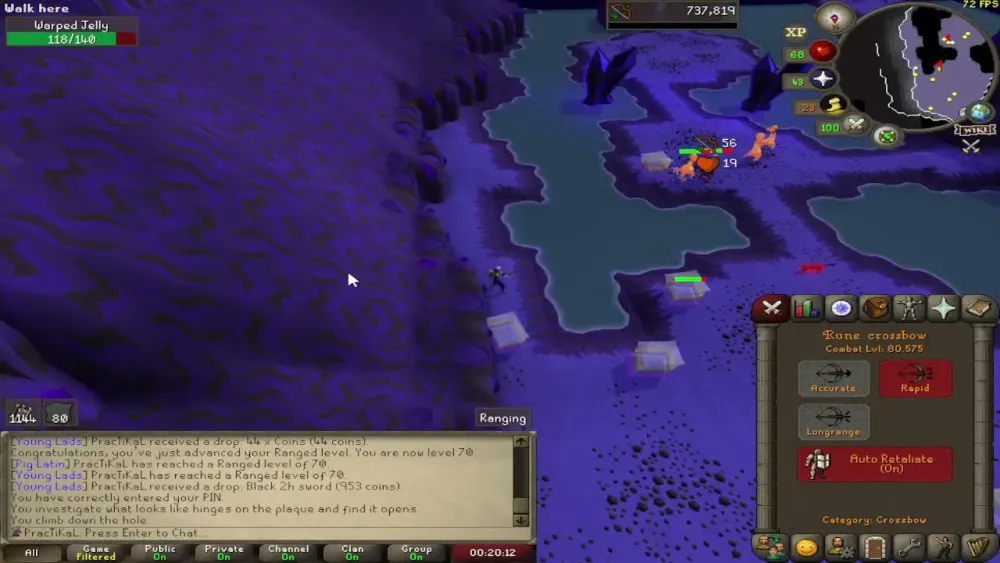
Ranged Safespotting (Low-Effort)
Safespotting is a cost-effective option in the eastern chamber. Stand across the south-east water or around corners to attack Jellies without taking damage. The Venator Bow is ideal for multi-target hits, though a Rune Crossbow with broad bolts works well for budget setups. Expect slower kills but minimal resource costs.
Melee (Budget-Friendly)
Melee is straightforward with Protect from Melee. Use a Dragon Scimitar or Abyssal Whip with high magic defense armor. Proselyte armor paired with prayer flicking minimizes prayer potion use, especially with the Catacombs’ bone-burying effect. Melee is slower but sustainable for low-budget players.
Safespotting Tips
- Water Safespot: Attack across the south-east water in the eastern chamber.
- Corner Safespot: Use the water’s corners to block Jellies’ melee range.
- Stair Safespot: Near lesser demons, wait for their aggression timer to expire, then safespot Jellies around the stairs.
Recommended Gear and Inventory
Your gear and inventory depend on your combat method, but all setups should prioritize magic defense or prayer efficiency. Below is a table summarizing recommended setups for each method.
| Method | Gear | Inventory |
|---|---|---|
| Magic (Bursting) | Ahrim’s Robes, Occult Necklace, Trident of the Seas, Imbued God Cape, Tormented Bracelet | Rune Pouch (Ice Burst/Barrage runes), 2-3 Prayer Potions, Explorer’s Ring 4, 1-2 Stamina Potions, Bronze Darts, Teleport Runes |
| Ranged | Black D’hide, Ava’s Accumulator, Archer’s Ring, Rune Crossbow, Broad Bolts | 1-2 Ranging Potions, 2 Prayer Potions, High Alchemy Runes, Teleport Runes, Food (Sharks) |
| Melee | Proselyte Armor, Dragon Scimitar, Dragon Defender, Amulet of Glory, Slayer Helmet | 1-2 Super Combat Potions, 2 Prayer Potions, High Alchemy Runes, Teleport Runes, Food (Monkfish) |
Inventory Tips
- Bonecrusher: Automatically buries bones for prayer restoration.
- Ring of Wealth: Increases gem drop table chances by removing “nothing” drops.
- Empty Spaces: Keep 2-3 slots for coins, alchables, and brimstone keys (Konar tasks).
Loot and Rewards
Warped Jellies offer a solid drop table, making them a profitable Slayer task, especially when farming hard clue scrolls. Their average kill value is around 2.7k GP on a Slayer task, with notable drops including:
Key Drops
- Hard Clue Scroll (1/64): High drop rate, comparable to Hellhounds, ideal for clue hunters.
- Ancient Shard (1/256): Used to charge the Arclight for demon-slaying.
- Dark Totem Pieces (1/384): Combine to access Skotizo, a demi-boss with valuable loot.
- Brimstone Key (1/77, Konar tasks): Unlocks the Brimstone Chest, averaging 93k GP per key.
- Rune Kiteshield (1/64): High-alch value for consistent profit.
Drop Table Highlights
| Item | Drop Rate | Average Value (GP) |
|---|---|---|
| Hard Clue Scroll | 1/64 | Varies (10k-1M+) |
| Rune Kiteshield | 1/64 | 32k |
| Ancient Shard | 1/256 | Untradeable |
| Dark Totem Piece | 1/384 | Untradeable |
| Coins (44-460) | 71/128 | 97.30 |
Maximizing Profit
Bring a Rune Pouch with High Alchemy runes to alch drops like Rune Kiteshields and Adamant 2h Swords on the spot. For Magic users, the Explorer’s Ring 4 provides free alchs, saving inventory space. Prioritize picking up clue scrolls, ancient shards, and totem pieces, as these offer long-term value. If on a Konar task, brimstone keys significantly boost profit.
Slaying Warped Jellies in the Catacombs of Kourend is a rewarding and engaging task for OSRS players. Whether you’re bursting for XP, safespotting for efficiency, or hunting clues, this guide equips you with the strategies and setups to succeed. Dive into the Shallows, stack those Jellies, and enjoy the loot!