Your cart is empty
OSRS Jad Gear Guide for a Successful Fire Cape Run

Conquering the TzHaar Fight Cave and defeating TzTok-Jad in Old School RuneScape (OSRS) is a rite of passage for many players, rewarding the coveted Fire Cape. This challenging minigame tests your combat skills, preparation, and prayer-switching reflexes across 63 waves of enemies, culminating in a showdown with Jad, a level-702 behemoth. To maximize your chances of success, choosing the right gear and inventory setup is critical. This comprehensive guide outlines the best gear setups, inventory recommendations, and strategies tailored for players aiming to secure their first Fire Cape or optimize repeat runs.
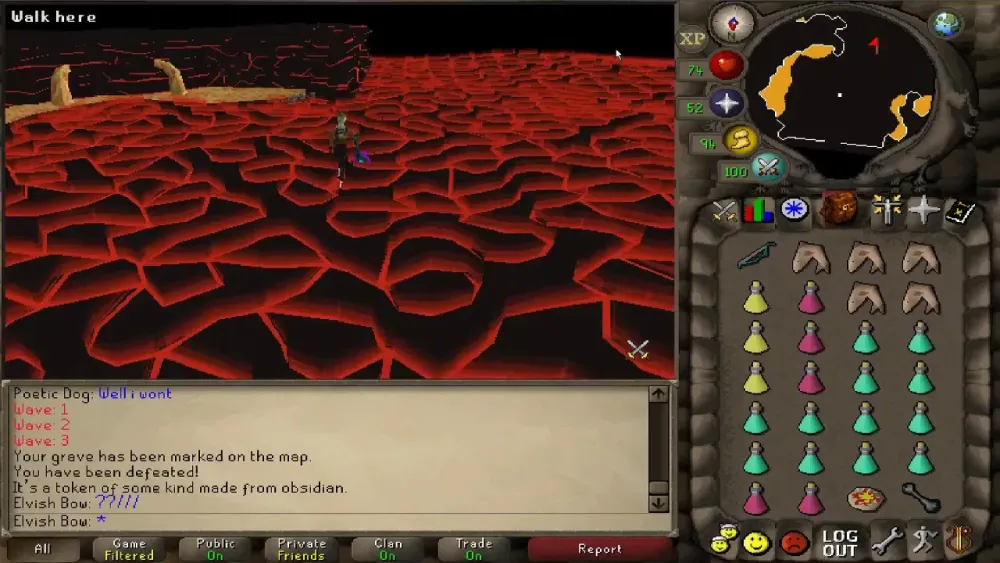
The Fight Cave, located in the Karamja volcano’s TzHaar City, pits you against increasingly difficult waves of monsters, ending with TzTok-Jad. Jad’s three attack styles—Melee, Ranged, and Magic—can each deal up to 97 damage, capable of one-hitting most players if not countered with the correct protection prayer. Ranged is the preferred combat style for its ability to safe-spot enemies and simplify Jad’s prayer switches by avoiding his Melee attack.
Fight Cave Wave Structure
The Fight Cave consists of 63 waves, with enemies spawning in predictable patterns:
- Tz-Kih (Level 22): Drains prayer when attacking; prioritize killing them.
- Tz-Kek (Level 45): Splits into two smaller versions upon death.
- Tok-Xil (Level 90): Uses Ranged attacks; pray Protect from Missiles when needed.
- Yt-MejKot (Level 180): Melee-based; can be safe-spotted.
- Ket-Zek (Level 360): Uses Magic and Melee; pray Protect from Magic.
- TzTok-Jad (Level 702): Final boss with devastating attacks.
Jad’s Attack Patterns
Jad’s attacks are telegraphed by animations and sounds, making prayer-switching manageable with practice:
- Ranged: Jad rears up on hind legs with a loud stomp; activate Protect from Missiles.
- Magic: Jad lowers his head and breathes a fireball; use Protect from Magic.
- Melee: Only used if you’re within melee range; avoid this by staying at a distance.
During Jad’s wave, healers (Yt-HurKot) spawn to restore his health. Lure them away one at a time to kill while maintaining focus on Jad’s attacks.
Recommended Stats for the Fight Cave

While there are no strict requirements, certain stat thresholds make the Fight Cave more manageable. These recommendations assume a Ranged-focused approach, as it’s the most accessible and effective for most players.
Combat Stat Goals
- Ranged: 75+ (for Toxic Blowpipe) or 61+ (for Rune Crossbow).
- Defence: 70+ for better survivability and access to Barrows gear.
- Prayer: 70+ for Piety (optional but boosts damage) or 43+ for protection prayers.
- Hitpoints: 70+ to withstand occasional hits and conserve supplies.
Optional Magic Stat
A Magic level of 94 allows use of Vengeance, which can reflect damage during tougher waves or against Jad. However, this is not essential for success.
Optimal Gear Setups for Jad
Your gear should balance Ranged attack bonuses, Defence, and Prayer bonuses to maximize damage output while surviving the Fight Cave’s onslaught. Below are setups for different budgets, focusing on Ranged.
Budget Gear Setup (2–4M GP)
Ideal for players with limited funds or Ironmen tackling their first Fire Cape.
| Slot | Item | Notes |
|---|---|---|
| Head | Slayer Helmet (i) or Neitiznot Helm | Slayer Helmet if on TzHaar task; Neitiznot for general use. |
| Cape | Ava’s Accumulator | Recovers ammo to save costs. |
| Neck | Amulet of Glory | Budget-friendly with minor bonuses. |
| Body | Black D’hide Body | Good Ranged and Magic Defence. |
| Legs | Black D’hide Chaps | Cost-effective Ranged gear. |
| Weapon | Rune Crossbow | Accurate and accessible; use Broad Bolts. |
| Shield | Book of Law or Crystal Shield | Book for Prayer bonus; Crystal for Defence. |
| Gloves | Barrows Gloves | Best-in-slot for budget setups. |
| Boots | Snakeskin Boots | Cheap Ranged boots. |
| Ring | Archers Ring or Ring of Recoil | Archers for accuracy; Recoil for passive damage. |
Mid-Tier Gear Setup (10–20M GP)
For players with moderate wealth, this setup offers improved efficiency.
| Slot | Item | Notes |
|---|---|---|
| Head | Slayer Helmet (i) or Armadyl Helmet | Armadyl for better bonuses if not on task. |
| Cape | Ava’s Assembler | Upgraded ammo recovery. |
| Neck | Amulet of Fury | Boosts all stats significantly. |
| Body | Armadyl Chestplate | High Ranged bonus and Defence. |
| Legs | Armadyl Chainskirt | Matches Chestplate for optimal stats. |
| Weapon | Toxic Blowpipe | Fast attacks; use Adamant Darts for waves, Dragon Darts for Jad. |
| Shield | Twisted Buckler | Excellent Ranged and Defence bonuses. |
| Gloves | Barrows Gloves | Retained for cost-effectiveness. |
| Boots | Ranger Boots | Improved Ranged accuracy. |
| Ring | Archers Ring (i) | Imbued for maximum Ranged bonus. |
High-End Gear Setup (100M+ GP)
For veterans or wealthy players aiming for speed and reliability.
| Slot | Item | Notes |
|---|---|---|
| Head | Masori Mask (f) | Best-in-slot Ranged helmet. |
| Cape | Ava’s Assembler | Maximizes ammo efficiency. |
| Neck | Necklace of Anguish | Top-tier Ranged bonus. |
| Body | Masori Body (f) | Unmatched Ranged stats. |
| Legs | Masori Chaps (f) | Completes Masori set. |
| Weapon | Toxic Blowpipe or Twisted Bow | Blowpipe for waves; Twisted Bow for Ket-Zek and Jad. |
| Shield | Twisted Buckler | Retained for balance. |
| Gloves | Zaryte Vambraces | Elite Ranged gloves. |
| Boots | Pegasian Boots | Best Ranged boots. |
| Ring | Venator Ring | Superior Ranged accuracy. |
Note: The Twisted Bow excels against high-Magic Defence targets like Ket-Zek and Jad but is less effective for earlier waves. Switch to Blowpipe for efficiency if using it.
Inventory Setup and Supplies
Your inventory must sustain you through 1–2 hours of combat without restocking. A balanced setup includes potions, food, and ammo.
Recommended Inventory
- 8–10 Saradomin Brews: Primary healing; restores Hitpoints and Defence.
- 3–4 Super Restores: Counteracts Brews’ stat drain and restores Prayer.
- 2 Ranging Potions: Boosts Ranged for key waves and Jad.
- 1 Stamina Potion: Maintains run energy for positioning.
- 1500+ Ammo: Adamant Darts/Broad Bolts for waves; Dragon Darts/Diamond Bolts (e) for Jad.
- Filler: Sharks or Prayer Potions for extra healing or Prayer points.
Tip: Maintain a 3:1 Brew-to-Restore ratio to avoid stat penalties. For budget runs, swap some Brews for Prayer Potions to save costs.
Guthan’s Healing Strategy
For players with Guthan’s armor, use it in early waves (1–14) to heal off enemies, conserving Brews. Swap to Ranged gear before Tok-Xil appears. This requires extra inventory space for Guthan’s set.
Strategies for Defeating Jad
Success against Jad hinges on prayer-switching, positioning, and healer management. Practice on tournament worlds or watch Jad attack videos to familiarize yourself with his animations.
Prayer-Switching Tips
- Stay Calm: Focus on Jad’s animations, not your damage output.
- Pre-Switch: Click Protect from Magic or Missiles as soon as you see Jad’s attack animation, then prepare for the next.
- Audio Cues: Turn on game sounds to hear Jad’s attack indicators.
Handling Healers
When healers spawn, lure them one at a time by attacking them briefly, then focus back on Jad. Trap them behind Jad or a rock to prevent healing. Kill them methodically while prayer-switching.
Safe-Spotting and Positioning
Use the Fight Cave’s terrain to your advantage:
- Italy Rock: A common safe-spot to trap enemies like Yt-MejKot.
- Jad Spawn: Position yourself near the center to react to Jad’s spawn location.
- Avoid Corners: Prevents being trapped by multiple enemies.
With the right gear, inventory, and strategies, defeating TzTok-Jad is achievable even for first-timers. Prioritize preparation, practice prayer-switching, and stay patient. Your Fire Cape awaits!

