Your cart is empty

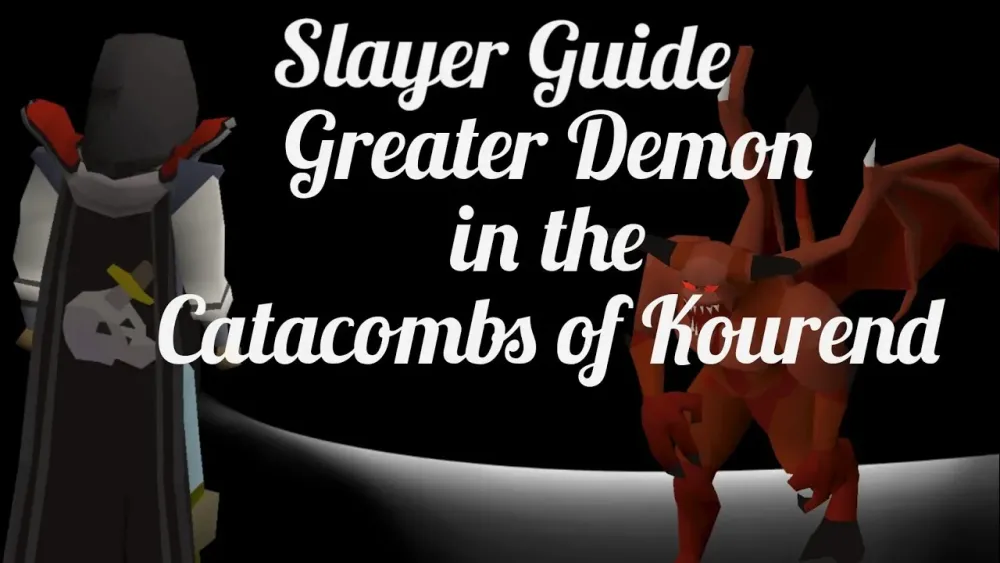
OSRS Greater Demons Catacombs of Kourend Ultimate Guide
In Old School RuneScape (OSRS), the Catacombs of Kourend is a sprawling underground dungeon beneath Great Kourend, packed with monsters perfect for slayer tasks and unique loot. Among the most popular targets here are Greater Demons, known for their decent drops and slayer experience. This guide dives deep into everything you need to know about tackling Greater Demons in the Catacombs, from strategies and gear to safespots and rewards, helping you maximize efficiency and fun.
Greater Demons in the Catacombs of Kourend are a favorite for players grinding slayer or seeking specific drops like ancient shards and dark totem pieces. Unlike other locations, the Catacombs offer unique mechanics, such as prayer point restoration when burying bones, making it a strategic spot for extended sessions. The multi-combat environment also allows for creative combat approaches, though it requires careful planning to avoid being overwhelmed.
Unique Catacombs Mechanics
The Catacombs have a special feature: burying bones restores a small amount of prayer points. Regular bones restore 1 point, big bones 2, and dragon bones 4. This is a game-changer for melee setups relying on protection prayers. Additionally, the Bonecrusher (unlocked via Morytania hard diary) automates this process, restoring prayer after each kill, which is ideal for AFK training.
Greater Demons Overview
Greater Demons are level 92–113 demonic monsters with relatively low defense, making them accessible for mid-to-high-level players. They hit hard with melee attacks, so preparation is key. In the Catacombs, they drop valuable items like rune full helms, hard clue scrolls, ancient shards, and dark totem pieces, which are exclusive to this location.
How to Access the Catacombs of Kourend
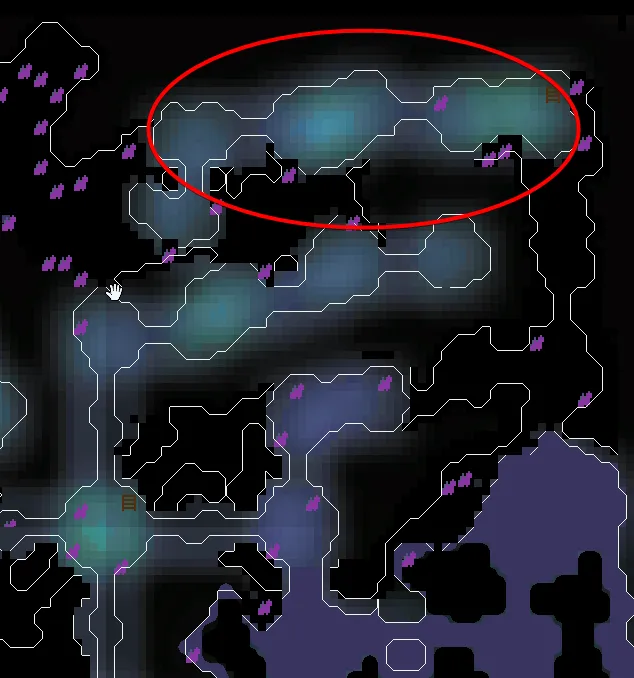
Getting to the Greater Demons in the Catacombs is straightforward, but knowing the fastest routes saves time. The dungeon lies beneath Great Kourend, with multiple entry points for convenience.
Main Entrance
The primary way in is by investigating the statue of King Rada I in Kourend Castle’s courtyard. This drops you into the central hub of the Catacombs. To reach Greater Demons, head northeast to the Demon’s Run section, where they spawn.
Alternative Entrances
Once inside, you can unlock four additional entrances by climbing ropes in specific areas. The Greater Demon exit is in the northeast corner of Demon’s Run, leading to a hole west of the Arceuus essence mine. After unlocking, use fairy ring code CIS for quick access. Other teleports like Xeric’s Talisman (“Xeric’s Heart”) or the “Teleport to Kourend” spell (requires Transportation Incantations book) get you close to the main entrance.
Combat Strategies for Greater Demons
Fighting Greater Demons in the Catacombs requires balancing offense and defense, especially in a multi-combat area. Below are the best approaches for melee, ranged, and magic setups, plus tips for staying efficient.
Melee Setup and Tactics
Melee is the most popular method due to fast kill speeds and synergy with the Catacombs’ prayer restoration. A typical setup includes:
- Weapon: Abyssal whip, dragon scimitar, or Arclight (best against demons, requires ancient shards).
- Armor: Proselyte for prayer bonus or Bandos for strength boosts.
- Inventory: Prayer potions, Bonecrusher, super combat potion, and food (sharks or better).
Use Protect from Melee to negate damage, and AFK by standing in a spot where demons pile up. Every 10 minutes, run a short distance to reset their aggression, then return. The Bonecrusher ensures prayer sustainability, making this method low-maintenance.
Ranged and Magic Safespotting
For safer kills, use safespots to avoid taking damage. Two reliable spots in the Greater Demon area are:
- Under the Arch: Stand beneath the arch dividing the demon area to attack without retaliation.
- Northeast Corner: Position behind the rope exit for a clear shot at demons.
Ranged Setup:
- Weapon: Rune crossbow or toxic blowpipe.
- Ammo: Broad bolts or adamant darts.
- Armor: Black d’hide or Armadyl for ranged bonuses.
Magic Setup:
- Spell: Fire Bolt (with Chaos Gauntlets) or high-level combat spells like Fire Wave.
- Armor: Mystic robes or Ahrim’s for magic accuracy.
Safespotting is slower but ideal for low-defense accounts or ironmen conserving resources.
Managing Multi-Combat Risks
The Catacombs’ multi-combat nature means multiple demons can attack at once. If not safespotting, stick to edges of the room to limit how many agro you at a time. Bring a teleport (like a royal seed pod) for emergencies, and avoid overextending without sufficient food or prayer.
Greater Demon Drops and Rewards
Greater Demons in the Catacombs offer a mix of standard and exclusive drops, making them worth farming. Their loot table isn’t the most lucrative, but consistent kills add up, especially for slayer tasks.
Key Drops Table
| Item | Drop Rate | Use |
|---|---|---|
| Rune Full Helm | 1/128 | Decent melee armor, good for mid-level players. |
| Hard Clue Scroll | 1/128 (1/64 with ring of wealth in Wilderness) | Leads to valuable treasure trails rewards. |
| Ancient Shard | 1/256 | Used to create/charge Arclight or teleport via Dark Altar. |
| Dark Totem Piece | 1/400 | Combines into a totem to fight Skotizo. |
| Vile Ashes | 100% | Prayer XP when scattered or sold for minor profit. |
Note: Drop rates for ancient shards and totem pieces are exclusive to Catacombs variants, making this spot superior to others like the Chasm of Fire for these items.
Skotizo and Dark Totem Farming
Dark totem pieces (base, middle, top) drop from Catacombs monsters, including Greater Demons. Combine them to form a dark totem, which grants one-time access to Skotizo, a demi-boss in the Catacombs’ depths. Skotizo guarantees a hard clue scroll and has a chance for rare drops like the Skotos pet or onyx bolts (e). Farming Greater Demons here passively builds your totem stockpile for future boss fights.
Tips for Efficient Greater Demon Slayer Tasks
Whether you’re chasing XP, loot, or totem pieces, optimizing your Greater Demon tasks in the Catacombs boosts your gains. Here’s how to make the most of your time.
Gear and Inventory Optimization
Prioritize gear that balances DPS and sustainability. For melee, the Arclight is king against demons, offering better stats than an abyssal whip when charged. Carry a looting bag to store stackable drops like ashes or coins, freeing up inventory space. If using prayer-heavy setups, bring a Falador shield or blessed spirit shield to restore prayer at an altar periodically.
Task Extensions and Alternatives
For 100 slayer points, unlock the “Greater Challenge” extension at any slayer master to increase Greater Demon tasks to 200–250 kills. This is worth it if you enjoy the Catacombs’ AFK style. Alternatively, K’ril Tsutsaroth (God Wars Dungeon) and Skotizo count as Greater Demons for tasks, offering variety but requiring more prep.
Maximizing XP and Loot
- Slayer Helm: Wear it on task for a 16.67% damage and accuracy boost.
- Ring of Wealth: Improves clue scroll drop rates slightly.
- Elite Kourend Diary: Unlocks Ash Sanctifier, scattering ashes automatically for prayer XP.
Focus on AFK melee for XP or safespotting for loot preservation. If totem pieces are your goal, prioritize high kill counts over speed.
Greater Demons in the Catacombs of Kourend are a fantastic choice for slayer tasks, offering a blend of accessibility, unique rewards, and flexible combat styles. Whether you’re meleeing with Protect from Melee, safespotting with a crossbow, or farming totems for Skotizo, the Catacombs provide a dynamic environment to suit your playstyle. With this guide, you’re equipped to tackle these demons efficiently, racking up XP and loot while exploring one of OSRS’s coolest dungeons. Happy slaying!