Your cart is empty
OSRS Greater Demon Safe Spot Guide for Efficient Slayer

In Old School RuneScape (OSRS), Greater Demons are a popular Slayer task for players looking to earn experience and valuable loot like the rune full helm or hard clue scrolls. Their high combat level and magic-based attacks can be intimidating, but using a safe spot makes them manageable, even for mid-level players. This guide explores the best safe spots for Greater Demons, strategies to maximize efficiency, and tips to optimize your Slayer tasks. Whether you’re training combat or hunting for drops, we’ve got you covered.
Safe spotting allows you to attack Greater Demons without taking damage, making it ideal for players with lower combat stats or those conserving resources. By exploiting terrain or obstacles, you can stay out of their attack range while dealing consistent damage. This approach is especially useful for ranged or magic users, as Greater Demons are weak to these attack styles.
Benefits of Safe Spotting
- Resource Conservation: No need for food or prayer potions since you avoid damage.
- Accessibility: Mid-level players can tackle high-level monsters safely.
- Efficiency: Focus on dealing damage without worrying about health management.
Who Should Use Safe Spots?
Safe spotting is perfect for players with 70+ Ranged or Magic, Ironmen seeking specific drops, or anyone looking to complete a Slayer task without high-end gear. It’s also great for those tackling Greater Demons in multi-combat areas like the Wilderness Slayer Cave.
Best Locations for Greater Demon Safe Spots

Greater Demons are scattered across Gielinor, but not all locations are ideal for safe spotting. Below, we highlight the top spots based on accessibility, safety, and efficiency.
Catacombs of Kourend
The Catacombs of Kourend is a prime location for safe spotting Greater Demons due to its layout and multi-combat zones. The dungeon’s pillars and corners allow you to trap demons effectively.
- Safe Spot Setup: Lure a Greater Demon to a pillar near the entrance from the Shades of Mort’ton teleport. Position yourself so the pillar blocks its magic attacks.
- Requirements: Access to Kourend (no specific quest needed), 70+ Ranged or Magic recommended.
- Pros: Restores prayer points via the altar, totem pieces for Skotizo.
- Cons: Crowded during peak hours.
Chasm of Fire
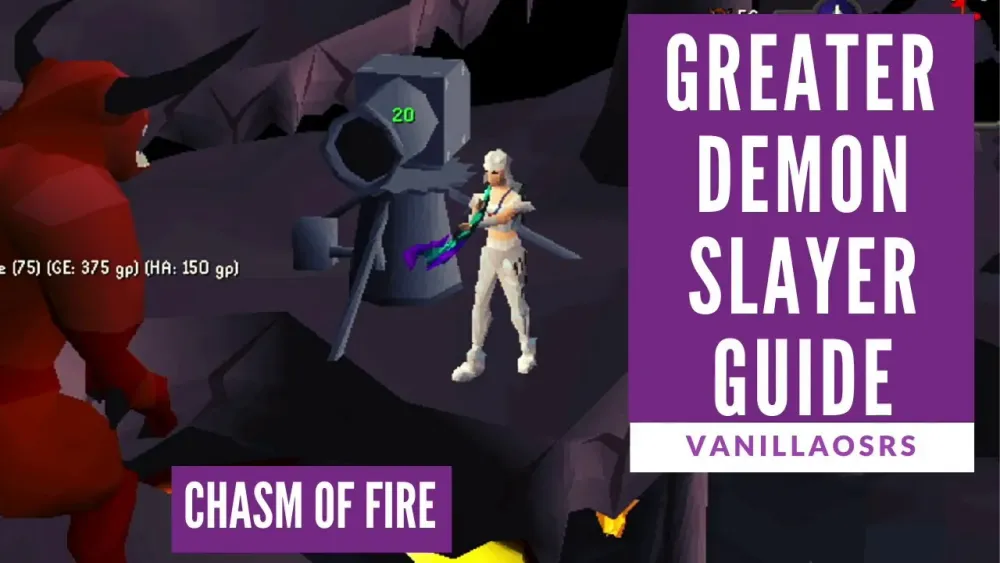
The Chasm of Fire, home to the Inferno minigame entrance, offers a less crowded safe spotting area. Its linear layout makes it easy to trap Greater Demons.
- Safe Spot Setup: Attack a demon and run to the narrow hallway near the entrance. Stand at the corner to avoid its attacks.
- Requirements: Started Priest in Peril for access to Morytania, 70+ combat stats.
- Pros: Quiet, easy to navigate.
- Cons: No additional benefits like totem drops.
Wilderness Slayer Cave
For risk-takers, the Wilderness Slayer Cave offers high-reward safe spots but comes with PKer threats. It’s best for tasks assigned by Krystilia.
- Safe Spot Setup: Lure a Greater Demon to the rocky outcrops in the northern section. Position yourself behind a rock to block attacks.
- Requirements: Wilderness access, high Ranged/Magic, and anti-PK gear.
- Pros: Bonus Slayer XP from Krystilia tasks, chance for unique drops.
- Cons: High risk of player killers.
Gear and Inventory Setup
Your gear and inventory play a big role in safe spotting success. Since you’re avoiding damage, focus on maximizing DPS (damage per second) and prayer efficiency.
Recommended Gear
| Slot | Ranged Setup | Magic Setup |
|---|---|---|
| Head | Archer’s Helm | Ahrim’s Hood |
| Cape | Ava’s Accumulator | God Cape |
| Body | Black D’hide Body | Ahrim’s Robetop |
| Legs | Black D’hide Chaps | Ahrim’s Robeskirt |
| Weapon | Rune Crossbow | Trident of the Seas |
| Ammo/Spell | Amethyst Bolts | Fire Wave |
Note: Budget options like a Magic Shortbow or Mystic Robes work for lower budgets.
Inventory Tips
- Teleportation: Kourend Castle teleport or Games Necklace for quick access.
- Prayer Potions: 1-2 for Protect from Magic in multi-combat zones.
- Runes/Arrows: Bring extra to avoid banking mid-task.
- Looting Bag: Useful in the Wilderness for collecting drops.
Safe Spotting Techniques and Strategies
Executing a safe spot requires precision to avoid aggro from other monsters or breaking the setup. Here’s how to do it right.
Luring the Demon
Greater Demons are aggressive, so luring them to a safe spot is straightforward but needs care in multi-combat areas.
- Step 1: Attack the demon from a distance to gain its attention.
- Step 2: Run to your chosen obstacle (pillar, rock, or corner).
- Step 3: Position yourself so the demon is stuck on the opposite side.
Maintaining the Safe Spot
Once set up, avoid moving unnecessarily to keep the demon trapped.
- Auto-Retaliate Off: Prevents accidental movement.
- Watch Aggro: Other demons may attack if you’re too close in multi-combat zones.
- Protect from Magic: Use in crowded areas to minimize stray hits.
Dealing with Interruptions
In busy areas like the Catacombs, other players or monsters can disrupt your setup.
- Switch Targets: If another player steals your demon, lure a new one.
- Reposition: Move to a different pillar or corner if crowded.
- World Hop: Find a less populated world for peace.
Maximizing Loot and Experience
Greater Demons offer decent XP and drops, but you can optimize your gains with the right approach.
Drop Table Highlights
- Rune Full Helm: Valuable for mid-level players, worth ~20k.
- Hard Clue Scroll: Chance for rare rewards.
- Ancient Shards/Totem Pieces: Catacombs-exclusive, used for Skotizo.
Boosting Efficiency
To get the most out of your Slayer task:
- Slayer Helm: Wear on-task for a 16.67% damage boost.
- Cannon (Catacombs): Speeds up kills in multi-combat areas.
- Alch Runes: High-alch junk drops like rune daggers to save inventory space.
XP Rates
Depending on your setup, expect:
- Ranged: 40-60k XP/hour with high-end gear.
- Magic: 30-50k XP/hour, slower but safer for Ironmen.
- Slayer XP: ~10-15k/hour, boosted with Krystilia tasks.
By using safe spots, you can tackle Greater Demons efficiently, regardless of your combat level. The Catacombs of Kourend stands out for its balance of safety and rewards, while the Wilderness offers high risk for high reward. Equip the right gear, master luring techniques, and watch your XP and loot pile up. Happy Slaying!
