Your cart is empty

OSRS Greater Demon Safe Spot Guide: Best Locations and Strategies
In Old School RuneScape (OSRS), Greater Demons are a popular Slayer monster known for their decent experience rates and valuable drops like the Rune Full Helm and Hard Clue Scrolls. For players looking to tackle these demonic foes efficiently, safe spotting is a game-changer. This guide dives deep into the best OSRS Greater Demon safe spot locations, strategies, and tips to maximize your Slayer tasks while minimizing risk. Whether you’re a mid-level player or a seasoned adventurer, this blog post will help you master Greater Demon slaying with ease.
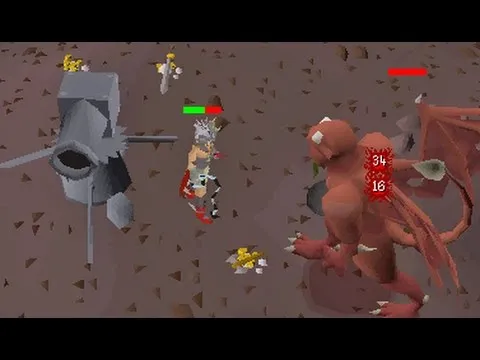
Safe spotting allows you to attack Greater Demons using Ranged or Magic without taking damage, making it an ideal strategy for players with lower combat stats or those looking to conserve resources. Greater Demons have a max hit of 10 with their melee slash attack, which can add up quickly if you’re not prepared. By leveraging safe spots, you can turn a potentially risky Slayer task into a smooth, AFK-friendly grind.
Benefits of Safe Spotting
- Resource Efficiency: No need for food or prayer potions when you’re out of harm’s way.
- Lower Risk: Perfect for Wilderness locations where PKers lurk.
- AFK Potential: Sit back and attack while the demons can’t retaliate.
Who Should Use Safe Spots?
Safe spotting is ideal for players with combat levels 70+, especially those with at least 43 Prayer for Protect from Melee (as a backup) and decent Ranged or Magic stats (50+ recommended). It’s also a great option for Ironmen who want to farm drops without burning through supplies.
Top OSRS Greater Demon Safe Spot Locations
Greater Demons are scattered across Gielinor, but not all locations are equal when it comes to safe spotting. Below, we’ll explore the best spots where you can take advantage of terrain or obstacles to stay safe while racking up kills.
Catacombs of Kourend Safe Spots
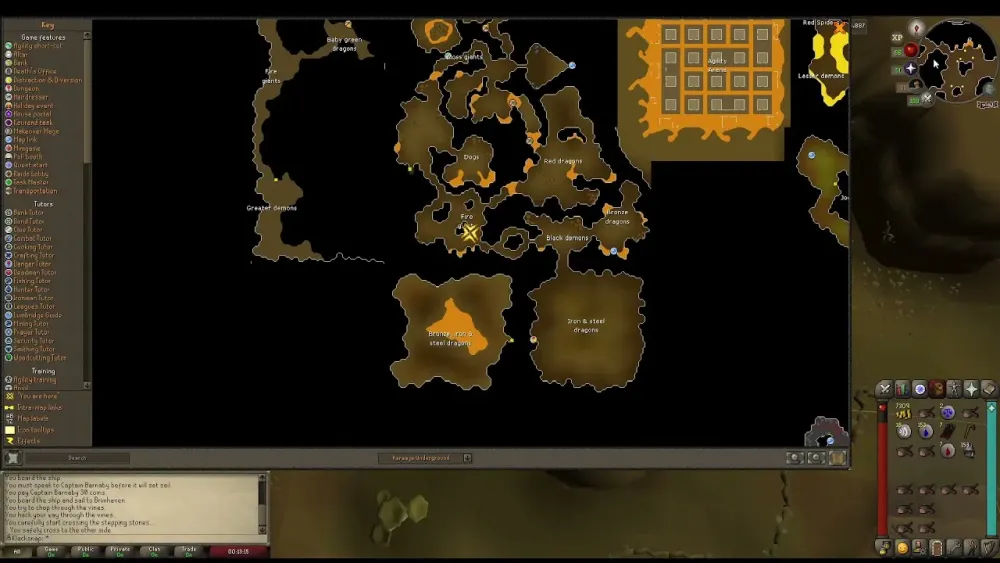
The Catacombs of Kourend is a fan-favorite for Greater Demon tasks due to its accessibility and multiple safe spotting opportunities. Located beneath Great Kourend, this multicombat area is packed with demons and offers unique drops like Ancient Shards and Dark Totem pieces.
- Safe Spot 1: Under the Arch: Stand under the archway dividing the Greater Demon area. The demons can’t reach you, allowing you to attack with Ranged or Magic.
- Safe Spot 2: Northeast Corner: Position yourself behind the rope exit in the extreme northeast corner. This spot keeps you out of melee range while you fire away.
- How to Get There: Teleport to Kourend Castle (requires 60% Arceuus favor) and inspect the statue, or use Fairy Ring code CIS and run northeast to the vine entrance.
Chasm of Fire Safe Spots
The Chasm of Fire, northwest of Shayzien, is a Slayer-only dungeon with 17 Greater Demon spawns split across two areas. While it’s single combat, the layout is perfect for safe spotting with Ranged or Magic.
- Safe Spot: Stand behind the pillars or along the narrow pathways. The demons’ large size (3×3 tiles) prevents them from squeezing through, leaving them stuck while you attack.
- Bonus Tip: You can set up a Dwarf Multicannon here for faster kills, though you’ll still only fight one demon at a time.
- How to Get There: Use Fairy Ring code DJR for quick access, then cross the bridge and enter the hole.
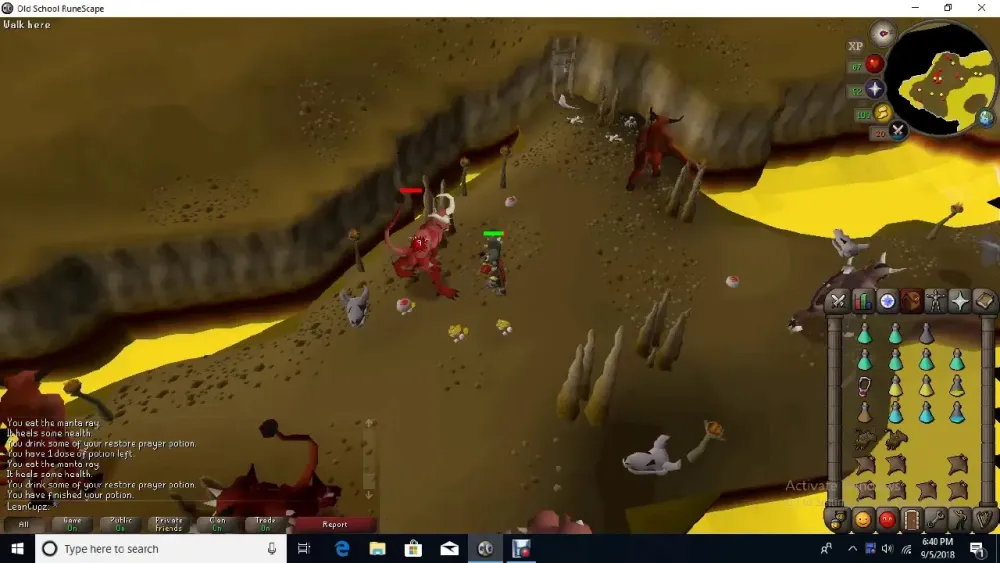
Wilderness Slayer Cave Safe Spots
For the brave, the Wilderness Slayer Cave offers enhanced drops and multicombat chaos, but it’s high-risk due to PKers. If you’re willing to take the gamble, the safe spots here are clutch.
- Safe Spot: Use the stalagmites at the entrance of the Greater Demon chamber. Position yourself so the demons can’t reach you, and consider a halberd for extra range.
- Risk Factor: Bring only what you’re willing to lose, and have a teleport ready (e.g., Royal Seed Pod).
- How to Get There: Wilderness Crabs teleport (pricey) or a long run from Edgeville.
Brimhaven Dungeon Safe Spots
Brimhaven Dungeon is a classic spot for F2P and P2P players alike, with several Greater Demons and safe spotting options.
- Safe Spot 1: Stand at the easternmost edge of their spawn area, where the demons can’t path to you.
- Safe Spot 2: Hide behind the fungus west of the stairs for a clear shot.
- How to Get There: Teleport to Karamja (e.g., Amulet of Glory) and pay 875 coins to enter the dungeon.
Gear and Inventory Setup for Safe Spotting
To make the most of your Greater Demon safe spots, your gear and inventory need to be on point. Since you’re avoiding melee combat, focus on Ranged or Magic setups for maximum efficiency.
Recommended Ranged Gear
| Slot | Item |
|---|---|
| Head | Archer Helm or Coif |
| Body | Black D’hide Body |
| Legs | Black D’hide Chaps |
| Weapon | Magic Shortbow or Rune Crossbow |
| Ammo | Amethyst Arrows or Broad Bolts |
Recommended Magic Gear
| Slot | Item |
|---|---|
| Head | Mystic Hat |
| Body | Mystic Robe Top |
| Legs | Mystic Robe Bottom |
| Weapon | Slayer Staff or Trident of the Seas |
| Spell | Fire Bolt or Water Blast |
Inventory Essentials
- Teleport: For quick escapes (e.g., Teleport Tab or Amulet of Glory).
- Ranging/Magic Supplies: Extra arrows, bolts, or runes.
- Looting Bag: Useful in the Wilderness to store drops.
- Prayer Potions (Optional): If you’re using Protect from Melee as a fallback.
Strategies for Efficient Greater Demon Slayer Tasks
Safe spotting is only half the battle—optimizing your kills and managing aggression timers can take your Slayer task to the next level.
Maximizing Kill Speed
While safe spotting is slower than melee with a cannon, you can still boost efficiency:
- Upgrade Your Weapon: Swap to a Crystal Bow or Toxic Blowpipe if you have the cash.
- Use Special Attacks: The Magic Shortbow’s special attack hits twice, speeding up kills.
- Boost Stats: Bring a Ranging or Magic Potion to hit harder.
Managing Aggression in Multicombat Areas
In places like the Catacombs or Wilderness Slayer Cave, demons lose aggression after 10 minutes. To reset it:
- Run a few screens away (e.g., to the entrance).
- Return to your safe spot and resume attacking.
Dealing with PKers in the Wilderness
If you’re in the Wilderness Slayer Cave or Demonic Ruins:
- Scout First: Hop worlds to check for PKers.
- Stay Alert: Keep your minimap open and fingers on your teleport hotkey.
- Low-Value Gear: Stick to budget setups to minimize loss.
Tips and Tricks for Greater Demon Safe Spot Success
Here are some final pointers to ensure your Greater Demon Slayer tasks go off without a hitch.
Loot Worth Picking Up
Greater Demons aren’t a goldmine, but some drops are worth grabbing:
- Rune Full Helm: 20k-30k GP each.
- Hard Clue Scrolls: Potential for big rewards.
- Ancient Shards (Catacombs): For Arclight upgrades.
Avoiding Common Mistakes
- Don’t Overcommit in the Wilderness: Only bring 3-4 valuable items.
- Check Your Position: Ensure the demon can’t path to you before attacking.
- Monitor Supplies: Running out of ammo mid-task wastes time.
When to Skip Greater Demons
If you have Slayer points to burn and hate the task, skip it. Greater Demons are decent but not top-tier for profit or XP compared to tasks like Dust Devils or Nechryaels. Use your points wisely!
With these safe spots and strategies, you’re ready to take on Greater Demons like a pro. Whether you’re grinding Slayer XP, chasing clues, or just enjoying some AFK combat, this guide has you covered. Happy slaying!