Your cart is empty

OSRS Grand Tree Safe Spot Guide for Black Demon Fight
The Grand Tree quest in Old School RuneScape (OSRS) is a thrilling adventure that pits players against a formidable level 98 Black Demon. For many, this fight is a daunting challenge, especially for low-level players or those with limited combat experience. Fortunately, safe spotting the Black Demon makes this encounter manageable, allowing you to defeat it without taking damage. In this comprehensive guide, we’ll explore the best safe spots, strategies, and tips to conquer the Black Demon in the Grand Tree quest, ensuring you complete this iconic quest with ease.
The Black Demon in the Grand Tree quest is a significant hurdle due to its high combat level and max hit of 16, which can be devastating for unprepared players. Safe spotting allows you to attack from a position where the demon cannot reach you, making the fight safer and more approachable. This strategy is particularly useful for players with low Hitpoints, limited gear, or those playing on restricted accounts like 10HP pures. By using safe spots, you can conserve resources and avoid the risk of dying, which would force you to restart the battle.
Quest Context: The Black Demon Encounter
During the Grand Tree quest, you confront Glough, the antagonistic gnome plotting against the Grand Tree. After entering a trapdoor in Glough’s house (by spelling “TUZO” with twigs on the pillars), a cutscene triggers where Glough summons a level 98 Black Demon to attack you. The fight takes place in a cave beneath the Grand Tree, and you must defeat the demon within 10 minutes, or it will despawn, requiring you to restart the encounter. Safe spotting is key to managing this time constraint effectively.
Best Safe Spots for the Black Demon
The cave where you fight the Black Demon offers several safe spots that exploit the environment to keep you out of the demon’s attack range. Below, we detail the most reliable safe spots, their setup, and how to use them effectively.
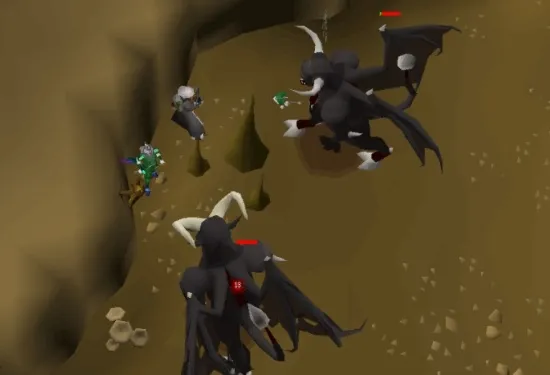
Safe Spot 1: North of the Entrance Ladder
The most recommended safe spot is located directly north of the ladder you use to enter the cave. As soon as the cutscene with Glough ends, run to the tile immediately north of the ladder. The Black Demon will get stuck behind the mithril rocks in front of you, preventing it from attacking. This spot is ideal for Ranged, Magic, or halberd users, as it’s easy to access and highly reliable.
- Setup: After the cutscene, click the tile north of the ladder immediately to position yourself before the demon closes in.
- Combat Style: Use Ranged (e.g., a crossbow with mithril bolts), Magic (preferably water spells due to the demon’s 40% weakness), or a halberd for melee.
- Tip: Ensure you have Auto Retaliate off to avoid accidentally stepping out of the safe spot.
Safe Spot 2: Near Glough’s Position
Another safe spot is where Glough stands during the fight, along the south wall behind some blue rocks. This spot is riskier, as the demon may still reach you if you’re not positioned correctly, especially for low-Hitpoints players. If the demon can attack, move behind another rock until it’s out of range.
- Setup: Run to the blue rocks where Glough is positioned and adjust your position if the demon approaches.
- Combat Style: Best for Ranged or Magic, though a halberd can work with careful positioning.
- Warning: This spot is less reliable due to the demon’s ability to draw you into melee range, so use it as a backup.
Safe Spot 3: Western Tunnel
You can also safe spot the demon by running into the narrow western tunnel in the cave, where the demon cannot follow. This spot is excellent for Ranged or Magic users, as it provides complete protection from the demon’s attacks.
- Setup: After the cutscene, run west into the tunnel until you’re out of the demon’s reach, then attack from there.
- Combat Style: Ranged or Magic (water spells recommended).
- Tip: Bring enough runes or ammo, as the tunnel’s distance may require more attacks to kill the demon.
Combat Strategies for Safe Spotting
Choosing the right combat style and gear is crucial for safe spotting the Black Demon. The demon has low Magic defense and a 40% weakness to water spells, making Magic a top choice for low-level players. Ranged and halberd melee are also viable for safe spotting. Below are tailored strategies for each style.
Magic Strategy
The Black Demon’s negative Magic defense and water spell weakness make Magic highly effective. Use the highest-tier water spell you can cast, such as Water Blast or Water Wave, to maximize damage.
| Spell | Level Required | Runes Needed | Max Hit |
|---|---|---|---|
| Water Strike | 5 | 1 Air, 1 Water, 1 Mind | 4 |
| Water Bolt | 23 | 2 Air, 2 Water, 1 Chaos | 10 |
| Water Blast | 47 | 3 Air, 3 Water, 1 Death | 14 |
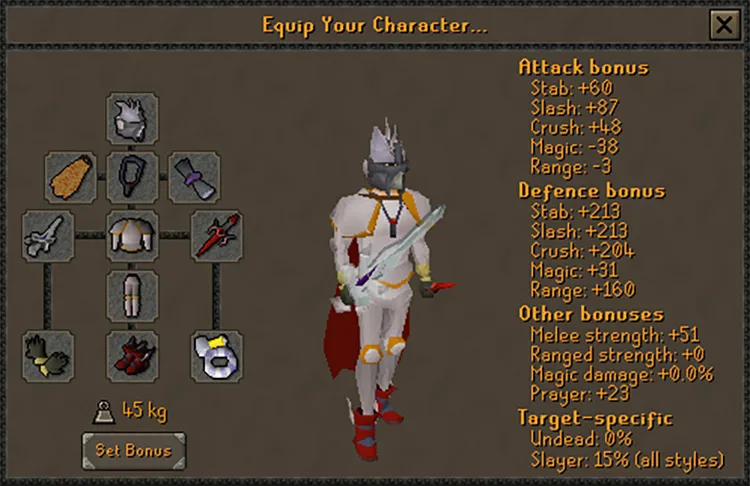
Gear: Equip a Mystic robe set or Wizard robes, a staff (e.g., Staff of Water), and an anti-dragon shield for defense. Bring 200-300 runes for your chosen spell.
Ranged Strategy
Ranged is a solid option for safe spotting, especially with a crossbow or shortbow. Use mithril bolts or arrows for cost-effectiveness and decent damage.
Gear: Wear leather or dragonhide armor, a coif, and an amulet of accuracy. Equip a maple shortbow or a rune crossbow with mithril bolts. Bring 200-300 ammo.
Tip: Steel arrows may be ineffective, so upgrade to mithril or better if you’re struggling to deal damage.
Halberd Melee Strategy
For melee players, a halberd (e.g., a Rune Halberd) allows you to attack from a distance while safe spotting. This is ideal for players with 40+ Attack and Strength.
Gear: Equip Rune armor, a Rune Halberd, and an anti-dragon shield. Use the north ladder or Glough’s safe spot for positioning.
Tip: Turn on Protect from Melee if you’re at risk of being hit while setting up the safe spot.
Tips for Low-Level and 10HP Pures
Low-level players and 10HP pures face unique challenges due to their limited Hitpoints and combat stats. Here are specialized tips to help you succeed:
- Use a Cannon (10HP Pures): With Bind, you can set up a dwarf multicannon 2-3 spaces west of the ladder. Use Bind immediately after the cutscene, set up the cannon, and reload it from the north ladder safe spot. Watch for rats aggroing and adjust positioning if the cannon stops firing.
- Stock Up on Supplies: Bring extra runes, bolts, or arrows (300-400) to account for lower accuracy and damage output.
- Test Your Setup: If you die, you can return to the cave via Glough’s trapdoor without losing progress, but ensure you have enough inventory space (at least 4 slots) for quest items.
- Avoid Glough’s Safe Spot: Its unreliability makes it risky for low-Hitpoints accounts. Stick to the north ladder or western tunnel.
Post-Fight Steps and Quest Rewards
After defeating the Black Demon, follow these steps to complete the quest:
- Head west, then north, to find King Narnode Shareen by a ladder. Complete all dialogue to proceed.
- Search the cave’s roots to find a Daconia rock (click “Continue” to add it to your inventory). Try multiple roots if needed.
- Give the Daconia rock to King Narnode to finish the quest.
Rewards: Completing the Grand Tree quest grants 5 Quest Points, 18,400 Attack XP, 7,900 Agility XP, 2,150 Magic XP, access to the Gnome Glider, and the Grand Tree mine. You also unlock the ability to start The Eyes of Glouphrie and Monkey Madness I.
Common Pitfalls to Avoid
- Timing Out: Kill the demon within 10 minutes, or it despawns. Use high-damage attacks to stay on pace.
- Inventory Space: Ensure at least 4 free inventory slots before opening Glough’s chest earlier in the quest to avoid issues with quest items.
- Dialogue Skipping: Complete all dialogue with King Narnode after the fight to trigger the next quest step.
By mastering these safe spots and strategies, you can defeat the Black Demon in the Grand Tree quest with confidence, regardless of your combat level. Whether you’re a low-level player, a pure, or a seasoned adventurer, this guide equips you to tackle one of OSRS’s most memorable quest bosses. Good luck, and happy questing!
