Your cart is empty

OSRS Basilisk Slayer Task Guide for Efficient Kills and Rewards

Old School RuneScape (OSRS) offers thrilling Slayer tasks, and the Basilisk Slayer task is a standout for players seeking both experience and valuable loot. Requiring level 40 Slayer, Basilisks are formidable foes found in the Fremennik Slayer Dungeon and, for advanced players, Jormungand’s Prison. This comprehensive guide covers everything you need to know about tackling Basilisks, including requirements, gear setups, strategies, and tips to maximize efficiency and rewards. Whether you’re hunting for the coveted Basilisk Jaw or grinding Slayer XP, this guide will help you conquer this task.
Before diving into the Basilisk Slayer task, ensure you meet the prerequisites and understand the unlocks needed for higher-level variants.
Basic Requirements
To be assigned a Basilisk task, you need:
- Level 40 Slayer: Required to receive the task from medium-level Slayer Masters like Vannaka or Chaeldar.
- Level 40 Combat: Ensures you can handle Basilisks’ combat level of 61.
- Level 20 Defence: Necessary to equip a Mirror Shield or V’s Shield, which are mandatory to counter the Basilisk’s gaze attack.
Unlocking Basilisks from Higher-Level Masters
For access to Basilisks from top-tier Slayer Masters like Duradel, Nieve, or Konar, you must purchase the “Basilocked” perk for 80 Slayer points. This unlock is crucial for players aiming to face Basilisk Knights in Jormungand’s Prison, which offer better drops.
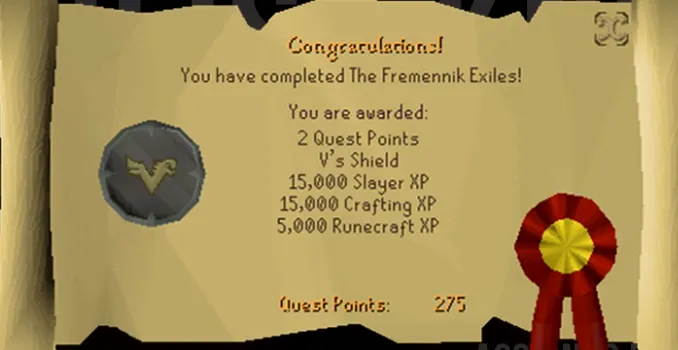
Quest Prerequisites for Basilisk Knights
To access Basilisk Knights, complete The Fremennik Exiles quest. This unlocks Jormungand’s Prison, where you can fight Basilisk Knights (level 60 Slayer required) and their superior variant, the Basilisk Sentinel.
Where to Find Basilisks in OSRS
Basilisks are located in two key areas, each with unique challenges and rewards.
Fremennik Slayer Dungeon
The primary location for regular Basilisks is the Fremennik Slayer Dungeon, accessible without quest requirements. This dungeon is ideal for players with level 40 Slayer who haven’t completed The Fremennik Exiles. Key features include:
- Safespot Availability: Use the southeastern wall or rocks to block Basilisk movement, reducing damage taken.
- No Cannon Support: Dwarf multicannons cannot be used here, so rely on manual combat.
Jormungand’s Prison
After completing The Fremennik Exiles, Jormungand’s Prison becomes accessible. This area houses Basilisk Knights and the Basilisk Sentinel. Notable aspects include:
- Higher Difficulty: Basilisk Knights (combat level 204) require level 60 Slayer and deal more damage.
- Better Drops: Includes the Basilisk Jaw, used to craft the Neitiznot Faceguard.
- Safespots: Stalagmites in the prison allow ranged safespotting, making ranged setups highly effective.
Recommended Gear and Inventory Setup
Proper gear and inventory preparation are critical for surviving and efficiently completing a Basilisk Slayer task. Basilisks are weak to crush attacks, and their gaze requires specific equipment.
Essential Equipment
The following table outlines recommended gear for melee and ranged setups:
| Slot | Melee Setup | Ranged Setup |
|---|---|---|
| Head | Slayer Helmet (i) (on task) or Helm of Neitiznot | Slayer Helmet (i) (on task) or Armadyl Helmet |
| Cape | Fire Cape or Obsidian Cape | Ava’s Accumulator |
| Body | Bandos Chestplate or Fighter Torso | Armadyl Chestplate or Black D’hide Body |
| Legs | Bandos Tassets or Obsidian Platelegs | Armadyl Chainskirt or Black D’hide Chaps |
| Weapon | Leaf-bladed Battleaxe or Dragon Mace | Rune Crossbow or Hunters’ Sunlight Crossbow |
| Shield | Mirror Shield or V’s Shield | Mirror Shield or V’s Shield |
| Ammo | N/A | Ruby Dragon Bolts (e) or Dragon Darts |
Note: Always equip a Mirror Shield or V’s Shield to negate the Basilisk’s stat-draining gaze. Without it, your combat stats will plummet, making the task nearly impossible.
Inventory Setup
Your inventory should balance healing, prayer support, and utility:
- Food: 10-15 high-healing items like Sharks or Monkfish.
- Prayer Potions: 2-4 for Piety or Protect from Melee.
- Super Combat Potion: Boosts Attack, Strength, and Defence for melee.
- Ranging Potion: Enhances Ranged accuracy and damage.
- Teleport: Rellekka or Lunar Isle teleport for quick banking.
- Fire Runes/Staff of Fire: For High Level Alchemy to alch frequent metal drops.
- Bones to Peaches Tablets: Converts Basilisk bones to peaches for extra healing.
Combat Strategies for Basilisks and Basilisk Knights
Basilisks and their Knight variants require distinct strategies due to differences in combat level, attack styles, and location.
Fighting Regular Basilisks
Regular Basilisks in the Fremennik Slayer Dungeon are straightforward but demand attention to their gaze attack. Key strategies include:
- Use Crush Weapons: Weapons like the Leaf-bladed Battleaxe or Dragon Mace exploit Basilisks’ weakness to crush, dealing ~5-7% more damage per second than slash weapons like the Dragon Scimitar.
- Safespotting: Position yourself at the southeastern wall or behind rocks to avoid melee attacks. The gaze attack remains ranged, so keep your shield equipped.
- Prayer Management: Use Protect from Melee to reduce damage, supplemented by Piety for faster kills if your Prayer level allows.
Tackling Basilisk Knights
Basilisk Knights in Jormungand’s Prison are tougher, with a combat level of 204 and a max hit of 20. Optimal strategies include:
- Ranged Safespotting: Use stalagmites to block melee attacks while ranging with Ruby Dragon Bolts (e) for high damage at full HP. Switch to Dragonstone Bolts (e) below ~180 HP.
- Prayer Flicking: Activate Protect from Magic on the tick after your attack, as Knights’ attack speed matches your weapon’s. This conserves Prayer potions.
- Monk’s Robes for Ironmen: For Ironmen, Monk’s Robes offer a higher Prayer bonus than Black D’hide, maintaining accuracy with a Slayer Helmet (i).
Superior Variants
With the Bigger and Badder perk (150 Slayer points), killing a Basilisk or Knight may spawn a Monstrous Basilisk or Basilisk Sentinel, respectively. These have better drops and more XP but are tougher. Use the same safespot and gear, but expect longer fights.
Tips for Maximizing Rewards and Efficiency
To make the most of your Basilisk Slayer task, focus on efficiency and loot optimization.
Loot and Drop Highlights
Basilisks have a poor drop table, but Basilisk Knights offer significant rewards:
- Basilisk Jaw: Drops at 1/1,000 on-task (1/5,000 off-task) from Knights, used to craft the Neitiznot Faceguard.
- Nature Runes: Frequent drops, ideal for alching metal armor/weapon drops.
- Herbs and Gems: Knights have a 3/52 chance for useful herbs and 8/52 for gems, enhanced by a Ring of Wealth.
Average Kill Value: On-task Knight kills are worth ~27,867 coins, compared to ~9,027 off-task, excluding jaw drops.
Efficiency Tips
- Slayer Master Choice: Duradel has the highest Basilisk task weight (2.59%), followed by Nieve (2.54%). Vannaka (2.05%) is faster for task cycling due to shorter tasks.
- Telekinetic Grab: Bring runes to grab drops while safespotting Knights to maintain aggression.
- Extend Tasks: Use Slayer points to extend Basilisk tasks for more Knight kills, increasing jaw drop chances.
- Disable After Jaw: Once you obtain the jaw, disable the Basilisk unlock to avoid slow tasks without using a block slot.
Common Mistakes to Avoid
- Forgetting the Shield: Never fight without a Mirror Shield or V’s Shield, as the gaze will drain stats rapidly.
- Ignoring Safespots: Failing to use safespots increases damage taken and Prayer potion usage.
- Off-Task Knight Farming: The jaw drop rate is five times worse off-task, making it inefficient.
By following this guide, you’ll tackle the Basilisk Slayer task with confidence, whether you’re slaying regular Basilisks or hunting Basilisk Knights for the elusive jaw. Optimize your setup, leverage safespots, and choose the right Slayer Master to maximize your rewards and Slayer XP. Happy slaying!
