Your cart is empty

OSRS Basilisk Knight Safe Spot Guide: Master the Strategy in 2025
Basilisk Knights in Old School RuneScape (OSRS) are a formidable Slayer monster that can yield impressive rewards, including the coveted Basilisk Jaw. However, their high combat level and dangerous attacks make them a challenge for unprepared players. Fortunately, with the right safe spotting techniques, you can take them down efficiently while minimizing risk. In this comprehensive guide, updated for 2025, we’ll explore the best OSRS Basilisk Knight safe spot strategies, gear recommendations, and tips to maximize your Slayer experience. Whether you’re a seasoned player or a newcomer tackling Jormungand’s Prison for the first time, this post has you covered.
What Are Basilisk Knights?
Basilisk Knights are Slayer creatures located in Jormungand’s Prison beneath the Island of Stone. Introduced with The Fremennik Exiles quest, they require level 60 Slayer to damage and boast a combat level of 204. These monsters use both melee and magic attacks, with a max hit of 20, and their gaze can drain your stats unless you equip a Mirror Shield or V’s Shield. Their drop table is a step up from regular basilisks, featuring the rare Basilisk Jaw, which upgrades the Helm of Neitiznot into the Neitiznot Faceguard—a best-in-slot helmet.
Why Use a Safe Spot?
Fighting Basilisk Knights head-on can be brutal due to their aggressive nature and dual attack styles. Safe spotting allows you to attack from a distance, avoiding their melee hits entirely while managing their magic attacks with prayer. This method is especially useful for players with lower defense levels or those looking to conserve resources like food and prayer potions during long Slayer tasks.
Requirements for Fighting Basilisk Knights
Quest and Slayer Prerequisites
Before you can even face Basilisk Knights, you’ll need to meet specific requirements:
- Quest: Completion of The Fremennik Exiles to access Jormungand’s Prison.
- Slayer Level: Minimum of 60 to deal damage to Basilisk Knights.
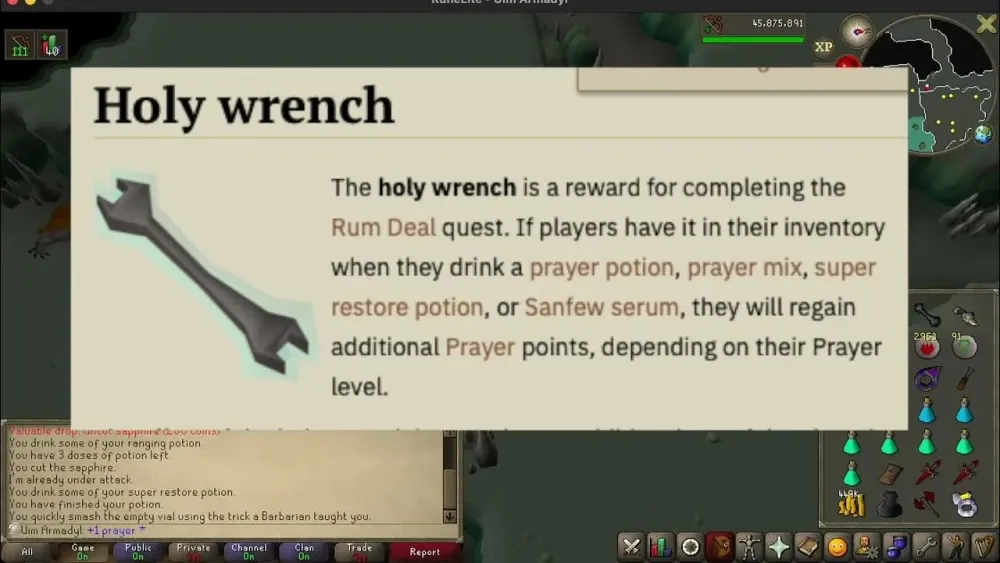
- Equipment: A Mirror Shield (purchasable from Slayer Masters) or V’s Shield (obtained post-quest) to counter their stat-draining gaze.
Recommended Stats and Gear
While the minimum requirements get you in the door, higher stats and better gear improve efficiency:
- Ranged: 80+ for accurate hits from a safe spot.
- Defence: 70+ to reduce damage taken if aggression pulls you out of position.
- Prayer: 43+ for Protect from Magic; 70+ for Rigour is ideal.
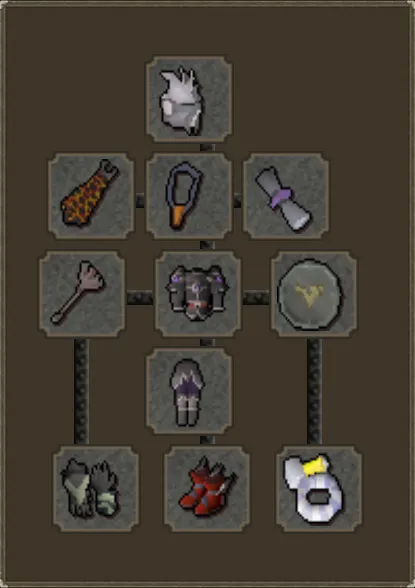
For gear, a solid ranged setup includes:
| Slot | Recommended Item | Alternative |
|---|---|---|
| Head | Slayer Helmet (i) | Black Mask (i) |
| Body | Armadyl Chestplate | Black D’hide Body |
| Legs | Armadyl Chainskirt | Black D’hide Chaps |
| Weapon | Toxic Blowpipe | Rune Crossbow |
| Shield | Mirror Shield | V’s Shield |
How to Reach Jormungand’s Prison
Travel Options
Getting to the Basilisk Knights requires a trip to the Island of Stone, followed by a descent into Jormungand’s Prison. Here are the fastest methods:
- Lunar Isle Teleport: Use a Lunar Isle teleport scroll or a Player-Owned House (POH) portal, then talk to a citizen to be kicked off to Rellekka. From there, speak to Haskell at the western dock to sail to the Island of Stone.
- Rellekka POH Portal: Teleport to your house if you have a Rellekka portal, exit, and head to Haskell’s dock.
- Fairy Ring (AJR): Use the code AJR to reach the Fremennik Slayer Dungeon, then travel north to Rellekka and take the boat.
Once on the Island of Stone, walk north to the cave entrance in the center and enter Jormungand’s Prison. Head southwest to find the Basilisk Knight chamber.
Best Safe Spot for Basilisk Knights
The Jormungand Room Safe Spot
The most reliable safe spot is just outside the entryway to the room where you fought The Jormungand during The Fremennik Exiles. This one-tile-wide doorway prevents Basilisk Knights from reaching you with melee attacks, forcing them to use only magic, which you can mitigate with Protect from Magic.
How to Set Up:
- Enter Jormungand’s Prison and navigate to the southwest chamber.
- Stand just outside the doorway to The Jormungand’s room.
- Attack a Basilisk Knight with your ranged weapon—they’ll approach but get stuck at the doorway.
- Activate Protect from Magic to reduce damage from their magic attacks.
Pro Tip: Basilisk Knights will try to close into melee range when aggroed, so always ensure you’re positioned where they can’t pass through. If they get too close, lure them back by stepping away and repositioning.
Stalagmite Safe Spots
Inside the Basilisk Knight chamber, stalagmites offer additional safe spotting opportunities:
- Location: Scattered throughout the southwest room.
- Method: Stand at least two tiles behind a stalagmite, ensuring the knight can’t reach you. Attack with ranged, keeping the stalagmite between you and the monster.
- Caution: Be mindful of other knights’ aggression—stay near an escape route like the doorway if needed.
This method is slower due to repositioning but works well for Ironmen or players conserving prayer.
Tips for Efficient Basilisk Knight Slayer Tasks
Prayer and Inventory Management
To extend your trips and boost efficiency:
- Prayer: Use Protect from Magic at all times when safe spotting. Flick Rigour or Eagle Eye for extra ranged damage if you’re comfortable with prayer flicking.
- Inventory: Bring Super Restores (or Prayer Potions), high-healing food (Sharks or better), and runes for Telekinetic Grab to pick up valuable drops like the Basilisk Jaw without breaking your safe spot.
- Divine Potions: Use a Divine Ranging Potion to offset stat drain from their gaze, pairing it with Rapid Heal prayer to mitigate damage.
Dealing with Basilisk Sentinels
If you’ve unlocked Bigger and Badder (150 Slayer points), a Basilisk Sentinel might spawn (1/200 chance on task). This superior variant has a special attack that launches an orb, encasing you in stone if it hits. To counter:
- Move one tile away when you see the orb in flight.
- If caught, spam-click to break free quickly, avoiding massive damage.
Sentinels drop better loot, so they’re worth the extra effort if you’re safe spotting effectively.
Maximizing Profit
Basilisk Knights are a goldmine if you’re lucky. The Basilisk Jaw has a 1/1000 drop rate on task (1/5000 off-task), making Slayer assignments prime time for profit. Other notable drops include runes, herbs, and mid-tier gear. Use a Ring of Wealth to slightly boost your chances of rare drops by removing “nothing” rolls.
In conclusion, mastering the OSRS Basilisk Knight safe spot in Jormungand’s Prison can turn a daunting Slayer task into a profitable and manageable endeavor. Whether you opt for the doorway or stalagmite method, preparation and positioning are key. Equip your ranged gear, stock your inventory, and head to the Island of Stone to take on these reptilian foes in 2025. Happy slaying!
