Your cart is empty
Mastering Smithing in OSRS: A Comprehensive Guide for Ironman Accounts
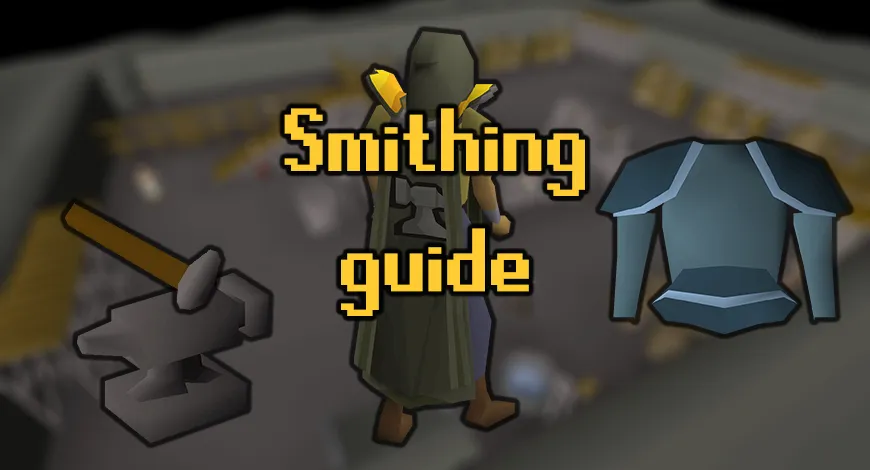
Smithing in Old School RuneScape (OSRS) is a crucial skill for players, especially for those on Ironman accounts, where self-sufficiency is key. This guide will provide an in-depth look at the Smithing skill, covering its mechanics, training methods, and tips for maximizing efficiency. Whether you’re looking to create your own armor, weapons, or other items, mastering Smithing will significantly enhance your gameplay experience.
Smithing is one of the essential artisan skills in OSRS, allowing players to create and improve various metal items. The skill is primarily used to forge weapons and armor from ores and bars. Players can smith items at anvils and furnaces located throughout Gielinor. To begin smithing, players must acquire ores, which can be mined using the Mining skill. As players progress, they will unlock the ability to create higher-level items, which require specific ores and smithing levels.
Ores can be smelted into bars at a furnace, which is the first step in the smithing process. Each type of ore has a different level requirement and yield. For example, copper and tin ores can be combined to create bronze bars, while iron ore can be converted into iron bars. Higher-level ores like coal, mithril, and adamantite require more advanced mining skills and higher-level furnaces. As you smelt ores, you gain experience points, which contribute to your overall Smithing level.
Smithing provides a variety of benefits, especially for Ironman accounts. Players can create their own gear instead of relying on the Grand Exchange, which is often unavailable to Ironman players. This self-sufficiency is crucial for combat and progression in the game. Additionally, certain quests and achievements require players to have specific smithing levels, making the skill even more valuable.
As you level up your Smithing skill, you’ll unlock different types of items to forge. The most basic items include bronze equipment, while higher levels allow for the creation of steel, mithril, and even rune items. Each item requires specific materials and offers different stats, making it essential to plan your smithing goals based on your combat needs.
In summary, understanding the Smithing skill in OSRS is vital for any player, particularly those on Ironman accounts. It provides the tools necessary for self-sufficiency and enhances the overall gameplay experience by allowing players to craft their own gear and equipment, thus contributing to their success in the game.
Essential Smithing Equipment for Ironman

When it comes to mastering Smithing in Old School RuneScape (OSRS), having the right equipment is crucial, especially for Ironman accounts. Unlike regular accounts, Ironman players cannot trade with others, making it essential to gather all necessary tools and materials by yourself. Here’s a breakdown of the equipment you’ll need to get started:
- Hammer: A basic hammer is essential for smithing. You can obtain one easily from general stores or as a drop from various monsters.
- Anvil: You’ll find anvils in several locations throughout Gielinor. They’re typically located near blacksmiths or in cities, and you’ll need one to smelt and smith your ores.
- Furnace: Similar to anvils, furnaces are found in various locations. You’ll need to use these to smelt ores into bars.
- Blacksmith’s Outfit: Although not necessary, wearing this outfit provides a small experience boost when smithing. You can obtain it by participating in the Horvik’s Smithing competition.
- Varrock Museum’s Smithing Tools: If you complete the “Varrock Museum” mini-quest, you can claim a smithing tool set that includes a hammer and anvil.
Having these essential items will significantly streamline your smithing journey. Remember, as an Ironman, you’ll need to plan your equipment acquisition carefully since you cannot rely on other players.
Iron Ore: Mining and Locations
Iron ore is the backbone of your smithing experience in OSRS, especially for Ironman accounts. You’ll need plenty of it to create iron bars, which are essential for crafting various weapons and armor. Here’s how to effectively mine iron ore and the best locations to do so:
- Mining Locations:
- Rimmington: A popular spot due to its proximity to a bank.
- Varrock South Mine: Located just south of Varrock, this area has three iron ore rocks.
- Al Kharid Mine: Easily accessible with multiple iron rocks.
- Mining Guild: Requires level 60 Mining for entry, but offers a rich source of iron ore.
- Mining Methods:
Iron ore can be found in abundance, but it’s always a good idea to choose a mining spot that suits your play style and level. Remember, the more iron you gather now, the easier your smithing journey will be later!
Smelting Iron Bars: Techniques and Tips
Smelting iron bars is a crucial skill for any Ironman account in OSRS, and mastering this process can significantly enhance your gameplay. Here are some essential techniques and tips to help you smelt iron bars efficiently:
- Gathering Iron Ore: Start by mining iron ore from iron rocks found in various locations like the Varrock South Mine or the Al Kharid Mine. You’ll need a pickaxe, preferably a steel or better one, to speed up the mining process.
- Using the Right Furnace: To smelt iron ore into bars, you’ll need to find a furnace. The one in Varrock is popular due to its proximity to a bank. Make sure to stock up on ores before heading to the furnace to minimize your trips.
- Coal vs. No Coal: Remember, smelting iron bars does not require coal, making it a great resource for early-game players. Simply use your iron ores directly in the furnace.
- Utilize the Superheat Item Spell: If you have access to magic, consider using the Superheat Item spell. This allows you to smelt ores directly in your inventory without a furnace, saving you time.
- Efficient Inventory Management: Always carry a full inventory of iron ores for maximum efficiency. You can also use the bank nearby to quickly deposit any extra ores you gather while mining.
- Experience Gains: Each iron bar you smelt grants you 12.5 experience points, which can significantly contribute to leveling your Smithing skill.
By following these tips, you’ll be well on your way to mastering the smelting process, making it easier to craft the armor and weapons you need!
Creating Armor and Weapons: Best Practices
Once you’ve smelted your iron bars, the next step is turning them into armor and weapons. Here are some best practices to help you create effective gear as an Ironman account:
- Understand Your Needs: Before crafting, assess what type of armor or weapon you need. For early-game players, iron armor provides a solid defense, while iron weapons can improve your combat performance.
- Use the Right Anvil: Find an anvil in towns like Varrock or Falador. You’ll need to be at least level 1 Smithing to create iron items, so make sure you’ve smelted enough bars first.
- Prioritize Armor Sets: When crafting armor, consider focusing on a full set. Iron armor sets include the iron full helm, iron platebody, and iron platelegs. Full sets provide additional bonuses to your defense.
- Crafting Weapons: For weapons, prioritize creating an iron scimitar or iron sword. These weapons offer a good balance of speed and damage, making them effective for combat.
- Utilize the Smithing Interface: The Smithing interface allows you to see all the items you can create based on your level and available bars. This can help you plan your crafting sessions efficiently.
- Level Up Your Smithing: Each item you craft provides experience points, so keep crafting to level up your Smithing skill. Higher levels unlock better items, improving your overall combat effectiveness.
By following these best practices, you’ll be able to create powerful weapons and durable armor, ensuring that you’re well-prepared for the challenges ahead in your Ironman journey!
Leveling Up Your Smithing Efficiently
When it comes to leveling up your Smithing skill in Old School RuneScape (OSRS), efficiency is key, especially for Ironman accounts. Here are some effective strategies to maximize your Smithing experience:
- Use the Best Tools: Always upgrade to the best anvils and hammers available to you. The Dragon and Rune Hammers provide a speed boost while smithing.
- Prioritize Bars: Focus on smelting ores into bars as this is a significant experience source. Iron bars yield the most experience per hour.
- Utilize Blast Furnace: The Blast Furnace is a game-changer for Ironman accounts. It allows you to smelt multiple ores at once, increasing your output and experience.
- Smithing Items: Smithing items like weapons and armor provides excellent experience. Start with bronze items and progress to higher-tier gear as you level up.
- Use Experience Lamps: Don’t forget about any experience lamps you might have. Using these on Smithing can give you a substantial boost.
Here’s a quick reference table to show the XP gained from various smithing actions:
| Action | Experience |
|---|---|
| Bronze Bar | 6 XP |
| Iron Bar | 12 XP |
| Steel Bar | 17.5 XP |
| Gold Bar | 22.5 XP |
| Rune Bar | 50 XP |
By following these strategies, you can level up your Smithing skill efficiently and enjoy the rewards of your hard work!
Smithing Quests and Rewards
Quests are a fantastic way to not only boost your Smithing level but also to enjoy the rich lore and stories that OSRS has to offer. Here are some noteworthy quests that provide Smithing experience and valuable rewards:
- The Knight’s Sword: This is a popular quest for Ironman accounts because it grants a whopping 12,725 Smithing experience upon completion. It requires minimal combat and is an excellent way to get started.
- Steel Platebody: While not a quest, crafting a steel platebody for the first time gives you a significant experience boost. Pair this with other quests for optimal leveling.
- Dragon Slayer: Completing this quest gives you access to Rune equipment and 18,650 experience in Smithing, which can be a game-changer for your account.
- Family Crest: This quest provides the opportunity to obtain the Goldsmith Gauntlets, which double the experience received when smelting gold bars, making it essential for efficient leveling.
Here’s a brief overview of the experience rewards you can gain from these quests:
| Quest | Smithing Experience |
|---|---|
| The Knight’s Sword | 12,725 XP |
| Dragon Slayer | 18,650 XP |
| Family Crest | An optional reward: Goldsmith Gauntlets |
By completing these quests, you not only improve your Smithing level but also gain access to essential items that will aid your Ironman journey!
Advanced Smithing Techniques for Ironman Players
Once you’ve mastered the basic Smithing techniques in OSRS, it’s time to dive into advanced strategies that can significantly enhance your efficiency and output. As an Ironman account, you’ll need to be resourceful and strategic when it comes to leveling up your Smithing skills. Here are some advanced techniques to consider:
- Coal Bag Usage: If you’ve completed the “Dwarf Cannon” quest, consider using a Coal Bag. This bag allows you to carry 27 pieces of coal, which saves inventory space when smelting ores.
- Use of Blast Furnace: The Blast Furnace is a game-changer. It allows you to smelt ores at a much faster rate for a reduced cost of coal. However, remember that you’ll need to have some cash on hand to pay the dwarves to run the furnace.
- Rune and Dragon Equipment: Focus on crafting higher-tier items like rune and dragon equipment. These items not only yield more experience but also provide significant combat benefits.
- Utilizing Bars Efficiently: Always look for opportunities to combine bars into items that offer the best experience per bar. For example, crafting items like darts or arrows can yield excellent experience.
- Training at the Blast Furnace: Use the Blast Furnace for training levels 30-99. It’s efficient and offers a great way to stock up on bars for your later crafting needs.
By incorporating these techniques into your Smithing routine, you’ll not only level up faster but also become a more self-sufficient Ironman account.
Conclusion: Becoming a Smithing Master in OSRS
In conclusion, mastering Smithing in Old School RuneScape as an Ironman account is both a rewarding and challenging endeavor. By following the strategies laid out in this guide, you’ll be well on your way to becoming a Smithing master. Here’s a quick recap:
- Understand the Basics: Start with the foundational skills and gradually build your way up.
- Maximize Experience: Use advanced techniques like the Blast Furnace and efficient bar usage.
- Be Resourceful: As an Ironman, your ability to gather and manage resources is paramount.
- Stay Updated: Keep an eye on game updates, as Smithing methods can evolve.
Remember, practice makes perfect. The more you smith, the better you’ll become. Enjoy the journey, and don’t forget to celebrate your milestones along the way. Happy Smithing!
