Your cart is empty

Mastering Hard Clue Puzzle Box OSRS A Comprehensive Guide
In the vast world of Old School RuneScape (OSRS), Treasure Trails offer adventurers a thrilling mix of exploration, combat, and brain-teasing challenges. Among these, the hard clue puzzle box stands out as a formidable obstacle for players tackling hard clue scrolls. These sliding tile puzzles demand patience, strategy, and a keen eye to unscramble a jumbled image and progress toward valuable rewards. Whether you’re a seasoned quester or a newcomer to Gielinor, this guide will walk you through everything you need to know about hard clue puzzle boxes in OSRS, from understanding their mechanics to mastering their solutions.
A hard clue puzzle box is a sliding tile puzzle encountered during hard clue scrolls in the Treasure Trails minigame. These puzzles present a scrambled image on a 5×5 grid, with one tile missing, allowing players to slide tiles into the empty space to reconstruct the correct image. Solving the puzzle is a prerequisite to receiving the next clue or reward from the NPC who issued it. Hard clue puzzle boxes are notorious for their complexity, but with the right approach, they can become a manageable and even enjoyable part of your Treasure Trail journey.
Types of Hard Puzzle Box Images
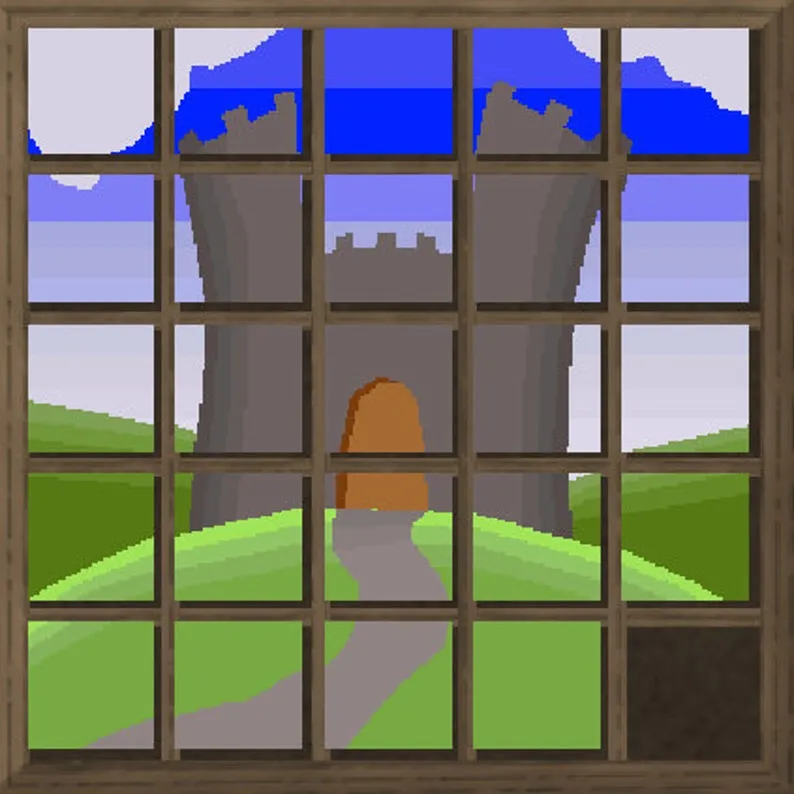
Hard clue puzzle boxes feature one of three distinct images, each corresponding to a specific theme:
- Castle: Depicts a castle structure, often with a gray and brown color scheme.
- Tree: Shows a large tree, typically with green foliage and a brown trunk.
- Troll: Features a troll, recognizable by its rugged appearance and earthy tones.
These images are unique to hard clue scrolls, distinguishing them from elite and master clue puzzles, which have their own set of images like Zulrah or Cerberus.
How Puzzle Boxes Fit Into Treasure Trails
Hard clue scrolls, which typically span 4-6 steps, are dropped by high-level monsters like dragons or demons or obtained through activities like thieving or slayer. When you speak to an NPC as part of a clue step (often after solving an anagram or cryptic clue), they may hand you a puzzle box. You must solve it before continuing the trail. If you close the puzzle box prematurely or log out without completing it, the puzzle will re-scramble, resetting your progress.
Mechanics of Solving a Hard Clue Puzzle Box
Understanding the mechanics of a puzzle box is crucial for efficient solving. The puzzle is scrambled by randomly sliding tiles 101 times from its solved state, creating a challenging but solvable configuration. Each move you make slides a tile into the empty space, gradually reordering the grid to match the target image.
The 5×5 Grid and Sliding Mechanics
The puzzle box consists of a 5×5 grid (25 tiles total), with 24 tiles containing parts of the image and one empty space. Clicking a tile adjacent to the empty space moves it into that space. The goal is to rearrange all tiles to form the correct image, which you can preview by hovering over the magnifying glass icon in the game’s interface.
Why Puzzle Boxes Feel Daunting
Many players find puzzle boxes intimidating due to their seemingly chaotic starting state and the need to manipulate multiple tiles simultaneously. Unlike coordinate or emote clues, puzzle boxes require sustained focus and spatial reasoning. However, with practice, you can develop a systematic approach that reduces the trial-and-error frustration.
Step-by-Step Strategy to Solve Hard Clue Puzzle Boxes
Solving a hard clue puzzle box efficiently requires a structured approach. The following step-by-step method, adapted from community strategies, breaks the puzzle into manageable sections, minimizing the need to disrupt completed areas.
Step 1: Solve the Top Row (Red Section)
Begin by arranging the top row (five tiles) from left to right to match the solved image. Focus on positioning each tile correctly, using the empty space to maneuver tiles into place. This establishes a foundation for the rest of the puzzle.
Step 2: Complete the Second Row (Orange Section)
Move to the second row, aligning its five tiles. Be careful not to disturb the top row. If a tile from the top row shifts, pause to restore it before continuing. This step builds on the first, creating a stable upper half.
Step 3: Arrange the Third Row (Yellow Section)
Repeat the process for the third row. By now, you’re working with a smaller area, which makes tile placement easier. Focus on sliding tiles within the third row while keeping the top two rows intact.
Step 4: Position the Bottom Left Corner (Green Section)
Correctly place the two leftmost tiles in the fourth row. These tiles act as an anchor for the final steps, reducing the complexity of the remaining grid.
Step 5: Complete the Fourth Row (Blue Section)
Arrange the remaining three tiles in the fourth row. With the left side secured, focus on sliding tiles horizontally and vertically within this row.
Step 6: Solve the Final Six Tiles (Purple Section)
The last step involves arranging the six tiles in the fifth row and the rightmost column of the fourth row. This section can be tricky, as it requires rotating tiles around the empty space. If you struggle, try working in a clockwise or counterclockwise pattern to shift tiles into their final positions.
Pro Tip: Use the Magnifying Glass
Hover over the magnifying glass icon to view the solved image at any time. This helps you identify which tiles belong where, especially when dealing with similar-looking pieces (e.g., tree leaves or castle stones).
Tips and Tools to Simplify Puzzle Box Solving
While solving puzzle boxes manually builds skill and satisfaction, several tips and tools can streamline the process, especially for players short on time or struggling with the mechanics.
Manual Solving Tips
- Work Top-Down: Always start with the top rows to create a stable base, reducing the need to backtrack.
- Reset if Stuck: If the puzzle feels unsolvable, close the box to reshuffle or log out for a new configuration. This is less practical for elite clues, where dropping the scroll isn’t an option.
- Practice Patterns: With experience, you’ll recognize common tile movements, making puzzles faster to solve. Community guides suggest it takes 3-5 minutes per puzzle once you’re familiar.
Community Tools and Solvers
Several external tools can assist with puzzle box solving, though they may reduce the sense of accomplishment:
- Alt1 Toolkit: This popular plugin can auto-solve puzzle boxes by analyzing a screenshot of your puzzle. It’s widely used but requires setup and may feel like “cheating” for some players.
- RuneApps Clue Solver: Upload a screenshot of your puzzle to get a step-by-step solution. Note that it may not work perfectly with high-DPI screens or certain game settings.
- OSRS Toolkit: Provides final solution images for all puzzle boxes, helping you visualize the goal.
Warning: Use third-party tools cautiously, as some may violate Jagex’s rules if they interact directly with the game client. Stick to reputable tools like RuneLite plugins or manual solvers.
Rewards and Risks of Hard Clue Puzzle Boxes
Completing a hard clue puzzle box is a critical step toward finishing a hard clue scroll, which can yield substantial rewards. However, the process comes with risks, particularly in dangerous areas like the Wilderness.
Potential Rewards
Hard clue scrolls reward players with a casket (hard) containing items from a specific loot table. Possible rewards include:
| Item Type | Examples |
|---|---|
| Rune Equipment | Rune platebody, Rune kiteshield |
| 3rd Age Gear | 3rd age platelegs (very rare) |
| Gilded Items | Gilded scimitar, Gilded chainbody |
| Miscellaneous | God pages, Blessed d’hide armor |
Completing 300 hard clues unlocks the Uri Transform emote, adding a fun cosmetic reward.
Risks in the Wilderness
Hard clue steps, including puzzle boxes, may lead you to the Wilderness, where player-killers (PKers) pose a threat. If you die above level 20 Wilderness without a clue box, your clue scroll will disappear. To minimize risk:
- Use a Clue Box: Protects your clue scroll on death, though the puzzle box itself is kept over the clue if killed by a player.
- Bring Teleports: Carry items like a Royal Seed Pod or Wilderness Sword for quick escapes.
- Scout First: Check for PKers before engaging with a clue step.
Why Puzzle Boxes Are Worth It
Despite their challenges, hard clue puzzle boxes are a gateway to some of OSRS’s most exciting rewards. The satisfaction of solving a puzzle, combined with the potential for rare loot, makes them a rewarding part of the Treasure Trails experience. Plus, the puzzle box itself is worth more than the clue scroll in terms of game mechanics, ensuring you retain it over the clue if killed in the Wilderness.
Mastering hard clue puzzle boxes in OSRS is a test of patience and strategy, but with the right approach, they become a conquerable challenge. By following a systematic solving method, leveraging community tools when needed, and preparing for risks, you’ll turn these puzzles into a rewarding part of your Treasure Trails adventure. So, grab your clue scroll, unscramble that image, and chase those caskets—Gielinor’s treasures await!