Your cart is empty

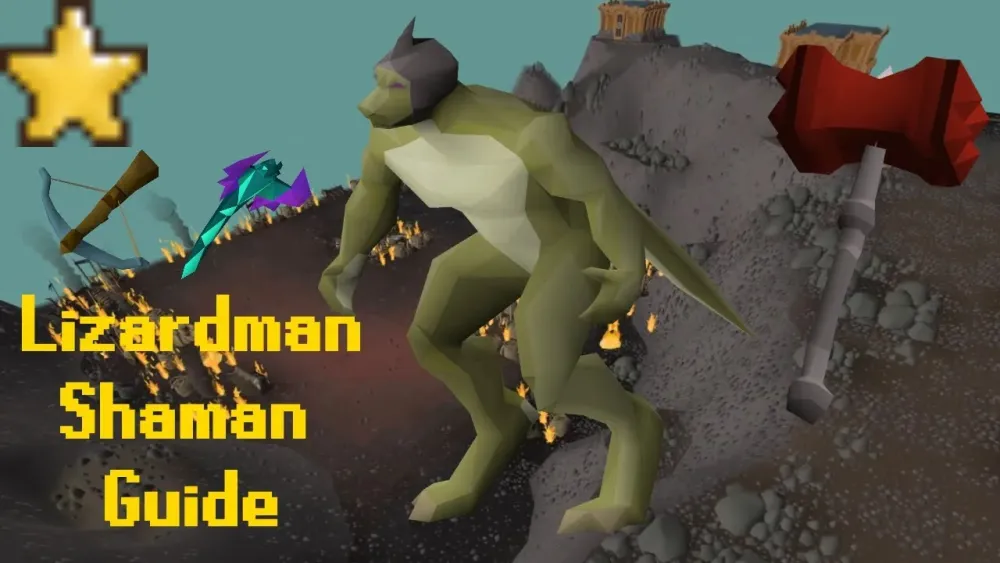
How to Get to Lizardman Shaman in OSRS: A Step-by-Step Guide

If you’re an Old School RuneScape (OSRS) player looking to hunt down the infamous Lizardman Shamans for their coveted Dragon Warhammer drop, you’re in the right place. These powerful reptilian foes reside in specific locations within the game, and getting to them can feel tricky if you’re unfamiliar with the routes. In this detailed guide, I’ll walk you through every method to reach the Lizardman Shamans, whether you’re after loot or tackling a Slayer task. Optimized for both beginners and seasoned adventurers, this post will ensure you’re well-prepared to navigate to these hotspots efficiently.
Before diving into the “how,” let’s briefly cover the “why.” Lizardman Shamans are a popular target in OSRS due to their unique drop table, most notably the Dragon Warhammer, a high-value item prized for its special attack in PvM scenarios. They also offer decent Slayer experience and other loot like Xerician fabric and Lizardman fangs. However, reaching them requires some preparation and knowledge of Great Kourend’s geography. Let’s break it down.
Key Requirements Before You Go
To access and fight Lizardman Shamans effectively, you’ll need to meet a few prerequisites:
- 100% Shayzien Favour: Required to kill Shamans outside of Slayer-only areas. Gain this by completing Shayzien-related tasks like healing wounded soldiers or fighting lizardmen in the Combat Ring.
- Slayer Task (Optional): For the Lizardman Caves or Temple, you’ll need a Lizardmen Slayer assignment from a medium or high-tier Slayer master.
- Partial Completion of Fairytale II – Cure a Queen: Unlocks fairy ring travel, making some routes faster.
- Xeric’s Talisman (Recommended): A teleport item that simplifies travel to Great Kourend.
With these in hand, you’re ready to explore the three main locations where Lizardman Shamans spawn.
Location 1: Lizardman Canyon
The Lizardman Canyon is the most accessible spot for players with 100% Shayzien favour, offering a multi-combat area with three Shamans. It’s ideal for cannon users or those hunting the Dragon Warhammer outside of a Slayer task.
Method 1: Xeric’s Talisman Route
This is the fastest way to reach the Canyon if you own a Xeric’s Talisman.
- Teleport to Xeric’s Inferno using the talisman.
- Head south through Lovakengj, passing the sulfur mines and giant bats.
- At the southern end near a house with a water source, veer slightly west until you spot Kourend guards patrolling.
- Move south into the Lizardman Canyon and descend the handholds on the western side.
- Walk west past Lizardman Brutes to find the Shamans in the multi-combat area.
Method 2: Fairy Ring Route (Code DJR)
If you’ve partially completed Fairytale II, fairy rings are a great alternative.
- Use the fairy ring code DJR, located just south of the Lizardman Canyon.
- Exit the fairy ring and head north into the Canyon.
- Descend the western handholds and proceed west past the Brutes to reach the Shamans.
Tips for Lizardman Canyon
- Watch for Aggro: Clear nearby Lizardmen in the north and southwest corners to avoid being overwhelmed.
- Cannon Placement: Set up in the northwest corner near an obstruction for optimal coverage.
Location 2: Lizardman Caves (Slayer-Only)
The Lizardman Caves, located at the northern end of the Lizardman Settlement, house eight Shamans in a single-way combat area. This spot is exclusive to players on a Lizardmen Slayer task, making it less crowded than the Canyon.
Method 1: Fairy Ring Route (Code CIR)
This route leverages the nearby Farming Guild fairy ring.
- Use fairy ring code CIR to teleport near the Farming Guild.
- Run south past the guild, crossing the bridge guarded by Shayzien soldiers.
- Continue south past Lizardman Brutes until you reach the Lizardman Caves entrance.
- Enter the cave and head north to find four combat rooms, each with two Shamans.
Method 2: Xeric’s Talisman to Xeric’s Shrine
A slightly longer but viable option using the talisman.
- Teleport to Xeric’s Shrine with the Xeric’s Talisman.
- Exit south over the bridge and continue south through the Lizardman Settlement.
- Pass the Brutes and enter the Lizardman Caves to the southwest.
- Navigate north inside to locate the Shamans.
Tips for Lizardman Caves
- Single Combat: Each room is single-way, so focus on one Shaman at a time.
- Slayer Helmet Boost: If you’ve completed the Hard Kourend & Kebos Diary, enhance your Slayer helmet with Captain Cleive for added protection.
Location 3: Lizardman Temple (Molch)
The Lizardman Temple beneath Molch contains six Shamans in a single-way combat area, also restricted to Slayer tasks. It’s a quieter spot with an altar nearby for prayer restoration.
Method 1: Fairy Ring Route (Code BLS)
The closest fairy ring makes this route straightforward.
- Use fairy ring code BLS to arrive at the Lizardman Settlement (Slayer-only area).
- Run north over the bridge and through the Settlement, passing Lizardman Brutes.
- Enter the Slayer-only cave near Captain Cleive.
- Inside, head to the Temple section with two Shamans per room.
Method 2: Shayzien Teleport and Foot Travel
For those without fairy ring access, this is a manual option.
- Teleport to Shayzien via a redirected house portal or skills necklace to the Farming Guild.
- Run southwest through Shayzien, past the graveyard, to the Lizardman Settlement.
- Continue north to the Slayer-only cave entrance and proceed to the Temple.
Tips for Lizardman Temple
- Altar Advantage: An altar outside the entrance lets you recharge prayer without potions.
- Safe Spots: Stand along the south or west walls to prevent Shaman jump attacks.
Choosing the Best Route for You
Each location has its perks, so your choice depends on your goals and resources. Here’s a quick comparison:
| Location | Combat Type | Shamans | Best For | Fastest Travel |
|---|---|---|---|---|
| Lizardman Canyon | Multi-combat | 3 | Non-Slayer grinding, cannon users | Xeric’s Talisman |
| Lizardman Caves | Single-way | 8 | Slayer tasks, less crowded | Fairy Ring CIR |
| Lizardman Temple | Single-way | 6 | Slayer tasks, prayer efficiency | Fairy Ring BLS |
Factors to Consider
- Slayer Task: Stick to the Caves or Temple for task-specific benefits.
- Crowd Levels: The Canyon is often busier; opt for Caves or Temple for solitude.
- Gear and Prep: Multi-combat in the Canyon favors ranged setups with a cannon, while single-way areas suit melee or ranged without extra aggro.
Preparing for the Journey
Getting to the Shamans is half the battle—surviving them is the other. Here’s what to bring:
Recommended Gear and Inventory
- Shayzien Armour (Tier 5): Nullifies acid spit damage (still poisons).
- Ranged Setup: Toxic Blowpipe or Bow of Faerdhinen for outranging their attacks.
- Inventory:
- Antidote++ or Sanfew Serum
- Prayer Potions (or use the Temple altar)
- Stamina Potions for running
- High-healing food (e.g., Sharks)
- Cannon and cannonballs (Canyon only)
Combat Tips
Lizardman Shamans have three special attacks: acid spit, a jump, and spawning minions. Use Protect from Missiles, dodge jumps by moving, and avoid minion explosions by stepping away. Ranged is preferred for its maneuverability.
Final Thoughts
Reaching the Lizardman Shamans in OSRS doesn’t have to be a chore. Whether you’re teleporting with Xeric’s Talisman, zipping through fairy rings, or hoofing it from Shayzien, each method offers a reliable path to your destination. Choose the Lizardman Canyon for multi-combat loot runs, the Caves for a focused Slayer grind, or the Temple for a chill experience with prayer support. With this guide, you’re equipped to navigate Great Kourend like a pro and take on those Shamans for a shot at that sweet Dragon Warhammer. Happy hunting, adventurers!