Your cart is empty

Best POH Setup OSRS – Ultimate Guide to an Efficient Player-Owned House
In Old School RuneScape (OSRS), a Player-Owned House (POH) is more than just a status symbol—it’s a functional hub for teleportation, restoration, and training. Optimizing your POH setup can save time, enhance gameplay efficiency, and make your adventures across Gielinor seamless. Whether you’re a PvM enthusiast, skiller, or quester, this guide covers the best POH setup in OSRS, focusing on layout, room placement, and key features to maximize utility. Let’s dive into crafting the ultimate POH!
A well-designed POH streamlines activities like bossing, Slayer tasks, and skilling by providing quick access to teleports, restoration pools, and storage. An efficient setup minimizes loading times and navigation, which is critical for high-intensity activities like Corporeal Beast or Abyssal Sire. With the right rooms and layout, your POH becomes a central hub that saves you time and resources.
Benefits of an Optimized POH
- Faster Teleportation: Access multiple locations via a Crystalline Portal Nexus.
- Restoration and Healing: Instantly restore Hitpoints, Prayer, and run energy.
- Skill Training: Train Prayer and Construction efficiently.
- Storage Solutions: Store pets and items to declutter your bank.
Choosing the Best POH Layout
The layout of your POH is crucial for efficiency. The goal is to minimize loading times and ensure easy access to key rooms. Recent updates have made house size less impactful on loading times, but a compact layout remains ideal for usability.
3×3 vs. 4×4 Layout
A 3×3 layout (9 rooms) is the most efficient for players with a Crystalline Portal Nexus, as it accommodates all essential rooms while keeping navigation quick. A 4×4 layout (16 rooms) is better for those without a Portal Nexus, as it allows for multiple Portal Chambers. Avoid larger layouts or multi-level houses (dungeons or upper floors), as they can increase complexity without adding significant benefits.
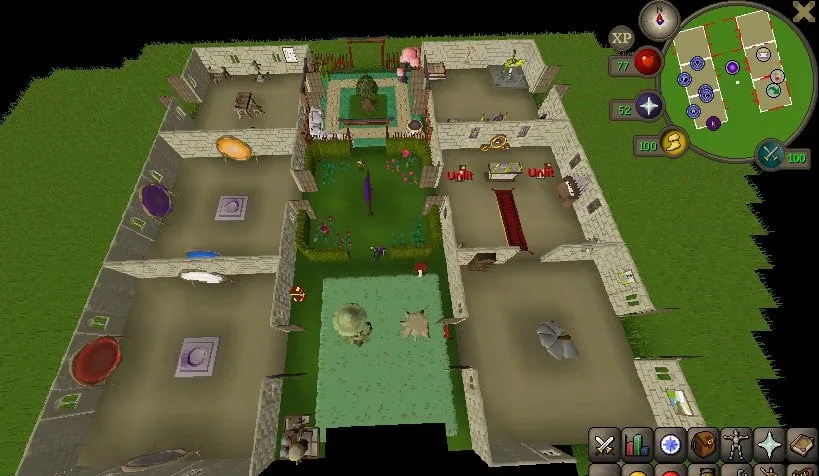
Recommended 3×3 Layout
Here’s a suggested 3×3 layout for optimal efficiency:
| Room | Purpose | Construction Level |
|---|---|---|
| Portal Nexus | Central teleport hub for 18+ locations | 92 (boostable from 84) |
| Superior Garden (Ornate Pool) | Restores Hitpoints, Prayer, run energy | 85 |
| Chapel | Prayer training with gilded altar | 70 |
| Achievement Gallery | Jewellery box and quest rewards | 80 |
| Study | Lectern for teleport tablets | 40 |
| Kitchen | Construction boost with tea | 67 |
| Menagerie | Pet storage and display | 37 |
| Workshop | Armor repair and flatpack furniture | 15 |
| Garden | Spirit Tree or Fairy Ring | 75/83 |
Tip: Place the Portal Nexus and Superior Garden near the entrance for quick access. Avoid fences around the Ornate Pool, as they slow navigation.
Essential Rooms and Features
Certain rooms are non-negotiable for a top-tier POH setup. Below are the must-have rooms and their key features, prioritized for efficiency and versatility.
Crystalline Portal Nexus
The Crystalline Portal Nexus (level 92 Construction, boostable from 84) is the cornerstone of an efficient POH. It consolidates up to 18 teleport destinations into one room, eliminating the need for multiple Portal Chambers. You can also mount a Digsite Pendant and Xeric’s Talisman for unlimited teleports, making it a game-changer for travel.
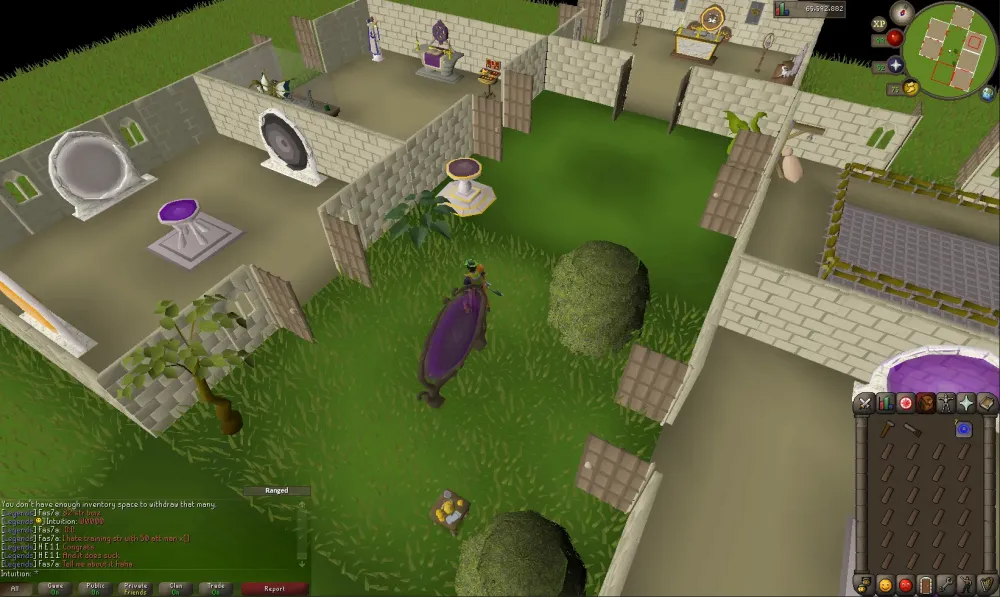
Superior Garden with Ornate Pool
The Ornate Rejuvenation Pool (level 85) is a one-stop shop for restoring Hitpoints, Prayer, run energy, and curing poison. It’s essential for PvM activities like Zulrah or Vorkath, where quick resets are critical. Pair it with a Spirit Tree or Fairy Ring in another Garden for additional teleport options.
Chapel with Gilded Altar
The Gilded Altar (level 75) offers a 350% Prayer experience boost when offering bones, making it the best place to train Prayer outside the Wilderness. It’s a must for players looking to level Prayer efficiently or host house parties for others to use.
Achievement Gallery
The Achievement Gallery (level 80) houses the Ornate Jewellery Box, which provides unlimited teleports to locations like Edgeville and Draynor Village. It also displays quest rewards and allows for a mounted Amulet of Glory for quick banking.
Kitchen for Construction Boosts
A Kitchen with Teak Shelves 2 (level 67) lets you make POH tea, granting a +3 Construction boost. Combined with a Crystal Saw (+3), this allows you to build high-level rooms like the Portal Nexus from level 86. Alternatively, a Spicy Stew with orange spice (+5) can boost from 84, though it’s less reliable.
Construction Levels and Boosting Strategies
Maxing your POH requires at least level 83 Construction for most useful rooms, but level 92 is ideal for the Crystalline Portal Nexus. Boosting is a cost-effective way to access high-level rooms without grinding to 99.
Training to 83 or 86 Construction
Train Construction using gnome benches (level 77, 870 XP each) instead of mahogany tables for faster XP per plank. From level 1 to 83, expect to spend around 10-15M GP, depending on plank prices. To reach 86 (for reliable boosting), add another 2-3M GP. Use a calculator like the one on OldSchool.tools to track costs.
Boosting to 92 Construction
To build the Crystalline Portal Nexus, you need level 92 Construction. Here’s how to boost:
- POH Tea (+3): Build a Kitchen with Teak Shelves 2, make tea using a kettle, teapot, and tea leaves. Combine with a Crystal Saw (+3) for a +6 boost (86 to 92).
- Spicy Stew (+5): After completing Freeing Evil Dave, use orange spice for a +5 boost, plus Crystal Saw (+3) for a +8 boost (84 to 92). Test stews at Edgeville bank to avoid wasting time. Expect to use 10-40 stews for the +5 boost.
Pro Tip: Monitor your boost timer with another potion (e.g., Attack potion) to know when your stats drop, ensuring you have enough time to build.
Tips for POH Efficiency and Usage
Beyond layout and rooms, small tweaks can make your POH even more efficient. These tips focus on practical usage for daily activities.
Minimize Loading Times
While house size no longer affects loading times as much, a 3×3 or 4×4 layout ensures 2-tick loading. To achieve this:
- Remove dungeons and upper floors.
- Center the portal in a 3×3 or 4×4 layout.
- Move your POH southwest if extra grass tiles appear on the instance map (visible with a third-party client).
Strategic POH Location
Relocate your POH to Rellekka (level 30 Construction, 10K GP) for proximity to the Fremennik Slayer Dungeon, Waterbirth Island, and quests like Lunar Diplomacy. Alternatively, Hosidius is great for Farming and Cooking, while Taverley suits low-level players near the Warriors’ Guild.
Using Your POH Effectively
Incorporate your POH into your gameplay loop:
- Zulrah: Use a house teleport, heal at the Ornate Pool, and use a Fairy Ring to return.
- Vorkath: Teleport home, restore stats, and use a Moonclan teleport to bank.
- General PvM: Carry a rune pouch with dust/law runes for quick teleports to Seers’ Village bank, then home.
Cost Considerations
Maxing a POH can cost 20-30M GP, including Construction training and materials like gold leaves and magic stones. Use a Ring of Duelling for quick banking and house teleport tablets for easy access to building mode. Check current prices with a calculator to budget effectively.
By following this guide, your POH will become a powerhouse of efficiency, saving you time and enhancing your OSRS experience. Whether you’re teleporting across Gielinor or restoring for your next boss fight, the best POH setup is one that fits your playstyle and goals. Happy building!