Your cart is empty
Giant Mole Strategy OSRS – Ultimate Guide to Defeating the Falador Boss

The Giant Mole in Old School RuneScape (OSRS) is a beginner-friendly boss located beneath Falador Park, perfect for players dipping their toes into PvM content. Known for its burrowing mechanic and lucrative drops like mole claws and skins, this boss offers consistent rewards for mid-level players. This guide provides a comprehensive strategy to defeat the Giant Mole efficiently, covering preparation, combat tactics, and tips to maximize your loot. Whether you’re a low-level adventurer or a seasoned player, this blog post will help you conquer the Falador Mole Lair with ease.
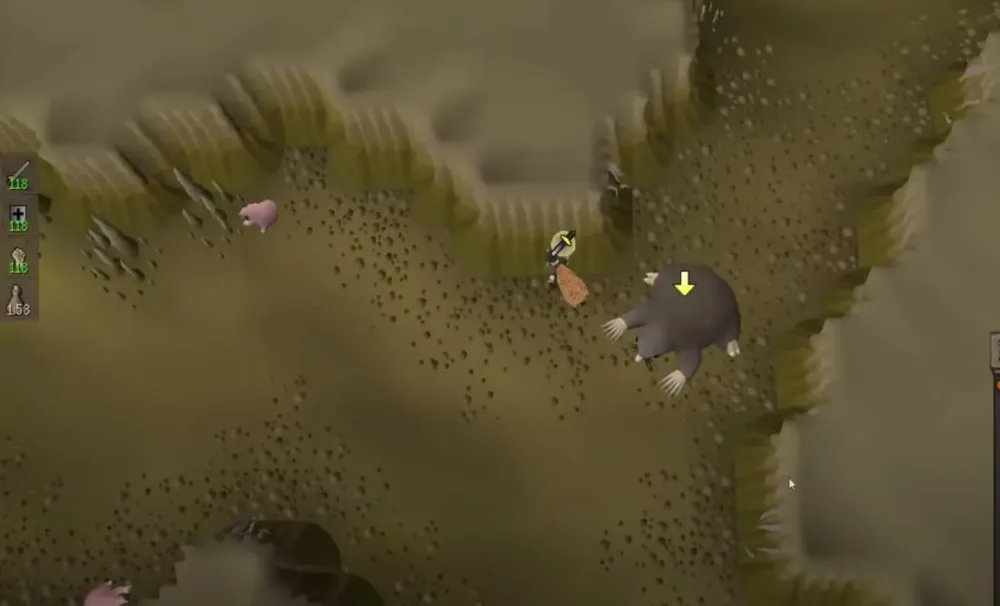
The Giant Mole, or Talpidae wysonian, resides in the Mole Lair under Falador Park. It’s a mid-level boss with a combat level of 230, making it accessible to players with moderate combat stats. Its primary attack is melee, dealing up to 21 damage, and it has a unique burrowing mechanic that requires players to chase it across the lair. Here’s a breakdown of its key mechanics to prepare you for the fight.
Key Mechanics of the Giant Mole
- Melee Attack: The Mole swipes with its claws, dealing up to 21 damage. Protect from Melee prayer completely negates this damage.
- Burrow: When its health drops between 5-50%, there’s a 25% chance any attack (except splashed magic) triggers it to burrow to another part of the lair, losing aggression. This can extinguish unprotected light sources like candles.
- No Special Abilities: Unlike other bosses, the Mole lacks complex mechanics, making it straightforward but tedious due to frequent burrowing.
Why Fight the Giant Mole?
The Giant Mole is popular for its 100% drop rate of mole claws and 1-3 mole skins, which can be traded to Wyson the gardener for bird nests. These nests often contain valuable seeds or jewelry, used in Herblore for Saradomin brews. An experienced player can earn around 150 bird nests per hour, making it a profitable mid-level boss.
Preparation for the Giant Mole Fight

Proper preparation is crucial to streamline your Giant Mole kills. You’ll need specific items, recommended stats, and an optimized inventory to handle the dark tunnels and the boss’s burrowing habit.
Recommended Stats and Requirements
- Combat Stats: At least 50 Attack, Strength, and Defense for a smoother fight. Higher levels (70+) improve efficiency.
- Prayer: 43+ for Protect from Melee; 70+ for Piety to boost damage.
- No Quest Requirements: The Mole has no prerequisites, but completing the Hard Falador Diary is highly recommended for noted drops and the Falador Shield 3/4.
Essential Gear and Inventory
Your gear and inventory setup will depend on your combat style and account type (e.g., main or Ironman). Below is a table outlining recommended setups for melee, the most common method, and alternatives for ranged.
| Slot | Melee (Dharok’s) | Melee (Budget) | Ranged |
|---|---|---|---|
| Helmet | Dharok’s helm | Rune full helm | Armadyl helmet |
| Chest | Dharok’s platebody | Rune platebody | Armadyl chestplate |
| Legs | Dharok’s platelegs | Rune platelegs | Armadyl chainskirt |
| Weapon | Dharok’s greataxe | Dragon scimitar | Twisted bow or Rune crossbow |
| Cape | Fire cape | Skillcape | Ava’s accumulator |
| Amulet | Amulet of fury | Amulet of glory | Amulet of glory |
Inventory Setup:
- Spade: To enter the Mole Lair.
- Light Source: Bullseye lantern, bruma torch, or Firemaking Skillcape (if 99 Firemaking) to avoid extinguishing.
- Falador Shield 3/4: Tracks the Mole’s location via a minimap arrow (Hard Falador Diary reward).
- Dwarven Rock Cake/Locator Orb: Lowers HP to 1 for Dharok’s set effect (max damage at low HP).
- Prayer Potions: 2-4 for Protect from Melee and Piety.
- Stamina Potions: 2-3 to maintain run energy while chasing the Mole.
- Food: 5-10 high-healing items (e.g., sharks) for emergencies.
- Teleport: Falador teleport or Ring of Wealth (Falador Park option).
Combat Strategy for the Giant Mole
The Giant Mole fight is simple but requires patience due to its burrowing. The most efficient method uses Dharok’s equipment at 1 HP to maximize damage, but safer alternatives exist for cautious players.
Dharok’s Melee Strategy (High Efficiency)
This method leverages Dharok’s set effect, which increases damage as your HP decreases. It’s ideal for players with 70+ combat stats and Hard Falador Diary completion.
- Setup: Equip Dharok’s gear, activate Protect from Melee, and use the Dwarven Rock Cake to lower your HP to 1. Drink a super strength/attack potion and activate Piety.
- Enter the Lair: Teleport to Falador Park, dig a mole hill with your spade, and find the Mole at the central spawn point.
- Combat: Attack the Mole with Dharok’s greataxe. Use special attacks (e.g., Dragon claws or Voidwaker) early to deal burst damage, as multi-hit attacks can trigger multiple burrows below 50% HP.
- Burrowing: When the Mole burrows, check your minimap for the Falador Shield’s red arrow to locate it quickly. Avoid poisoning without the shield, as poison damage can trigger burrows while searching.
- Repeat: Continue attacking until the Mole dies (2-3 hits with high stats). Loot claws/skins and teleport back to Falador to reset.
Tip: With optimal gear and stats, you can achieve 50-75 kills per hour, yielding around 100-150 bird nests.
Budget Melee Strategy (Low-Level/Safe)
For players without Dharok’s or high stats, a budget melee setup works well, especially with safespotting.
- Setup: Equip budget melee gear (e.g., Rune armor, Dragon scimitar), activate Protect from Melee, and bring a stabbing weapon for the Mole’s lower stab defense.
- Safespotting: Lure the Mole to a cavern wall and position yourself so the wall blocks its path. It won’t move around to attack, allowing safe damage.
- Burrowing: Chase the Mole when it burrows. Without the Falador Shield, use familiars (e.g., Spirit Terrorbird) to track its direction.
- Combat: Deal consistent damage, using food as needed. Expect longer fights (5-10 minutes per kill).
Ranged Strategy (Alternative)
Ranged is viable for safespotting or high-level players with a Twisted Bow, which offers the fastest kills.
- Setup: Use Armadyl gear and a Twisted Bow or Rune crossbow with broad bolts. Bring a ranging potion.
- Safespot: Attack from behind cavern walls, as the Mole has low ranged defense.
- Burrowing: Follow the same tracking method as melee. The Twisted Bow can kill in 1-2 minutes with high stats.
Tips to Maximize Efficiency and Profit
To make your Giant Mole farming sessions as rewarding as possible, consider these additional tips.
Optimizing Your Runs
- Complete Hard Falador Diary: Noted drops and the Falador Shield’s locator save significant time.
- Use Stamina Potions: Maintain run energy to chase the Mole quickly.
- Avoid Poison: Without the Falador Shield, poison can cause unnecessary burrows, slowing kills.
- Bank Efficiently: Use a Player-Owned House (POH) with an Ornate Rejuvenation Pool for quick HP/prayer restoration, then teleport to Falador.
Maximizing Loot
The Giant Mole’s average kill is worth ~30,384 GP, with 84% from claws and skins. Trade these to Wyson for bird nests, which can yield high-value seeds (e.g., Ranarr, Snapdragon). Completing the Elite Falador Diary adds a Mole Nose drop, increasing nest value.
Common Mistakes to Avoid
New players often make errors that slow down or derail their Giant Mole kills. Here’s what to watch out for:
- Unprotected Light Sources: Candles or torches can extinguish, leaving you vulnerable to bug damage. Always use a bullseye lantern or equivalent.
- Ignoring Prayer: Without Protect from Melee, the Mole’s 21-damage hits add up quickly, especially for low-level players.
- Chasing Without a Shield: Without the Falador Shield, locating the Mole is tedious. Prioritize the Hard Falador Diary.
- Overusing Special Attacks: Multi-hit special attacks below 50% HP can cause excessive burrowing, prolonging fights. Use them early.
With these strategies, you’re ready to tackle the Giant Mole in OSRS. Whether you opt for the high-risk Dharok’s method, a safe budget setup, or a ranged approach, this boss is a fantastic way to earn profit and practice PvM. Happy hunting, and may your bird nests be filled with rare seeds!
