Your cart is empty

OSRS Greater Demon Safe Spot Guide

In Old School RuneScape (OSRS), Greater Demons are a popular Slayer monster known for their decent experience rates and valuable drops. For players looking to maximize efficiency and safety, using safe spots is key. This guide explores the best safe spot locations, strategies, and tips for tackling Greater Demons, ensuring you can slay them with minimal risk. Whether you’re a mid-level player or a seasoned veteran, this blog post will help you master Greater Demon tasks.
Greater Demons are level 92 Slayer monsters assigned by mid-to-high-level Slayer masters like Krystilia, Chaeldar, Konar, Nieve/Steve, and Duradel/Kuradal. They are weak to all attack styles, making them versatile targets for melee, ranged, or magic setups. Their drop table includes valuable items like the rune full helm and hard clue scrolls, though it’s not as lucrative as some other monsters.
Why Use Safe Spots?
Safe spotting allows players to attack Greater Demons without taking damage, which is ideal for conserving supplies and extending trips. This strategy is especially useful for players with lower combat stats or those on a budget, as it minimizes the need for high-end gear or frequent banking.
Key Stats and Weaknesses
- Combat Level: 92
- Hitpoints: 87
- Weaknesses: No specific resistances; vulnerable to all combat styles
- Slayer Requirement: None, but often assigned as a Slayer task
Best Locations for Greater Demon Safe Spots
Greater Demons can be found in several locations across Gielinor, but not all are ideal for safe spotting. Below are the top spots where you can effectively use safe spots to kill Greater Demons.
Catacombs of Kourend
The Catacombs of Kourend is one of the most popular locations for Greater Demon Slayer tasks due to its accessibility and safe spot opportunities. Located in Great Kourend, the Catacombs are multi-combat, but the layout allows for easy safe spotting.
- Safe Spot: In the Greater Demon area, position yourself behind the large bones or pillars. These obstacles block the demons’ melee attacks, allowing you to attack with ranged or magic from a distance.
- Getting There: Use the Kourend Castle teleport or the Xeric’s Talisman to reach Great Kourend, then enter the Catacombs via the main entrance.
- Pros: Restores prayer points on kill (with Bonecrusher and Demon’s Ashes), multi-combat for faster kills, and close to a bank.
- Cons: Can be crowded during peak hours.
Chasm of Fire
The Chasm of Fire, located beneath Shayzien, is another excellent location for safe spotting Greater Demons. This area is less crowded than the Catacombs and offers a straightforward safe spot.
- Safe Spot: Use the rocky outcrops or corners near the entrance to trap Greater Demons. Position yourself so the demon is stuck behind the obstacle, and attack with ranged or magic.
- Getting There: Requires completion of the “Priest in Peril” quest to access Shayzien. Use a Shayzien teleport or run from the Lovakengj Minecart Network.
- Pros: Less crowded, simple layout, and good for Ironmen.
- Cons: Slightly further from a bank compared to the Catacombs.
Wilderness Slayer Cave
The Wilderness Slayer Cave is a riskier option but viable for those assigned Greater Demons by Krystilia. It’s a single-combat area, making safe spotting straightforward.
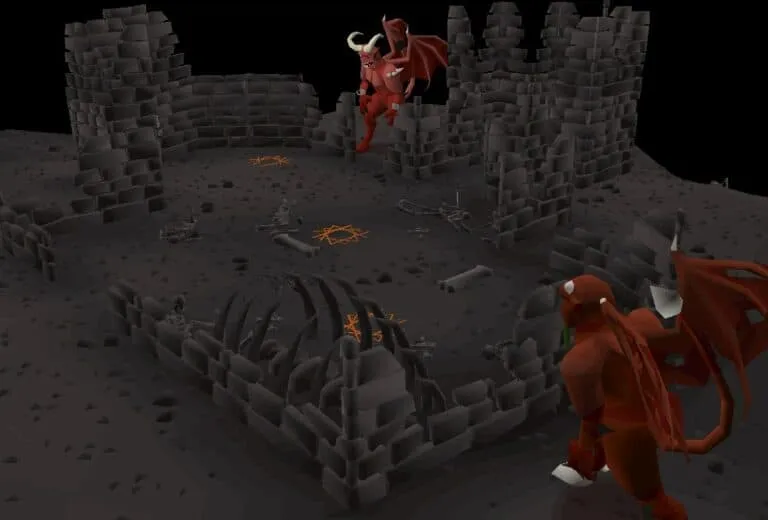
- Safe Spot: Use the rocks or corners in the Greater Demon section to trap them. Ranged or magic attacks work best from a distance.
- Getting There: Teleport to the Wilderness (e.g., via the Wilderness Obelisk or Carrallanger teleport) and run to the cave entrance near the Lava Maze.
- Pros: Bonus tertiary drop table for Krystilia tasks, including items like the Mysterious Emblem.
- Cons: High risk of PKers; bring minimal gear and be prepared to escape.
Recommended Gear and Inventory
Your gear and inventory setup will depend on your combat style and whether you’re in a safe or risky area like the Wilderness. Below are suggested setups for safe spotting Greater Demons.
Melee Setup
While melee is less common for safe spotting, it’s viable in single-combat areas like the Chasm of Fire or Wilderness Slayer Cave.
| Slot | Item |
|---|---|
| Head | Slayer Helmet (i) or Black Mask (i) |
| Cape | Ardougne Cloak or Fire Cape |
| Weapon | Abyssal Whip or Dragon Scimitar |
| Body | Proselyte Armour or Bandos Chestplate |
| Legs | Proselyte Tasset or Bandos Tassets |
Note: Melee safe spotting requires luring the demon to a specific spot, which can be time-consuming.
Ranged Setup
Ranged is the most popular choice for safe spotting due to its ease and effectiveness.
| Slot | Item |
|---|---|
| Head | Slayer Helmet (i) or Armadyl Helmet |
| Cape | Ava’s Accumulator or Assembler |
| Weapon | Rune Crossbow or Toxic Blowpipe |
| Ammo | Broad Bolts or Adamant Darts |
| Body | Black D’hide Body or Armadyl Chestplate |
Inventory: Prayer potions, ranging potions, food (sharks or monkfish), teleport runes, and a Bonecrusher (for Catacombs).
Magic Setup
Magic is a great option for players with high magic levels, especially in multi-combat areas.
| Slot | Item |
|---|---|
| Head | Slayer Helmet (i) or Ahrim’s Hood |
| Cape | Imbued God Cape |
| Weapon | Trident of the Seas or Iban’s Staff |
| Body | Ahrim’s Robetop or Mystic Robe Top |
| Legs | Ahrim’s Robeskirt or Mystic Robe Bottom |
Inventory: Runes for your spell, prayer potions, food, and a teleport method.
Safe Spotting Strategies and Tips
Using safe spots effectively requires some planning and execution. Here are strategies to optimize your Greater Demon kills.
Luring and Positioning
To safe spot, you need to lure the Greater Demon to a position where it’s trapped behind an obstacle. Follow these steps:
- Attack the Demon: Aggro the demon with a single attack.
- Move to the Safe Spot: Run to your chosen obstacle (e.g., bones in the Catacombs or rocks in the Chasm).
- Trap the Demon: Position yourself so the demon is stuck on the opposite side of the obstacle.
- Attack: Use ranged or magic to deal damage while staying out of melee range.
Managing Aggro
Greater Demons have a limited aggression range. If you move too far away, they may stop attacking. Stay within 10-15 tiles of the demon to maintain aggro while safe spotting.
Prayer and Supplies
In the Catacombs, killing Greater Demons drops Demon’s Ashes, which restore prayer points when used with a Bonecrusher. This allows you to use Protect from Melee indefinitely, reducing the need for prayer potions. In other locations, bring enough prayer potions to sustain your trip.
Drops and Rewards
Greater Demons have a modest drop table, but certain items make them worth killing, especially on Slayer tasks.
Notable Drops
| Item | Drop Rate | Approximate Value |
|---|---|---|
| Rune Full Helm | 1/64 | 20,000 GP |
| Hard Clue Scroll | 1/128 | Variable |
| Adamant 2h Sword | 1/128 | 3,500 GP |
| Mithril Kiteshield | 1/64 | 1,000 GP |
Wilderness Bonus: When assigned by Krystilia, Greater Demons in the Wilderness Slayer Cave have a chance to drop items like the Mysterious Emblem or Slayer’s Enchantment.
Experience Rates
Using safe spots, you can expect the following experience rates per hour (assuming optimal gear and focus):
- Melee: 20,000–30,000 Combat XP
- Ranged: 25,000–35,000 Ranged XP
- Magic: 20,000–30,000 Magic XP
- Slayer XP: 5,000–8,000 (on task)
Mastering Greater Demon safe spots in OSRS can significantly improve your Slayer efficiency and profitability. By choosing the right location, gear, and strategy, you can slay these monsters with ease while minimizing risk. Whether you prefer the Catacombs of Kourend, Chasm of Fire, or the Wilderness Slayer Cave, this guide provides everything you need to succeed. Happy slaying!
