Your cart is empty

One Small Favour OSRS Quick Guide
Completing the One Small Favour quest in Old School RuneScape (OSRS) can feel like an epic journey across Gielinor, but it’s a rewarding challenge for players seeking quest points and unique rewards. This humorous quest starts with a seemingly simple task that spirals into a chain of favors, testing your patience and inventory management. Our SEO-optimized quick guide will walk you through the steps, requirements, and tips to finish this quest efficiently, ensuring you save time and energy. Whether you’re a seasoned adventurer or a new player, this guide is designed to make your experience smoother. Let’s dive in!
One Small Favour is a members-only quest known for its lengthy chain of tasks and humorous dialogue. Starting in Shilo Village, the quest involves helping various NPCs across the map, each requesting a favor that leads to another. It’s recommended for experienced players due to its travel demands and moderate combat.
Prerequisites
- Quests: Completion of Druidic Ritual, Rune Mysteries, and Shilo Village.
- Skills: 36 Agility, 25 Crafting, 18 Herblore, 30 Smithing.
- Combat: Ability to defeat three level 35 dwarves and one level 63 dwarf.
Recommended Items
To streamline your journey, prepare these items to minimize backtracking:
| Category | Items |
|---|---|
| Teleportation | Amulet of Glory, Ring of Dueling, Skills Necklace, Camelot Teleport, Varrock Teleport |
| Resources | 1 bronze bar, 1 iron bar, 4 steel bars, 2 guam leaves, 1 marrentill, 1 harralander, chisel, hammer, empty pot, empty tea cup, bowl of water |
| Optional | Weight-reducing clothing, stamina potions, 8,000 coins, 2 cut opals, jades, red topazes, sapphires |
Tip: Use a good pickaxe and mine gems (two each of jade, opal, sapphire, red topaz) near Shilo Village before starting to avoid crafting failures later.
Starting the Quest

Begin in Shilo Village by speaking to Yanni Salika in the antiques shop north of the river (use fairy ring code CKR for quick access). He asks for red mahogany logs from a Jungle Forester south of the village, kicking off the chain of favors. Before leaving, buy a ticket for the “Lady of the Waves” from Seravel upstairs in the Shilo Village Fishing shop for 26–44 coins to save time later.
Initial Steps
- Jungle Forester: Exit Shilo Village through the southeast gates, climb over the cart, and talk to a Jungle Forester near the Kharazi Jungle barrier. They give you a blunt hatchet and ask you to get it sharpened via Captain Shanks.
- Captain Shanks: Head west to the coast, climb the ladder to the ship, and speak to Captain Shanks. He refuses to help and tells you to take the hatchet to Port Sarim yourself. Use the ticket or teleport to Port Sarim (e.g., Amulet of Glory to Karamja, then sail).
- Brian in Port Sarim: Visit Brian in the axe shop northeast of the Port Sarim lodestone. He’ll sharpen the hatchet if you help his friend, directing you to Aggie in Draynor Village. Ensure he takes the hatchet before leaving (chat options: 3•2•4).
Chain of Favors: Misthalin and Asgarnia
This section covers the favors in Misthalin (Draynor, Lumbridge, Varrock) and Asgarnia (Falador, Taverley). Expect to crisscross the map, so keep teleports handy.
Draynor Village and H.A.M. Hideout
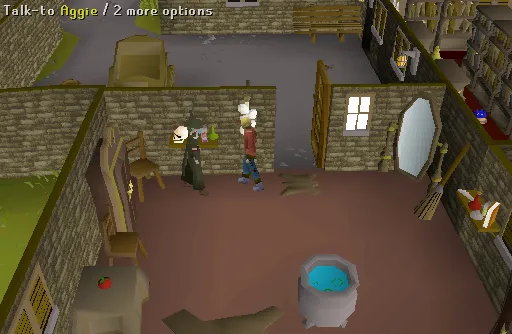
- Aggie the Witch: In Draynor Village, speak to Aggie (chat: 1•3•2). She agrees to help Brian but needs you to find her apprentice, Jimmy the Chisel, last seen near the old mine between Draynor and Lumbridge.
- Johanhus Ulsbrecht: Head to the H.A.M. Hideout (northeast of Lumbridge, across the river). Pick the lock on the trapdoor, go southeast to the jail, and talk to Johanhus Ulsbrecht (chat: 4•3•2). He’ll release Jimmy if you arrange a month’s supply of chickens from Fred the Farmer.
Lumbridge and Varrock
- Fred the Farmer: North of Lumbridge, talk to Fred at his house (near the sheep). He lacks enough chickens and suggests visiting Seth Groats east of the river. Before going, grab a bowl of water from the Lumbridge Castle kitchen and heat it on the stove.
- Seth Groats: Find Seth in the chicken coop across from the cow field. He needs three steel bars delivered to Horvik in Varrock for chicken cages.
- Horvik: In Varrock’s plate/chainmail shop, Horvik is ill and needs herbal medicine from the Apothecary.
- Apothecary: The Varrock Apothecary agrees to help but accidentally breaks his pot while giving you breathing salts. He needs an airtight pot from Tassie Slipcast in Barbarian Village.
Barbarian Village and Taverley
- Tassie Slipcast: In Barbarian Village, Tassie is too upset to help due to pressure from Hammerspike Stoutbeard, a dwarf raising her loan interest. She suggests convincing him to become a druid initiate.
- Sanfew: In Taverley, upstairs in the herb shop, Sanfew agrees to take Hammerspike as an initiate for two favors: deliver a Guthix rest potion to Captain Bleemadge on White Wolf Mountain and arrange a glider route to Feldip Hills. Make the potion by adding 1 harralander, then 2 guam leaves, then 1 marrentill to a heated bowl of water poured into an empty tea cup (steal tea in Varrock and drink it for the cup).
- Captain Bleemadge: Take a gnome glider or walk to White Wolf Mountain, give Bleemadge the potion, and convince him to open the Feldip Hills route. Watch for the level 43 Big Wolf nearby.
Kandarin and Feldip Hills
The quest now takes you to Kandarin (Ardougne, Catherby, Port Khazard) and Feldip Hills, with tasks involving crafting and exploration.
Ardougne and Catherby
- Sanfew Follow-Up: Return to Sanfew in Taverley to confirm the favors. He agrees to accept Hammerspike.
- Hammerspike Stoutbeard: In the Dwarven Mines (northeast of Falador), confront Hammerspike. He refuses to become a druid and sics three level 35 dwarves and himself (level 63) on you. Defeat them, then talk to him again to make him back off.
- Tassie Slipcast: Back in Barbarian Village, Tassie teaches you to make an airtight pot using soft clay on a potter’s wheel to create an unfired lid, then firing it in a pottery oven.
- Apothecary: Deliver the airtight pot to the Varrock Apothecary for breathing salts.
- Horvik: Give the salts to Horvik, who makes the chicken cages for Seth.
- Seth and Fred: Return the cages to Seth, who supplies Fred, who then supplies Johanhus.
- Johanhus and Aggie: Johanhus releases Jimmy, allowing Aggie to help Brian, who sharpens the hatchet.
- Jungle Forester: Take the sharpened hatchet to the Jungle Forester for mahogany logs.
Port Khazard and Feldip Hills
- Yanni Salika: Give the logs to Yanni, who rewards you with a key ring and two antique lamps (10,000 XP each for skills above level 30).
- Additional Tasks: Earlier, visit Wizard Cromperty in East Ardougne for a teleport spell issue, leading to Tindel Merchant in Port Khazard needing a better mattress. Take the stodgy mattress to Rantz in Feldip Hills, who needs help with a noisy gnome. Fix the gnome’s weathervane in Catherby using steel bars and gems, then return to complete the chain.
Tips for Efficiency and Rewards
One Small Favour is notorious for its travel-heavy nature, so optimize your route with these tips:
- Teleportation: Use Amulet of Glory, Skills Necklace, and fairy rings to cut travel time.
- Inventory Management: Carry all required items from the start to avoid multiple trips.
- Energy Preservation: Wear weight-reducing clothing and use stamina potions for running.
- Gem Crafting: Cut gems early to avoid crushing them during the weathervane repair.
Rewards
- 2 Quest Points
- Two antique lamps (10,000 XP each for skills above level 30)
- Steel key ring to store keys
- Access to subsequent quests like Cabin Fever and Recipe for Disaster
Note: The quest’s humor and absurdity, like NPCs mocking your efforts, make it memorable, but the key ring is a game-changer for bank space!
With this guide, you’re ready to tackle One Small Favour in OSRS efficiently. Happy questing, and enjoy the rewards of your patience!
