Your cart is empty
Chaos Altar OSRS Prayer Guide for Efficient Training

Prayer is a vital skill in Old School RuneScape (OSRS), offering combat buffs like increased attack, defense, and even hitpoint regeneration. However, training Prayer can be costly and time-consuming. One of the most efficient and cost-effective methods is using the Chaos Altar in the Wilderness. This guide explores how to train Prayer at the Chaos Altar, its benefits, risks, and strategies to maximize experience while staying safe. Whether you’re aiming for level 43, 70, or 99 Prayer, this method can save you millions of gold.
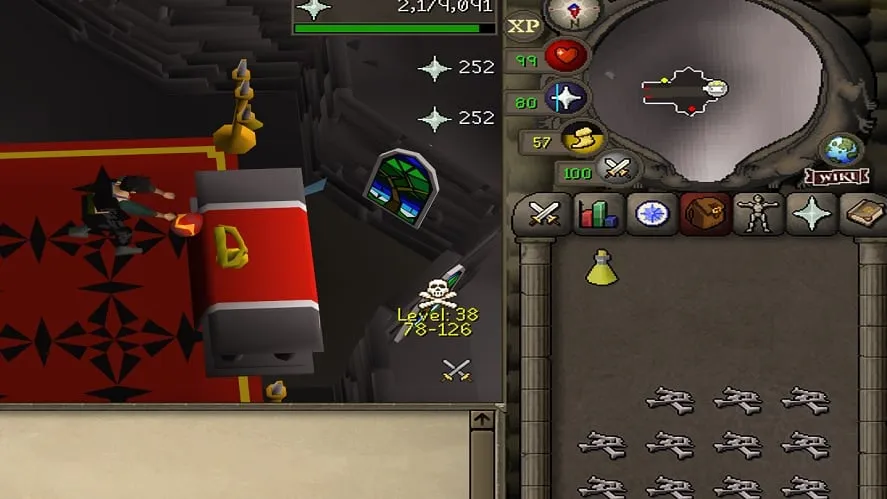
The Chaos Altar is a Zamorakian altar located in the Chaos Temple, situated in level 38 Wilderness, west of the Lava Maze. It’s a hotspot for Prayer training due to its unique mechanics, offering significant experience boosts and cost savings compared to other methods like the Gilded Altar or Ectofuntus. The altar is accessible to both free-to-play and members, but only members can use bones on it for training.
Location and Access
The Chaos Temple sits in a multi-combat zone, making it a risky but rewarding location. You can reach it through several methods:
- Burning Amulet: Teleports you to the Lava Maze entrance; run southwest to the temple.
- Ghorrock Teleport: Using Ancient Magicks, teleport to Ghorrock and run south.
- Cemetery Teleport: On the Arceuus spellbook, teleport to the cemetery and run north.
- Obelisk Teleport: If you’ve completed the Hard Wilderness Diary or have an Obelisk in your player-owned house, teleport to level 44 Wilderness and run south.
Each method has trade-offs, with Burning Amulet being the most accessible for most players. Always plan your route and escape options due to the Wilderness’s player-killing (PKing) risks.
Why Use the Chaos Altar for Prayer Training?

The Chaos Altar stands out for its efficiency and cost-effectiveness, making it the go-to choice for players looking to stretch their gold further. Here’s why it’s so popular:
Experience Boost and Bone-Saving Mechanic
Offering bones at the Chaos Altar grants 350% Prayer experience per bone, equivalent to a Gilded Altar with both incense burners lit. For example, a dragon bone, which gives 72 XP when buried, yields 252 XP at the Chaos Altar. Additionally, there’s a 50% chance that the bone won’t be consumed, allowing you to offer it again. This effectively doubles the experience per bone, averaging 504 XP per dragon bone over time.
Cost Efficiency
The bone-saving mechanic means you need roughly half as many bones as you would for a Gilded Altar to reach your Prayer goal. For instance, training from level 1 to 99 Prayer typically requires around 130,000 dragon bones at a Gilded Altar. At the Chaos Altar, you might need only 65,000 due to the 50% save chance, saving tens of millions of gold.
Comparison with Other Methods
Here’s a quick comparison of popular Prayer training methods:
| Method | XP Multiplier | Cost per XP (GP) | Risk Level |
|---|---|---|---|
| Chaos Altar | 350% (700% effective with saves) | ~0.5–1 GP | High (Wilderness) |
| Gilded Altar | 350% | ~2–3 GP | Low |
| Ectofuntus | 400% | ~1–2 GP | Low |
| Varlamore (Bone Shards) | ~290–340 XP per dragon bone | ~1.5–2 GP | Low |
The Chaos Altar’s low cost per XP makes it unbeatable for budget-conscious players, despite the Wilderness risks.
How to Train Prayer at the Chaos Altar
Training at the Chaos Altar requires careful planning to balance efficiency and safety. Below is a step-by-step guide to get started.
Gear Setup
Your gear should prioritize defense to survive PKer attacks long enough to use your bones. Recommended setup:
- Helm: Serpentine Helm or Helm of Neitiznot
- Body and Legs: Black Dragonhide or Barrows armor (e.g., Dharok’s or Torag’s)
- Shield: Dragon Square Shield or Dinh’s Bulwark
- Amulet: Amulet of Glory (for teleporting)
- Ring: Ring of Suffering or Ring of Life
- Prayers: Protect from Magic, Protect Item, and optionally Augury for extra defense
Wearing Zealot’s Robes can further boost efficiency, as their 5% bone-saving bonus stacks with the altar’s 50%, increasing the effective save chance to 52.5%.
Inventory Setup
There are two main strategies: single inventory runs and noted bone runs.
- Single Inventory Run: Bring 26–28 unnoted bones (e.g., dragon bones), a teleport (Burning Amulet or Glory), and optional food/brews. Use all bones, then suicide to the Chaos Fanatic or use a locator orb to die and respawn near a bank (e.g., Ferox Enclave or Edgeville).
- Noted Bone Run: Bring noted bones (100–200), gold for unnoting (50 GP per bone via Elder Chaos Druid), and tank gear. Unnote bones at the Elder Chaos Druid outside the temple and offer them. This is riskier but faster for high XP rates.
Execution
Follow these steps for efficient training:
- Teleport to the Wilderness using your preferred method.
- Run to the Chaos Temple, keeping Protect from Magic active.
- Use bones on the altar. Enable the Menu Entry Swapper plugin in RuneLite to set “Use” as the default action for bones.
- Monitor your surroundings for PKers using the Player Indicator plugin.
- If attacked, keep offering bones while tanking hits. Switch to Protect from Range if needed.
- Once done, teleport out or suicide to bank and repeat.
Tips for Surviving PKers at the Chaos Altar
The Wilderness is a dangerous place, and the Chaos Altar’s multi-combat zone attracts PKers. Here are strategies to minimize losses and maximize training time:
Anti-PK Tactics
- World Hopping: Use the World Hopper plugin to quickly switch worlds if a PKer appears. Set a hotkey (e.g., Ctrl+Shift+Space) for faster hopping.
- Low Risk: Only bring what you’re willing to lose. Single inventory runs with unnoted bones minimize risk.
- Tank and Pray: Most PKers at the Chaos Altar use magic or range. Keep Protect from Magic on and switch to Protect from Range if you spot a ranged attack.
- Skull Prevention: Enable PK skull prevention in your settings to avoid accidentally attacking and skulling, which risks all your items.
RuneLite Plugins
RuneLite plugins can significantly improve your experience:
- Menu Entry Swapper: Swap the left-click option on bones to “Use” instead of “Bury.”
- Player Indicator: Highlights PKers in-game and on the minimap.
- World Hopper: Allows quick world switches to evade PKers.
- Entity Hider: Use “::renderself” to make your character invisible to yourself, revealing PKers logging in under you.
Suicide Strategy
To save time, use the suicide method: after using your bones, run northeast to the Chaos Fanatic or use a locator orb to die. Set your respawn point to Ferox Enclave or Edgeville (5M GP to unlock) for quick banking. This is slower than noted bone runs but safer.
Maximizing XP Rates and Efficiency
With the right setup, the Chaos Altar can yield XP rates comparable to or better than Gilded Altars while being far cheaper. Here’s how to optimize:
1-Tick Method
Using the 1-tick method with RuneLite, you can offer bones faster by minimizing mouse movement. This requires practice but can push XP rates to 800k–1M XP per hour with superior dragon bones.
Bone Types
Choose bones based on your budget and goals:
- Dragon Bones: 252 XP per offer (504 XP effective), affordable and widely used.
- Superior Dragon Bones: 420 XP per offer (840 XP effective), fastest but expensive, requiring 70 Prayer.
- Frost Dragon Bones: 350 XP per offer (700 XP effective), a middle ground.
Additional Boosts
Wear Zealot’s Robes for a 5% bone-saving boost. Use perfect juju prayer potions or the Illumination Aura (if available) for extra XP. These stack with the altar’s bonuses, further reducing costs.
By combining the Chaos Altar’s unique mechanics with smart strategies, you can train Prayer efficiently while saving millions. Just stay vigilant, gear up, and embrace the Wilderness’s chaos!

