Your cart is empty

OSRS Giant Mole Guide for Beginners and Veterans
The Giant Mole is a low-level boss in Old School RuneScape (OSRS), found in the Falador Mole Lair beneath Falador Park. Known for its simplicity, it’s an excellent starting point for players new to bossing or those seeking consistent loot like mole claws, mole skins, and the coveted Baby Mole pet. This guide covers strategies, gear setups, and tips to maximize efficiency, whether you’re a beginner or a seasoned player. Learn more about the Giant Mole on the OSRS Wiki.
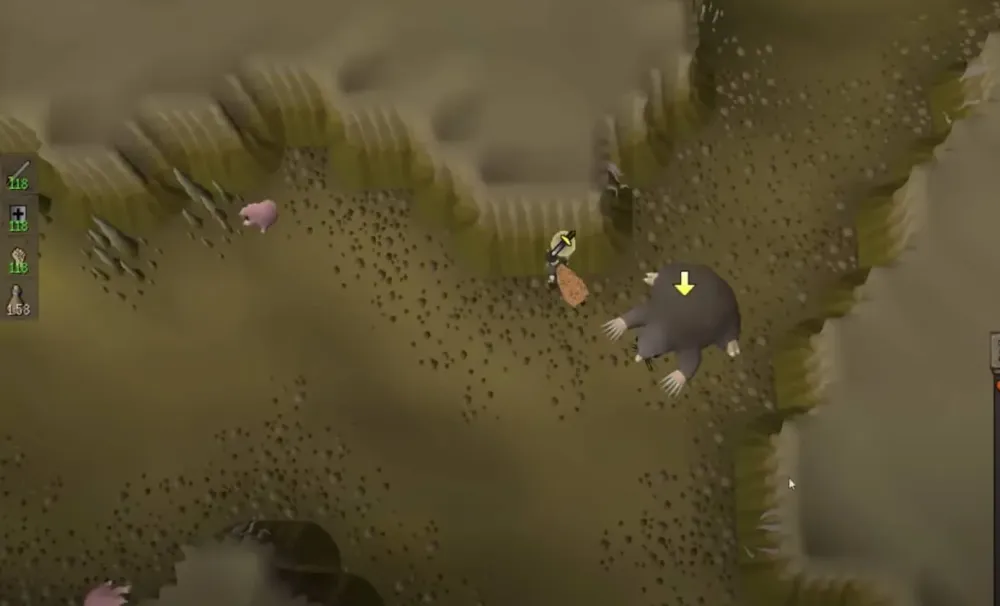
The Giant Mole, or Talpidae wysonian, resides in a multi-combat area under Falador Park, accessible by digging with a spade at molehills. It’s designed for players around combat level 60, making it one of the most accessible bosses in OSRS. The boss drops hard and elite clue scrolls, alongside mole-specific items, offering decent gold per hour (GP/h) for low to mid-level players. Its special attacks, like burrowing and rapid movement, can catch unprepared players off guard, but with the right approach, it’s a straightforward fight.
Why Fight the Giant Mole?
Fighting the Giant Mole offers several benefits:
- Accessibility: Low combat requirements make it ideal for newer players.
- Loot Potential: Drops like clue scrolls and mole skins provide consistent GP.
- Pet Chance: The Baby Mole pet is a rare flex for collectors.
- Learning Curve: Perfect for practicing basic boss mechanics.
Location and Requirements
The Falador Mole Lair is located under Falador Park. To access it, you’ll need:
- Spade: To dig into the lair.
- Light Source: The lair is dark; a bullseye lantern or seers’ headband is recommended.
- Tinderbox: Optional for relighting your light source.
- Falador Hard Diary (Optional): Unlocks a teleport to the lair, significantly speeding up runs.
Combat stats of 60+ in melee or ranged are suggested for efficient kills, though lower levels can manage with careful strategy.
Combat Strategies for the Giant Mole

The Giant Mole has 200 hitpoints and uses melee attacks, with two special mechanics: burrowing to random spots in the lair and a stun attack that can deal moderate damage. Its low defense makes it vulnerable to most combat styles, but melee and ranged are the most popular. Below are tailored strategies for each.
Melee Strategy
Melee is the most common approach due to its simplicity and effectiveness. The Mole’s large size allows for easy positioning, and high-damage weapons shine here.
- Positioning: Stay near the center of the lair to spot the Mole when it burrows.
- Prayer: Use Protect from Melee to reduce damage from its standard attacks.
- Special Attacks: Watch for its burrow (it digs and reappears elsewhere) and stun (a small quake animation).
A popular melee setup is the Dharok’s set, which maximizes damage when your hitpoints are low, though it’s riskier for beginners.
Ranged Strategy
Ranged is safer for lower-level players or those avoiding melee’s close-quarters combat. It requires more attention to ammo and positioning.
- Weapon Choice: Use a dragon crossbow (if available) or rune crossbow with broad bolts for cost-efficiency.
- Safe Spotting: Lure the Mole to a corner and run to the opposite side of a tunnel to attack safely.
- Ammo Management: Bring 200–300 bolts per trip to avoid running out.
Ranged setups are ideal for players with 70+ Ranged and access to blessed dragonhide or void armor.
Dealing with Special Attacks
The Mole’s special attacks can disrupt your flow:
- Burrow: When it digs, run to the center of the lair and look for dirt piles indicating its new location.
- Stun Attack: If you see a quake animation, move a few tiles away to avoid 10–20 damage.
Completion of the Falador Hard Diary helps track the Mole’s location, as it highlights its burrow spots.
Recommended Gear and Inventory
Your gear and inventory setup depend on your combat style and budget. Below are beginner-friendly and advanced options, with a table summarizing key items.
Melee Gear Setup
For melee, prioritize strength and prayer bonuses. Here’s a breakdown:
| Slot | Beginner | Advanced |
|---|---|---|
| Head | Helm of Neitiznot | Neitiznot Faceguard |
| Body | Obsidian Platebody | Bandos Chestplate |
| Legs | Obsidian Platelegs | Bandos Tassets |
| Weapon | Abyssal Whip | Blade of Saeldor |
| Shield | Dragon Defender | Avernic Defender |
| Amulet | Amulet of Glory | Amulet of Torture |
Ranged Gear Setup
Ranged setups focus on accuracy and range bonuses:
| Slot | Beginner | Advanced |
|---|---|---|
| Head | Coif | Armadyl Helmet |
| Body | Black D’hide Body | Armadyl Chestplate |
| Legs | Black D’hide Chaps | Armadyl Chainskirt |
| Weapon | Rune Crossbow | Dragon Crossbow |
| Amulet | Amulet of Glory | Necklace of Anguish |
Inventory Setup
A typical inventory includes:
- Food: 5–10 sharks or monkfish for healing.
- Prayer Potions: 2–4 doses to maintain Protect from Melee or Piety.
- Spade: For entering the lair.
- Light Source: Bullseye lantern or equivalent.
- Teleport: Falador teleport tabs or runes for quick banking.
- Stamina Potion: 1–2 to reduce run energy depletion.
For ranged, add 200–300 bolts or arrows. Advanced players can bring a divine ranging potion for a boost.
Loot and Profitability
The Giant Mole’s loot is consistent, with potential for high-value drops. Its profitability depends on kill speed, gear, and diary completion.
Notable Drops
Key drops include:
- Mole Claw and Skin: Tradeable, worth 2–5k each, stackable for banking.
- Hard/Elite Clue Scrolls: Can yield millions if you get lucky with rewards.
- Baby Mole Pet: Rare (1/500 chance), a status symbol.
- Miscellaneous: Runes, ores, and noted items for extra GP.
Average loot per kill is around 10–20k, with 20–30 kills per hour yielding 200–600k GP/h.
Maximizing Efficiency
To boost profits:
- Complete Falador Hard Diary: Faster lair access and burrow tracking.
- Bank Frequently: Use Falador teleports to restock quickly.
- Optimize Kills: Practice luring and positioning to reduce downtime.
With high-end gear and diary perks, players report up to 800k GP/h on good runs.
Tips and Tricks for Success
These additional pointers will help you master the Giant Mole and avoid common pitfalls.
Preparation Tips
Before heading to the lair:
- Check Light Source: Ensure it’s fueled to avoid darkness damage.
- Quest Progress: Complete “Falador Hard Diary” tasks for efficiency.
- Practice: Do a few test runs to learn burrow patterns.
Combat Tips
During the fight:
- Stay Mobile: Keep run on to chase the Mole after it burrows.
- Conserve Prayer: Toggle Protect from Melee only when the Mole is attacking.
- Watch Health: Eat at 50% HP to avoid stun attack knockouts.
Common Mistakes to Avoid
Steer clear of these errors:
- No Light Source: Leads to constant damage from darkness.
- Overloading Inventory: Limits food and potion space, risking death.
- Ignoring Burrows: Wastes time searching for the Mole.
With this guide, you’re ready to tackle the Giant Mole in OSRS. Whether you’re after GP, clues, or the Baby Mole pet, consistent practice and the right setup will make your trips efficient and rewarding. Head to Falador Park, grab your spade, and start digging!
