Your cart is empty
OSRS Infernal Cape Strategy Guide for Success

The Infernal Cape is the ultimate prize for Old School RuneScape (OSRS) players tackling the Inferno, a grueling solo PvM challenge. With 69 waves of increasingly tough enemies and a final showdown against TzKal-Zuk, earning this cape demands skill, preparation, and patience. This guide dives into proven strategies to help you conquer the Inferno and claim your Infernal Cape. Whether you’re a seasoned player or a determined newcomer, these tips will boost your chances of success.
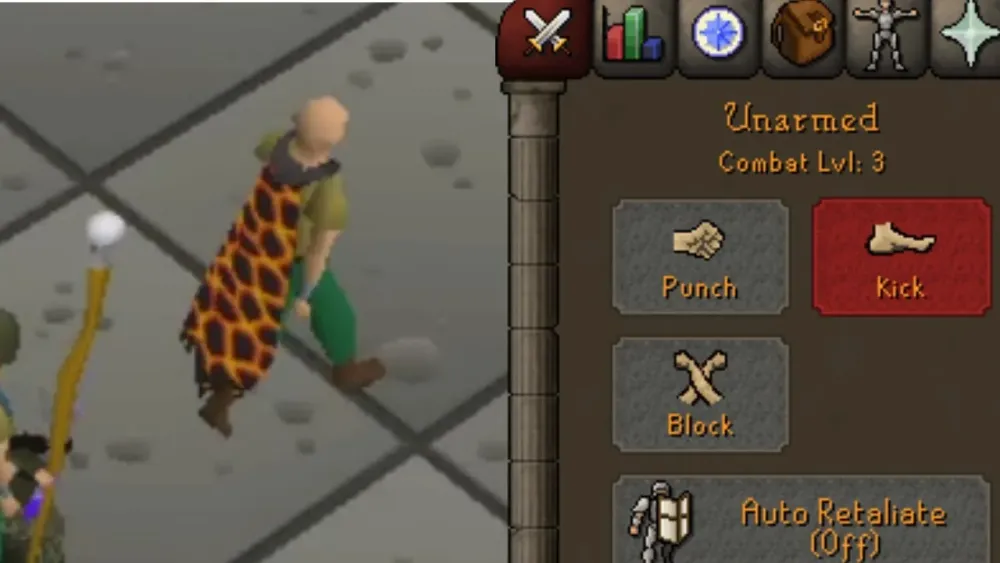
The Inferno is a step up from the TzHaar Fight Caves, requiring you to defeat waves of monsters while managing limited resources. To access it, you must sacrifice a Fire Cape to TzHaar-Ket-Keh in Mor Ul Rek. The reward? The Infernal Cape, boasting +8 strength, +4 to all attack bonuses, and +12 to all defense bonuses—making it the best melee cape in OSRS.
Why the Infernal Cape Matters
Beyond its stellar stats, the Infernal Cape is a badge of prestige. As of April 2025, over 119,000 players have earned it, but it remains a rare achievement. It’s a must-have for high-level PvM content like Theatre of Blood or Nightmare of Ashihama, where every stat boost counts.
What to Expect in the Inferno
You’ll face 69 waves, with enemies like Jal-Nib (Nibblers), Jal-Ak (Blobs), Jal-ImKot (Meleers), Jal-Xil (Rangers), Jal-Zek (Magers), and multiple TzTok-Jads in later waves. The final boss, TzKal-Zuk, tests every skill you’ve honed. Expect to fail multiple times—most players need 30–50 attempts (around 30 hours) to succeed.
Preparation and Gear Setup

Before stepping into the Inferno, optimize your gear and inventory. High combat stats (90+ Attack, Strength, Defense, Ranged, Magic; 77+ Prayer) are crucial, as is top-tier equipment.
Recommended Gear
Ranged is the go-to combat style for its versatility and safespot potential. Here’s a sample setup:
| Slot | Item | Alternative |
|---|---|---|
| Head | Ancestral Hat | Armadyl Helmet |
| Cape | Ava’s Assembler | Ranging Cape |
| Neck | Occult Necklace | Amulet of Fury |
| Body | Ancestral Robe Top | Armadyl Chestplate |
| Legs | Ancestral Robe Bottom | Armadyl Chainskirt |
| Weapon | Twisted Bow | Armadyl Crossbow |
| Shield | Crystal Shield | Book of Darkness |
| Gloves | Barrows Gloves | Void Knight Gloves |
| Boots | Pegasian Boots | Ranger Boots |
| Ring | Archers Ring (i) | Ring of Suffering (i) |
Inventory Setup
Your inventory should balance damage, healing, and prayer restoration:
- Twisted Bow or Armadyl Crossbow for primary damage
- Toxic Blowpipe (5,000 scales, 1,500 dragon darts) for quick kills
- Rune Pouch with 5,000 soul, blood, and death runes for Blood/Ice Barrage
- 8 Saradomin Brews for healing
- 11 Super Restores for prayer and stat restoration
- 2 Bastion Potions for ranged and defense boosts
- 1 Stamina Potion for run energy
Boosting Stats Before Entry
Maximize your stats at the bank:
- Sip a dose of Bastion Potion for Ranged and Defense boosts.
- Eat an Anglerfish to overboost Hitpoints.
- Use an Ancient Mace special attack on an undead combat dummy to gain up to 38 extra Prayer points.
Mastering Inferno Mechanics
The Inferno’s difficulty lies in multitasking: prayer switching, safespotting, and prioritizing targets. Understanding monster behaviors is key.
Monster Breakdown
- Jal-Nib (Nibbler): Low HP, attacks pillars. Kill quickly to protect safespots.
- Jal-Ak (Blob): Splits into smaller blobs when killed. Pray against its strongest attack style.
- Jal-ImKot (Meleer): Short attack range. Safespot behind pillars.
- Jal-Xil (Ranger): Long-range attacks. Pray Protect from Missiles.
- Jal-Zek (Mager): Revives dead monsters. Pray Protect from Magic.
- TzTok-Jad: Appears in waves 67–68. Watch for stomp (Melee), boulder (Ranged), or fireball (Magic) and switch prayers.
Safespotting Basics
Use the three pillars to block line-of-sight from most monsters, except Nibblers and Meleers, which have short ranges. Position yourself to attack one enemy at a time while keeping others out of range. For Blobs, confirm safespots by noting if they stop moving toward you—their attacks are delayed, so stay alert.
Prayer Flicking Tips
Prayer flicking conserves points, especially for Protect from Missiles and Magic. Practice one-tick flicking to maintain prayers without draining points. Game sounds are critical—attacks like Jad’s have distinct audio cues, helping you switch prayers even if you can’t see the animation.
Wave-by-Wave Strategy
Each wave introduces tougher combinations, culminating in triple Jads and TzKal-Zuk. Here’s how to approach key phases:
Early Waves (1–30)
Focus on learning monster spawns and safespotting. Kill Nibblers immediately to protect pillars, then prioritize Blobs or Rangers. Use your Blowpipe for quick kills and conserve supplies by flicking prayers.
Mid Waves (31–66)
Complexity increases with multiple high-damage monsters. Always kill Magers (Jal-Zek) early to prevent revives. Use Blood Barrage to heal off weaker enemies like Nibblers when safe. If overwhelmed, hide behind a pillar, reassess, and tackle one enemy at a time.
Triple Jads (Waves 67–68)
Wave 67 spawns three Jads, and wave 68 adds more monsters. Stay behind the northeast pillar, praying against the first Jad you see. Switch prayers based on audio cues (hiss for Magic, stomp for Melee, click for Ranged). Kill one Jad at a time, using your Twisted Bow for accuracy.
Defeating TzKal-Zuk
TzKal-Zuk, the level 1400 final boss, hits hard and summons adds like healers and Jads. Here’s how to beat him:
Zuk Fight Mechanics
- Shield Phase: Zuk starts with a shield at 600 HP. Stand behind the floating shield to block his attacks.
- Healers: At 480 HP, four healers spawn. Use Ice Barrage to freeze them or kill them with your Blowpipe.
- Jad Spawns: Every 90 seconds, a Jad or Ranger/Mager set spawns. Deal with them immediately, prioritizing prayer switches.
- Zuk’s Attacks: Pray Protect from Magic for his fireballs. Avoid standing in lava pools he creates.
Step-by-Step Zuk Strategy
- Position behind the shield and chip away at Zuk with your Twisted Bow, praying Protect from Magic.
- When healers spawn, freeze them with Ice Barrage or kill them quickly to refocus on Zuk.
- Listen for Jad spawns. Switch prayers and kill Jad before returning to Zuk. Use the northeast pillar if needed.
- Keep your HP above 70 with Saradomin Brews to survive unexpected hits.
- Once Zuk hits 0 HP, all remaining monsters die, and you’ll earn your Infernal Cape!
Managing Supplies
Don’t skimp on supplies—use Brews and Restores liberally early on to stay alive. Save at least 4 Brews and 6 Restores for Zuk, as the fight can last 10+ minutes. If low on prayer, use Blood Barrage on healers to regain HP without drinking.
Earning the Infernal Cape is a monumental task, but with practice and these strategies, it’s within reach. Stay calm, learn from each attempt, and don’t rush. Your persistence will pay off with one of OSRS’s most coveted rewards. Good luck, adventurer!
