Your cart is empty

Alchemical Hydra OSRS Guide
The Alchemical Hydra is one of the most engaging and rewarding Slayer bosses in Old School RuneScape (OSRS). Found in the Karuulm Slayer Dungeon, this level 426 beast requires 95 Slayer and a Hydra task to challenge. Known for its unique mechanics, multi-phase fight, and valuable loot, mastering the Alchemical Hydra can significantly boost your Slayer XP and bank value. This comprehensive guide covers everything you need to know, from preparation and gear to strategies for each phase, ensuring you can tackle this formidable foe with confidence.
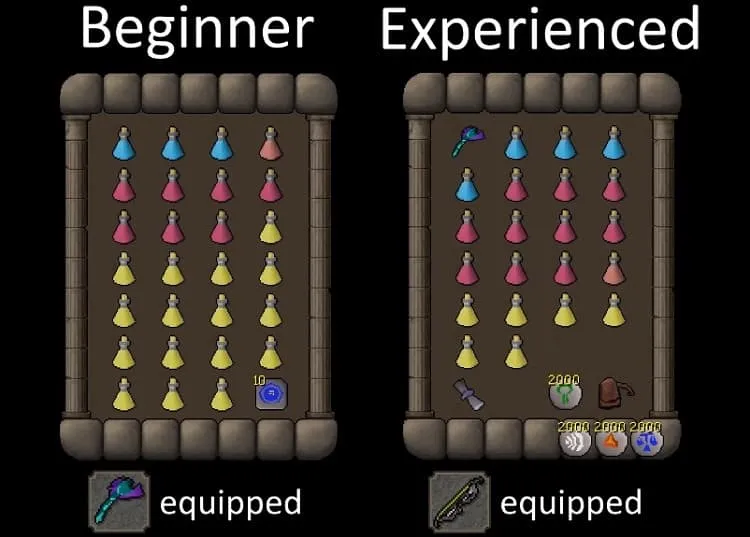
Before heading to the Karuulm Slayer Dungeon, proper preparation is key. The Alchemical Hydra’s complex mechanics demand specific gear, inventory setups, and knowledge of the fight. Let’s break down what you need to succeed.
Requirements
To fight the Alchemical Hydra, you must meet the following:
- 95 Slayer: Required to receive a Hydra task from Konar.
- Hydra Slayer Task: Only Konar assigns Hydras, and the boss can only be fought on-task.
- Access to Karuulm Slayer Dungeon: Located in Mount Karuulm, west of Lovakengj.
- Boots of Stone, Brimstone, or Granite: Protects against the dungeon’s heated floor unless you’ve completed the Elite Kourend & Kebos Diary.
Optional but helpful:
- 88 Agility: For the mysterious pipe shortcut to the boss lair.
- 43+ Prayer: For Protect from Magic and Missiles.
- 75+ Ranged: Recommended for the most effective combat style.
Recommended Gear
Ranged is the preferred combat style due to the Hydra’s lower Ranged defense and the safety of distance. Below is a table of recommended gear setups for different budgets.
| Slot | High-End Gear | Mid-Tier Gear | Budget Gear |
|---|---|---|---|
| Head | Slayer Helmet (i) | Black Mask (i) | Neitiznot Helm |
| Neck | Necklace of Anguish | Amulet of Fury | Amulet of Glory |
| Weapon | Toxic Blowpipe (Amethyst/Dragon Darts) | Dragon Hunter Crossbow | Rune Crossbow (Ruby Bolts (e)) |
| Body | Armadyl Chestplate | Blessed D’hide Body | Black D’hide Body |
| Legs | Armadyl Chainskirt | Blessed D’hide Chaps | Black D’hide Chaps |
| Boots | Pegasian Boots | Blessed D’hide Boots | Boots of Brimstone |
| Cape | Ava’s Assembler | Ava’s Accumulator | Ava’s Attractor |
| Ring | Archers Ring (i) | Ring of Suffering (i) | Ring of Wealth |
Notes: Use Ruby Bolts (e) for high hits early in the fight, switching to Diamond Bolts (e) or a Blowpipe in later phases. The Dragon Hunter Crossbow is excellent due to the Hydra’s draconic nature, boosting accuracy and damage.
Inventory Setup
Your inventory should balance combat sustainability and utility. A suggested setup includes:
- 2-3 Ranging Potions: Boosts Ranged for higher damage.
- 2 Antidote++: Counters poison from special attacks.
- 8-10 Prayer Potions: Maintains Protect prayers.
- High-healing Food: Sharks, Manta Rays, or Anglerfish (8-10).
- Rune Pouch: With High Alchemy runes for noted drops.
- House Teleport Tablet: For quick banking.
- 1-2 Super Restores: Optional for prayer restoration.
Getting to the Alchemical Hydra
The Alchemical Hydra resides in an instanced lair within the Karuulm Slayer Dungeon. Here’s how to reach it efficiently.
Travel Options
You have several ways to get to the boss:
- Rada’s Blessing 3/4: Teleports directly to Mount Karuulm (3 daily uses for Hard Diary, unlimited for Elite).
- Fairy Ring (CIR): Teleports near the Farming Guild, then run southwest to the dungeon.
- Skills Necklace: Teleport to the Farming Guild, then head southwest.
- Agility Shortcut: With 88 Agility, use the mysterious pipe behind Kaal-Ket-Jor for direct access to the lair.
From the dungeon entrance, run north past the Tasakaal, then east past regular Hydras to reach Orrvor quo Maten, who guards the lair entrance. The fight is instanced, so if you die, you can reclaim items from Orrvor for 100,000 coins (but lose them if you die elsewhere before reclaiming).
Understanding the Alchemical Hydra’s Mechanics
The Alchemical Hydra fight consists of four phases, each triggered at 75%, 50%, and 25% health (825, 550, and 275 Hitpoints). The boss uses Ranged and Magic attacks, switching styles every three attacks, and has unique special attacks per phase. Its carapace provides 75% damage reduction unless lured to the correct chemical vent.
Phase Overview
- Phase 1 (Green Carapace): Lure to the red vent. Features poison pool attacks.
- Phase 2 (Blue Carapace): Lure to the green vent. Features lightning attacks.
- Phase 3 (Red Carapace): Lure to the blue vent. Features fire wall attacks.
- Phase 4 (Grey Carapace): No vent needed. Alternates combat styles every attack with increased speed.
Warning: Luring the Hydra to the wrong vent increases its enrage stack, boosting its damage output significantly.
Attack Patterns
The Hydra’s attacks are predictable:
- Ranged: Fanged projectile from the right head.
- Magic: Two green projectiles from the left head.
- Pattern: Three attacks of one style, then switches. In Phase 4, it alternates every attack.
Use Protect from Missiles for Ranged and Protect from Magic for Magic. Prayer flicking is essential in Phase 4 to avoid high damage (up to 55 per hit).
Strategies for Each Phase
Each phase requires specific positioning and awareness to maximize damage and minimize risk. Here’s a detailed breakdown.
Phase 1: Green Carapace (Poison)
Start by standing near the red chemical vat in the southeast corner. When the Hydra spawns, it’s automatically lured over the red vent, removing its damage reduction.
- Special Attack: After three auto-attacks, the Hydra launches 4-5 poison blobs in a 3×3 area around you, dealing up to 12 damage per tick if you stand in them.
- Strategy: Move west two tiles when you see the Hydra rear back to spit poison. Stay near the red vat to keep the Hydra on the vent.
- Prayer: Flick between Protect from Missiles and Magic based on the attack style (watch for fanged vs. green projectiles).
At 75% health (825 HP), the bottom-right head falls off, transitioning to Phase 2. Run to the green vent in the northeast corner.
Phase 2: Blue Carapace (Lightning)
Lure the Hydra to the green vent to remove its damage reduction.
- Special Attack: The Hydra launches an electric ball to the room’s center, spawning four lightning currents in random corners. These converge on your position, dealing up to 22 damage and binding you if hit.
- Strategy: Start near the room’s center, then loop around one of the last lightning spawns to escape the converging box. Stay near the green vent to keep the Hydra in place.
- Prayer: Continue flicking prayers based on attack style.
At 50% health (550 HP), the bottom-left head falls off, moving to Phase 3. Run west to the blue vent.
Phase 3: Red Carapace (Fire)
Lure the Hydra to the blue vent in the southwest corner.
- Special Attack: The Hydra moves to the center, creating two 5×5 fire walls on either side of you, followed by a tracking fire trail. Getting hit deals 20 initial damage plus 5 per tick for 5 ticks.
- Strategy: Turn off run and walk to avoid the fire trail. Stay near the blue vent to maintain the Hydra’s position. Attack while moving to keep DPS up.
- Prayer: Flick prayers as before.
At 25% health (275 HP), the middle head falls off, entering Phase 4. No vent is needed here.
Phase 4: Grey Carapace (Enraged)
The Hydra becomes enraged, with no damage reduction removable by vents. Its attack speed increases to every 4 ticks, and it alternates Ranged and Magic every attack.
- Special Attack: Reuses poison attacks from Phase 1 after every 3-9 normal attacks.
- Strategy: Prayer flick precisely between Protect from Missiles and Magic for each attack. The first attack is the opposite style of the last attack in Phase 3 (e.g., if Phase 3 ended with Magic, Phase 4 starts with Ranged). Move to avoid poison blobs as in Phase 1.
- Tip: Stay focused, as mistakes can lead to hits up to 55 damage.
Once defeated, the Hydra respawns in 20 seconds, allowing you to loot and prepare for the next kill.
Loot and Rewards
The Alchemical Hydra is highly profitable, with an average kill value of around 190,000 GP when on a Konar task. Its drop table includes regular loot like noted herbs, runes, and dragon items, plus unique drops:
- Hydra’s Eye, Fang, Heart: Combine to create the Brimstone Ring, a best-in-slot tribrid ring.
- Hydra Leather: Crafts Ferocious Gloves.
- Hydra Tail: Used for the Bonecrusher Necklace.
- Hydra Claw: Creates the Dragon Hunter Lance.
- Alchemical Hydra Heads: Trophy item for the Slayer lodge.
- Jar of Chemicals: Rare decorative item.
- Ikkle Hydra: A rare pet drop (1/3,000 chance).
With 25-28 kills per hour possible at max efficiency, the Hydra offers 1,320 Slayer XP per kill, making it a top-tier choice for both profit and training.
Tips for Maximizing Efficiency
- Use Tile Markers: Mark vent positions to streamline luring.
- Practice Prayer Flicking: Especially in Phase 4 to avoid damage.
- High Alchemy: Alch noted drops to save inventory space.
- Extend Tasks: Use a Bracelet of Slaughter to prolong Hydra tasks.
With practice, the Alchemical Hydra becomes a manageable and lucrative boss. Focus on mastering vent luring, prayer switching, and dodging special attacks to optimize your kills. Happy Slaying!
