Your cart is empty

OSRS Demonic Gorilla Gear Guide for Maximum Efficiency

Demonic gorillas in Old School RuneScape (OSRS) are a challenging yet rewarding foe, dropping valuable items like zenyte shards and ballista components. Found in the Crash Site Cavern after completing Monkey Madness II, these level 275 monsters require careful preparation due to their unique mechanics. They switch between all three combat styles—melee, ranged, and magic—after missing three hits and change protection prayers based on your attacks. This guide dives into the best gear setups, inventory recommendations, and strategies to optimize your kills, whether you’re a seasoned player or just starting out.
Before gearing up, it’s crucial to grasp how demonic gorillas operate. They use protection prayers, switching to counter your attack style after you deal 50 damage. They also change their combat style after three missed hits, forcing you to adapt quickly. Additionally, they can toss a boulder when using ranged or magic, dealing 33% of your health in damage if you don’t move. These mechanics make gear switching and prayer management essential for success.
Why Gear Matters
Your gear directly impacts your damage output and survivability. Since you’ll need at least two combat styles (melee and ranged are most common due to their high magic defense), choosing equipment that balances offense and defense while minimizing switches is key. High-level gear boosts kills per hour, but budget setups can still get the job done with practice.
Recommended Gear Setups
Demonic gorillas demand a hybrid approach, typically combining melee and ranged gear. Below are setups for different budgets, prioritizing damage and efficiency. Most players stick to melee and ranged because of the gorillas’ high magic defense, but we’ll cover alternatives too.
High-End Gear Setup
For players with deep pockets, this setup maximizes damage per second (DPS) and trip length. It assumes access to best-in-slot (BiS) items and focuses on 3–4 item switches to keep things manageable.
- Helmet: Slayer Helmet (i) (on task) or Neitiznot Faceguard
- Amulet: Amulet of Torture (melee), Necklace of Anguish (ranged)
- Cape: Infernal Cape or Fire Cape
- Body: Bandos Chestplate (melee), Armadyl Chestplate (ranged)
- Legs: Bandos Tassets (melee), Armadyl Chainskirt (ranged)
- Weapon: Arclight with Avernic Defender (melee), Toxic Blowpipe with Amethyst Darts (ranged)
- Shield: None (Avernic Defender for melee)
- Gloves: Ferocious Gloves or Barrows Gloves
- Boots: Primordial Boots (melee), Pegasian Boots (ranged)
- Ring: Berserker Ring (i) (melee), Archer’s Ring (i) (ranged)
Note: If you own a Twisted Bow, it’s a game-changer for ranged due to the gorillas’ high magic level, but it’s overkill for most.
Mid-Tier Gear Setup
This setup is for players with decent stats (80+ combat skills) but without millions to spend. It balances cost and performance, keeping switches simple.
- Helmet: Slayer Helmet (i) (on task) or Helm of Neitiznot
- Amulet: Amulet of Fury or Glory
- Cape: Fire Cape or Ardougne Cloak
- Body: Fighter Torso (melee), Black D’hide Body (ranged)
- Legs: Obsidian Platelegs or Black D’hide Chaps
- Weapon: Abyssal Whip or Blade of Saeldor (melee), Rune Crossbow with Broad Bolts (ranged)
- Shield: Dragon Defender (melee)
- Gloves: Barrows Gloves or Combat Bracelet
- Boots: Dragon Boots or Ranger Boots
- Ring: Ring of Suffering (i) or Warrior Ring
Tip: The Rune Crossbow is a solid budget ranged option, offering decent DPS without the cost of a Blowpipe.
Budget Gear Setup
For low-level players or those on a tight budget, this setup works with minimal investment. Expect slower kills, but it’s viable with practice.
- Helmet: Helm of Neitiznot or Obsidian Helmet
- Amulet: Amulet of Strength or Glory
- Cape: Obsidian Cape or Skill Cape
- Body: Proselyte Hauberk (melee), Black D’hide Body (ranged)
- Legs: Proselyte Tasset or Black D’hide Chaps
- Weapon: Dragon Scimitar (melee), Magic Shortbow with Rune Arrows (ranged)
- Shield: Rune Defender or Book of War
- Gloves: Regen Bracelet or Mithril Gloves
- Boots: Climbing Boots or Rune Boots
- Ring: Ring of Wealth or Recoil
Pro Tip: Stick to single-way combat areas to avoid being overwhelmed, especially with weaker gear.
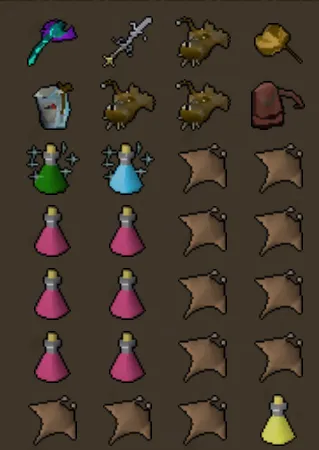
Inventory Setup
Your inventory should support long trips while keeping switches efficient. Here’s a recommended setup for most players, adjustable based on your gear and skill level.
| Item | Purpose |
|---|---|
| Super Combat Potion | Boosts Attack, Strength, and Defense |
| Ranging Potion | Boosts Ranged for Blowpipe/Crossbow |
| Prayer Potions (4–6) | Restores Prayer for Protection Prayers |
| Saradomin Brews (2–4) | Emergency healing and stat restoration |
| Sharks/Monkfish (14–18) | Primary food source |
| Teleport (Royal Seed Pod) | Quick escape to Grand Tree |
| Special Attack Weapon (e.g., Dragon Dagger) | Optional for burst damage |
Note: If using Guthan’s equipment for healing, replace some food with Guthan’s pieces, but expect slower kills due to lower DPS.
Inventory Tips for Efficiency
- Potion Management: Sip potions early to maintain boosts without wasting inventory space.
- Food Balance: Bring enough food to survive mistakes but don’t overpack—10–12 kills per trip is realistic with good gear.
- Spec Weapon: A Dragon Dagger or Saradomin Godsword can help with quick damage bursts, especially on Slayer tasks.
Combat Strategies and Gear Switching
Killing demonic gorillas efficiently hinges on mastering gear switches and prayer flicking. Here’s how to approach the fight step-by-step.
Prayer Switching Basics
Demonic gorillas’ attacks are telegraphed by animations:
- Melee: Swipes claws downward—use Protect from Melee.
- Ranged: Throws a boulder—use Protect from Missiles.
- Magic: Emits a green orb—use Protect from Magic.
Start with Protect from Magic, as their first attack is often magic-based. Switch prayers reactively based on their animations, and always move one tile to dodge boulder tosses when they’re using ranged or magic.
Gear Switching Flow
When the gorilla switches its protection prayer (after you deal 50 damage), swap your attack style:
- If Protect from Melee: Switch to ranged gear (e.g., Blowpipe, Armadyl pieces).
- If Protect from Missiles: Switch to melee gear (e.g., Arclight, Bandos pieces).
- If Protect from Magic: Rare, but use melee or ranged as magic attacks are inefficient.
Minimize switches to 2–4 items (e.g., weapon, necklace, body, legs) to avoid fumbling. Practice in single-way combat areas to get the rhythm down.
Using Plugins for Ease
If you use RuneLite, the Demonic Gorilla plugin is a lifesaver. It tracks attack counts, predicts switches, and highlights boulder tosses, reducing mental load. This is especially helpful for beginners or when learning prayer flicking.
Tips for Maximizing Profit and XP
Demonic gorillas are a solid money-maker, averaging 90k per kill with zenyte shards (worth millions) being the big prize. Here’s how to boost your efficiency and rewards.
Slayer Task Advantage
On a black demon or monkey Slayer task, demonic gorillas count toward your kill count. Use a Slayer Helmet (i) for a 15% damage and accuracy boost, and bring Arclight for extra damage against demons (up to 70% boost with charges). This significantly speeds up kills and increases profit.
Profit Expectations
With decent gear and stats, expect 50–60 kills per hour, yielding 700k–3M GP per hour depending on zenyte shard drops. Without shards, profit drops to ~20k per kill, so prioritize long trips to maximize rare drop chances. Here’s a breakdown:
- Common Drops: Rune items, seeds, herbs (~20k–30k per kill).
- Rare Drops: Zenyte shards (~10M+), ballista parts (~500k–1M).
- Hourly Profit: Varies widely—shards make or break big gains.
Combat Achievement Tasks
Two Combat Achievement tasks offer 8 points total:
- Demonic Defence: Kill a gorilla without taking damage (requires perfect prayer switches).
- Shayzien Protector: Kill a gorilla in full Shayzien armor (niche but doable).
These add extra goals for experienced players and unlock rewards like cosmetics or Slayer point boosts.
With the right gear, inventory, and strategies, demonic gorillas become a manageable and profitable grind. High-end setups like Arclight and Blowpipe shine, but mid-tier and budget options work with practice. Focus on mastering prayer and gear switches, use plugins if needed, and capitalize on Slayer tasks for maximum efficiency. Whether you’re chasing zenyte shards or combat XP, this guide equips you to tackle the Crash Site Cavern with confidence. Happy hunting!
