Your cart is empty

OSRS Olm Tile Markers: Your Guide to Mastering Chambers of Xeric
Old School RuneScape (OSRS) players know that tackling the Chambers of Xeric (CoX) raid is no small feat. At the heart of this challenging raid lies the Great Olm, a formidable boss that demands precision, teamwork, and strategy. One of the most effective tools for success in this encounter is the use of Olm tile markers. These markers help players navigate the boss’s mechanics, avoid deadly attacks, and optimize their positioning. In this comprehensive guide, we’ll dive into everything you need to know about OSRS Olm tile markers, from what they are to how to use them effectively for a smoother CoX experience.
Olm tile markers are visual indicators placed on the game’s floor tiles within the Chambers of Xeric raid. They’re typically used with the RuneLite client, a popular third-party tool for OSRS, to mark specific spots that guide players during the Great Olm fight. These markers simplify the chaos of Olm’s attack patterns, helping teams coordinate movements and avoid damage.
Why Tile Markers Matter
The Great Olm uses a variety of attacks—such as Crystal Burst, Lightning, and Falling Crystals—that require players to stand on or avoid specific tiles. Without markers, keeping track of safe spots or key positions can be overwhelming, especially in larger groups. Tile markers provide a clear, visual reference, reducing the mental load and boosting efficiency.
How RuneLite Enhances the Experience
RuneLite’s Ground Markers plugin is the go-to tool for setting up Olm tile markers. It allows players to mark tiles by holding Shift, right-clicking a tile, and selecting “Mark tile.” These markers persist between sessions and can be customized with colors and border thickness, making them a must-have for serious raiders.
How to Set Up Olm Tile Markers

Setting up tile markers for Olm is straightforward with RuneLite, but it requires some preparation. Whether you’re a solo raider or part of a team, here’s how to get started.
Step-by-Step Setup Guide
- Install RuneLite: If you haven’t already, download and install the RuneLite client from its official website.
- Enable Ground Markers: Open the RuneLite settings, navigate to the “Plugins” section, and toggle on the Ground Markers plugin.
- Marking Tiles: In-game, hold Shift, right-click a tile in the Olm room, and select “Mark tile.” Adjust the color and style as needed.
- Importing Markers: For pre-made setups, copy a tile marker string (available from community resources like RuneMarkers.net) and import it via the Ground Markers menu.
- Syncing with a Team: Share your exported marker string with teammates to ensure everyone’s on the same page.
Where to Find Pre-Made Olm Tile Markers
Communities like RuneMarkers.net and Reddit’s r/2007scape offer pre-made Olm tile marker sets. These often include safe spots for mechanics like the mage hand, melee hand, and crystal bomb phases, saving you the hassle of manual placement.
Key Olm Mechanics and Tile Marker Strategies
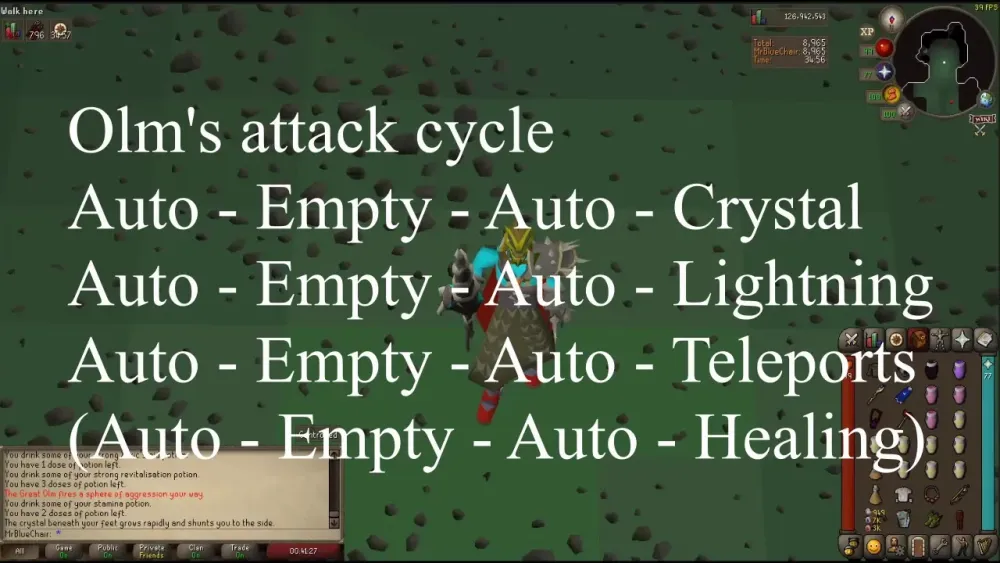
The Great Olm’s fight is split into phases, each with unique mechanics that tile markers can help you master. Let’s break down the most critical ones and how markers play a role.
Crystal Burst
Olm throws crystal seedlings under players, which explode after a delay, pushing anyone standing on them to a nearby tile and dealing heavy damage. Markers can indicate safe retreat spots to avoid the blast radius.
Lightning Attack
Lightning bolts streak across the room, binding and damaging players caught in their path. Tile markers can highlight safe lanes or endpoints where players should stand to avoid getting zapped.
Falling Crystals
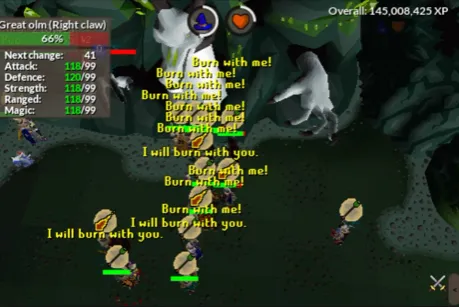
During phase transitions and the final phase, Olm summons falling crystals that deal area-of-effect damage. Markers can pinpoint safe zones or warn of high-risk areas, especially for the targeted player with the red aura.
Swap (Teleport) Attack
Olm teleports players, dealing more damage the farther they are from the target tile. Pre-marked tiles can help players quickly reposition to minimize damage, especially in solo or small-team runs.
Best Practices for Using Olm Tile Markers
While tile markers are powerful, using them effectively requires some know-how. Here are tips to maximize their impact and keep your raid team thriving.
Consistency Is Key
Ensure your team uses the same marker setup. Export your markers via RuneLite’s World Map orb (right-click to export) and share the string with your group. Inconsistent markers can lead to confusion and wipes.
Color Coding for Clarity
Assign distinct colors to different mechanics—e.g., green for safe spots, red for danger zones, and blue for hand positions. This visual distinction helps players react faster under pressure.
Adapting to Team Size
Tile marker setups vary by team size. Solo players might prioritize safe spots for all mechanics, while larger teams might mark roles like “mage hand tank” or “runner.” Adjust your markers based on your group’s strategy.
Practice Makes Perfect
Don’t expect to nail Olm on your first marked run. Spend time in practice raids to familiarize yourself with the markers and tweak them as needed. Experience will refine your setup over time.
Olm Tile Marker Examples and Layouts
To give you a head start, here are some practical examples of Olm tile marker layouts, tailored to common strategies. These can be imported into RuneLite or used as inspiration for your own setup.
Solo Olm Layout
For solo raiders, simplicity is crucial. A basic layout might include:
- Green Markers: Safe spots for Crystal Burst retreat.
- Red Markers: Danger zones for Falling Crystals.
- Blue Marker: Mage hand tanking position.
Team Olm Layout (4-6 Players)
In mid-sized teams, coordination is vital. A sample layout could look like this:
| Marker Color | Purpose | Location |
|---|---|---|
| Green | Safe lane for Lightning | North-south center tiles |
| Yellow | Melee hand tank spot | Near Olm’s right claw |
| Red | Crystal Bomb avoidance | Outer edges of room |
| Blue | Mage hand tank spot | Near Olm’s left claw |
Advanced Layout for Large Teams
For 10+ players, you might add role-specific markers:
- Purple Markers: Runner positions for Swap attack.
- Orange Markers: Healing pool spots for Life Siphon phase.
- White Markers: DPS stack points for final phase.
These layouts are just starting points—tweak them based on your team’s playstyle and Olm’s random attack patterns.
Mastering the Great Olm in OSRS is a rite of passage for any serious raider, and tile markers are your secret weapon. By setting up and using them effectively, you’ll turn a chaotic boss fight into a manageable challenge. Whether you’re dodging lightning, tanking the mage hand, or coordinating a full team, Olm tile markers bring clarity to the madness. So, grab RuneLite, mark those tiles, and dive into the Chambers of Xeric with confidence. Happy raiding!
