Your cart is empty
Best Bloodveld Spot in OSRS: Top Locations for Slayer Tasks in 2025

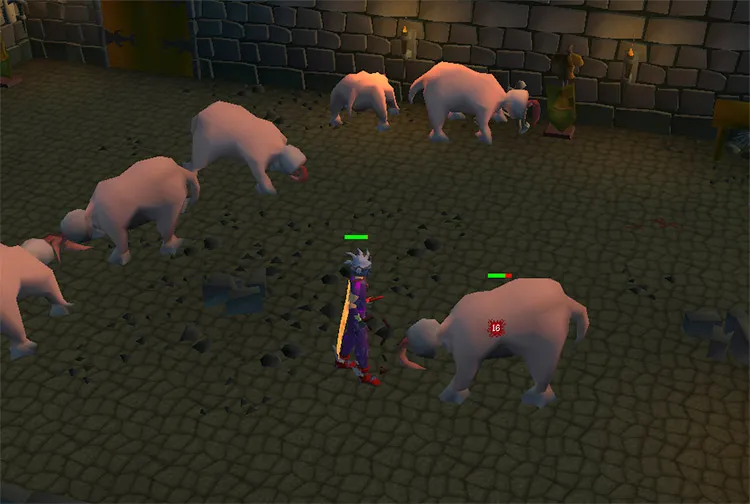
If you’re an Old School RuneScape (OSRS) player tackling a Bloodveld Slayer task, finding the best spot can make all the difference. Bloodvelds are demonic creatures requiring level 50 Slayer to damage, known for their high hitpoints, decent experience rates, and unique drops like blood runes and ensouled heads. Whether you’re aiming for fast XP, profit, or an AFK-friendly setup, this guide dives into the best Bloodveld spots in OSRS as of April 2025. Let’s explore the top locations, strategies, and tips to optimize your Slayer grind!
Bloodvelds stand out in OSRS due to their balance of accessibility and rewards. With a combat level of 76 (or 123 for mutated variants), they’re manageable for mid-level players while offering solid XP and loot potential. Their magic-based melee attacks require specific gear, but their low max hit (5-6) makes them forgiving with the right setup. Whether you’re cannoning for speed or safespotting for efficiency, picking the right spot is key to maximizing your time.
What Makes a Good Bloodveld Spot?
A top-tier Bloodveld location depends on your goals:
- Proximity to a Bank: Quick banking means less downtime.
- Multi-Combat Areas: Ideal for cannon or burst setups.
- Safespots: Great for AFK training or low-effort kills.
- Loot Potential: Mutated variants drop better loot like ancient shards.
- XP Rates: High-density spawns boost Slayer and combat XP.
Top 5 Bloodveld Spots in OSRS

Here’s a rundown of the best places to kill Bloodvelds in OSRS, ranked by efficiency, accessibility, and rewards.
1. Stronghold Slayer Cave: Best for Cannon Efficiency
The Stronghold Slayer Cave, located beneath the Tree Gnome Stronghold, is a fan favorite for Bloodveld tasks. With 12 spawns and a multi-combat area, it’s the go-to spot for players using a dwarf multicannon.
- Pros: Close to a bank (via Nieve/Steve), cannonable, decent spawn density.
- Cons: Requires a Slayer task to access, can get crowded.
- How to Get There: Use a Slayer ring teleport or Gnome Stronghold spirit tree.
- Strategy: Set up a cannon in the northeast corner, wear magic defense gear (e.g., dragonhide), and pray Protect from Melee.
XP Rates: Up to 40k-50k Slayer XP/hour with a cannon.
2. Catacombs of Kourend: Best for Mutated Bloodvelds and AFK
The Catacombs of Kourend house 18 mutated Bloodveld spawns, offering higher XP and better drops like ancient shards and dark totem pieces. This multi-combat dungeon is perfect for bursting or AFK melee setups.
- Pros: High HP mutated variants (120 HP), Prayer restoration mechanic, safespots available.
- Cons: Requires travel to Kourend, no cannon in single-combat zones.
- How to Get There: Teleport to Kourend Castle via fairy ring (CIR) or Xeric’s Talisman.
- Strategy: Use Ice Burst/Barrage with an alt to stack them, or AFK with Proselyte armor and Protect from Melee.
XP Rates: 60k+ Slayer XP/hour with bursting; 25k-30k with AFK melee.
3. Meiyerditch Laboratories: Best for Cannon and Profit
Hidden in Morytania, the Meiyerditch Laboratories feature 4 mutated Bloodveld spawns in a multi-combat area. It’s the only spot where you can cannon mutated Bloodvelds, making it ideal for profit-focused players.
- Pros: Cannonable mutated Bloodvelds, great loot (blood runes, vile ashes), relatively low traffic.
- Cons: Requires partial completion of Sins of the Father, longer travel time.
- How to Get There: Fairy ring DLS to the labs, then take the shortcut near Ivandis’ tomb.
- Strategy: Cannon the center of the room, use Arclight for demonbane boosts, and bring prayer potions.
Profit: Around 2.5k-3k GP per kill with mutated drops.
4. Slayer Tower: Best for Low-Level Players and Safespotting
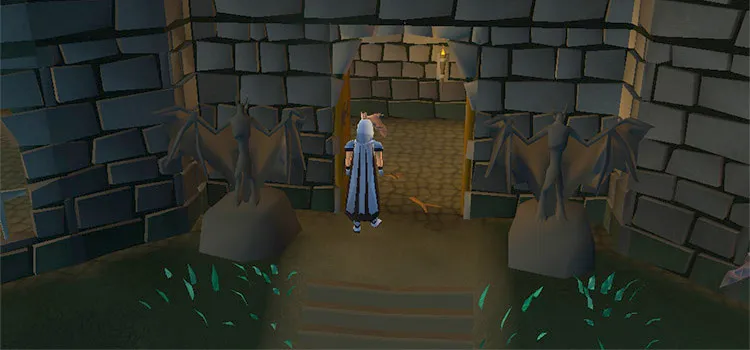
The Slayer Tower in Morytania has 15 Bloodveld spawns on the second floor (US). It’s a classic spot with safespots, making it perfect for lower-level players or those without high-end gear.
- Pros: Multiple safespots (northeast corner, armor stands), Morytania Diary XP boosts (up to 10%).
- Cons: Single-combat, no cannon, slower XP rates.
- How to Get There: Teleport to Slayer Tower via ring or Ectophial to Port Phasmatys.
- Strategy: Safespot behind the chair or wardrobes, wear dragonhide, and bring alch runes for fire rune drops.
XP Rates: 20k-25k Slayer XP/hour with safespotting.
5. Iorwerth Dungeon: Best for Crystal Shards
The Iorwerth Dungeon in Prifddinas offers mutated Bloodvelds with a chance to drop crystal shards, a rare resource for endgame gear. It’s a single-combat area but supports cannon use.
- Pros: Crystal shard drops, cannonable, quiet spot.
- Cons: Requires Song of the Elves, single-combat limits XP rates.
- How to Get There: Teleport to Prifddinas, head north to the dungeon entrance.
- Strategy: Cannon near the spawns, use ranged or melee with magic defense.
Profit: Crystal shards add 50k-100k GP/hour potential.
Gear and Inventory Setup for Bloodvelds
Bloodvelds use magic-based melee, so your gear should prioritize magic defense while maintaining offensive power. Here’s a recommended setup:
Melee Setup
- Helm: Slayer Helmet (on task)
- Chest: Proselyte Hauberk (prayer bonus)
- Legs: Proselyte Cuisse
- Weapon: Arclight (demonbane) or Abyssal Whip
- Shield: Dragon Defender
- Cape: Fire Cape
Ranged Setup (Safespotting)
- Helm: Slayer Helmet
- Chest: Black D’hide Body
- Legs: Black D’hide Chaps
- Weapon: Toxic Blowpipe or Karil’s Crossbow
- Ammo: Broad Bolts
- Cape: Ava’s Accumulator
Inventory Tips
- Prayer Potions (4-6)
- High-Alch Runes (for fire rune drops)
- Teleport (Slayer Ring, Xeric’s Talisman, or Ectophial)
- Food (Sharks or better, optional with Prayer)
- Cannonballs (if cannoning)
Comparing Bloodveld Spots: Which Is Right for You?
Choosing the best spot depends on your playstyle. Here’s a quick comparison:
| Location | Cannon? | Mutated? | XP/Hour | Profit Potential | Accessibility |
|---|---|---|---|---|---|
| Stronghold Slayer Cave | Yes | No | 40k-50k | Low | High |
| Catacombs of Kourend | No | Yes | 25k-60k | Medium | Medium |
| Meiyerditch Laboratories | Yes | Yes | 50k-60k | High | Low |
| Slayer Tower | No | No | 20k-25k | Low | High |
| Iorwerth Dungeon | Yes | Yes | 30k-40k | High (shards) | Low |
Best for Speed: Meiyerditch Laboratories
If you want the fastest task completion, Meiyerditch with a cannon is unmatched.
Best for AFK: Catacombs of Kourend
For a laid-back session, the Catacombs’ safespots and Prayer restoration shine.
Best for Beginners: Slayer Tower
Newer players will appreciate the simplicity and safespots here.
Tips and Tricks for Killing Bloodvelds
Maximize your efficiency with these pro tips:
Use Demonbane Weapons
Arclight or Silverlight (upgraded) deal bonus damage to Bloodvelds as demons, speeding up kills.
Leverage Superior Variants
Unlock Bigger and Badder (150 Slayer points) for a 1/200 chance at Insatiable Bloodvelds, which drop triple loot and 2.9k Slayer XP each.
Optimize Prayer Usage
Protect from Melee nullifies all damage—pair it with Proselyte armor to stretch your prayer potions.
Bring an Ash Sanctifier
For mutated Bloodvelds, this turns vile ashes into passive Prayer XP, saving inventory space.
Conclusion: Where Will You Slay Bloodvelds?
The best Bloodveld spot in OSRS depends on your goals. For cannon enthusiasts, the Stronghold Slayer Cave and Meiyerditch Laboratories lead the pack. AFK fans will love the Catacombs of Kourend, while crystal shard hunters should hit the Iorwerth Dungeon. Low-level players can’t go wrong with the Slayer Tower’s safespots. Whatever you choose, gear up, set your cannon, and enjoy the grind—Bloodvelds are a Slayer staple for a reason!
Happy slaying in 2025, and let us know your favorite spot in the comments!

