Your cart is empty

Duke Tile Markers in OSRS: A Comprehensive Guide
Duke Tile Markers are an essential tool for players in Old School RuneScape (OSRS), facilitating precise navigation and efficient gameplay. These markers allow players to mark specific tiles on the game map, aiding in various activities such as questing, skilling, and PvP. Understanding how to utilize Duke Tile Markers effectively can enhance the overall gaming experience and streamline gameplay strategies.
Duke Tile Markers are customizable indicators that players can place on the game map to denote specific locations or objectives. Developed by the player community, these markers can help players track important spots, whether it’s for questing, bossing, or training skills. Unlike traditional in-game markers, Duke Tile Markers offer a more personalized and flexible approach to navigation.
To use Duke Tile Markers, players typically need to install a third-party client that supports this feature, such as RuneLite. Once installed, players can easily place a marker by clicking on the desired tile, which can then be customized with different colors and labels. This allows players to categorize their markers based on their needs, such as marking locations for gathering resources, training locations, or even important quest points.
Additionally, Duke Tile Markers are particularly useful during group activities, allowing team members to coordinate strategies and target specific areas. For example, during a raid or boss encounter, players can mark safe spots or attack zones, ensuring better communication and execution of plans. The ability to mark tiles can significantly reduce confusion and improve overall efficiency in group settings.
Moreover, players can manage their markers through the client interface, which often includes options to delete, edit, or temporarily hide markers. This level of control means that players can maintain a clutter-free map while still having access to critical information when needed. Overall, Duke Tile Markers are a powerful feature that enhances gameplay by providing players with the tools to navigate the vast world of Gielinor more effectively.
Benefits of Using Duke Tile Markers
Duke Tile Markers are a fantastic tool for players in Old School RuneScape (OSRS). They enhance your gameplay experience in several ways, making your adventures smoother and more enjoyable. Let’s dive into the key benefits:
- Improved Navigation: Duke Tile Markers allow you to mark important locations on your game map. This is particularly useful for quests or areas you frequently visit, helping you find your way quickly without getting lost.
- Efficient Training: When training skills, especially those requiring specific locations (like fishing or mining), these markers help you maintain an organized approach. You can plan your training sessions more effectively.
- Enhanced Communication: If you’re playing with friends or a team, sharing locations via Duke Tile Markers helps coordinate activities. Everyone can be on the same page, making group gameplay more fluid.
- Questing Aid: Many quests involve multiple steps spread across different locations. With Duke Tile Markers, you can mark where you need to go next, reducing the time spent searching for quest NPCs or items.
- Customizable Colors: You can customize the colors of the markers, allowing you to categorize them based on your needs. For example, use one color for skills training and another for quest-related locations.
Overall, Duke Tile Markers significantly enhance your efficiency and enjoyment while playing OSRS, making them an essential tool for any serious player.
How to Obtain Duke Tile Markers
Getting your hands on Duke Tile Markers in OSRS is a straightforward process. Here’s how you can obtain and start using them:
- Install RuneLite: Duke Tile Markers are a feature of the RuneLite client. If you haven’t already, download and install RuneLite, which is a popular third-party client for OSRS.
- Enable Duke Tile Markers: After installing RuneLite, launch the client. Go to the “Plugins” tab found on the sidebar. In the search bar, type “Duke Tile Markers” and toggle the option to enable it.
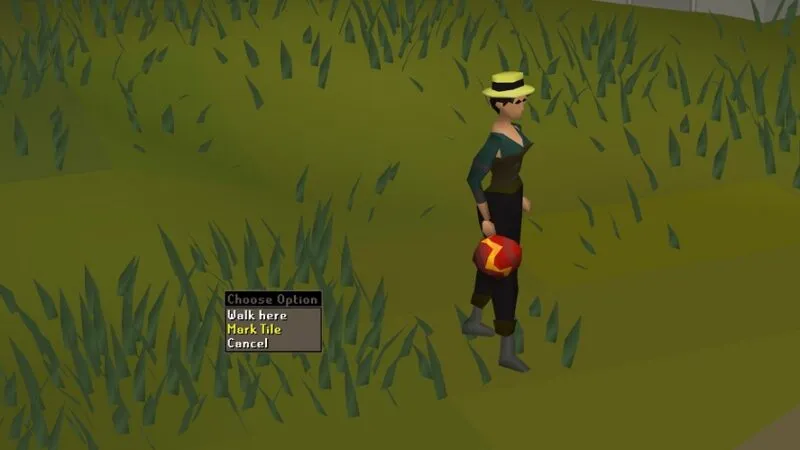
- Access the Markers: Once enabled, you can access Duke Tile Markers during your gameplay. Right-click on the ground in the game world to place a marker. You can also customize its color and label to fit your needs.
- Using the Markers: To view your markers, simply hover over them or click on the relevant icon in the RuneLite interface. This feature allows you to keep track of your marked locations easily.
By following these simple steps, you can quickly start using Duke Tile Markers and enjoy the numerous benefits they offer in your OSRS journey!
Using Duke Tile Markers Effectively
When it comes to maximizing your efficiency in Old School RuneScape (OSRS), Duke Tile Markers can be a game-changer. These handy little markers not only help you track your quests and activities but also enhance your navigation in the game. Here are some tips to use them effectively:
- Prioritize Key Locations: Start by marking significant locations like banks, quest points, and resource spots. This way, you can always find your way back without wasting time.
- Color Coding: Use different colors for different types of markers. For instance, green for resources, red for quest locations, and blue for places where you often train skills. This visual organization will speed up your gameplay.
- Group Similar Markers: If you’re marking several areas related to a single quest, cluster them together. It helps in visualizing your path and reduces confusion.
- Regular Updates: As you progress in the game, revisit your markers. Remove outdated ones and add new locations that become significant. Keeping your markers fresh will keep your gameplay efficient.
By incorporating these strategies into your gameplay, you’ll find that Duke Tile Markers not only save you time but also enhance your overall gaming experience. Happy marking!
Common Mistakes to Avoid with Duke Tile Markers
While Duke Tile Markers can significantly improve your efficiency in OSRS, there are common pitfalls that players often encounter. Avoiding these mistakes will ensure you get the most out of your markers:
- Overcrowding Markers: One of the biggest mistakes is placing too many markers in a single area. This can create a cluttered interface and make it difficult to find what you need. Keep it simple!
- Ignoring Updates: Many players forget to update their markers as they progress. If a quest is completed or a location becomes irrelevant, remove or adjust the marker. Stale markers can lead to confusion.
- Inconsistent Use of Colors: If you’re using color coding, be consistent! Changing your color scheme mid-game can lead to misunderstandings about what each color represents.
- Neglecting the Map: Relying solely on markers can make you overlook the in-game map. Use the map in conjunction with your markers for a fuller understanding of your surroundings.
By steering clear of these common mistakes, you’ll enhance your gameplay and make the most of Duke Tile Markers in OSRS. Remember, efficiency is key!
7. Advanced Techniques for Tile Marking
Once you’ve got the basics of tile marking down in Old School RuneScape (OSRS), it’s time to elevate your game with some advanced techniques. These methods can enhance your efficiency and improve your overall gameplay experience. Let’s dive into some of these techniques that can give you an edge.
- Color Coding: Use different colors for your tile markers to signify various zones or objectives. For instance, you might use red for areas with high-level monsters and green for safe spots. This visual cue can save you time and keep you focused.
- Dynamic Marking: Adjust your markers based on your current activities. If you’re hunting a boss, mark its spawn location. If you’re gathering resources, outline the paths you frequently take. This adaptability makes tile marking a powerful tool in your arsenal.
- Coordinate with Friends: If you’re playing in a group, coordinate your tile markers with your friends. This can help align your strategies, especially in raids or boss fights. Use similar colors or patterns to avoid confusion.
- Practice Timing: Learn to mark tiles quickly and efficiently. Speed is crucial in high-stakes situations like PvP or boss encounters. With practice, you’ll be able to place markers without losing focus on your primary objectives.
- Combine with Other Tools: Use tile markers alongside other tools, such as the map or your minimap. By integrating these elements, you can create a comprehensive navigation system that enhances your gameplay.
These advanced techniques can significantly improve your tile marking skills, making your adventures in Gielinor even more enjoyable!
8. Conclusion
In conclusion, tile marking in OSRS is more than just a simple gameplay mechanic; it’s a strategic tool that can greatly enhance your gaming experience. By mastering the basics and exploring advanced techniques, you can navigate the vast world of Gielinor with ease.
Remember, the key is to be adaptable. As you progress in the game, your needs will change, and so should your approach to tile marking. Whether you’re a solo player or part of a team, the right markers can provide valuable insights into your surroundings and help you achieve your goals more efficiently.
So, go ahead and experiment with different marking styles and techniques. The more you practice, the better you’ll become at using this powerful tool. Happy marking, and may your adventures in OSRS be as rewarding as they are fun!
